Introduction
There was a time when the world heavily depended on analogue formats for their media consumption. The 8 Track, Laser Discs, Video Cassettes, they were all great formats in their own way. However, with the developments in image quality and the availability of faster hardware for rendering media, the world has moved on to better digital formats which are not only easier to work with, but also much more convenient if you need to upsample or downsize them. DVD video used one of the most popular formats back in the day but sadly though this format isn’t as popular now and is on the verge of slowly dying due to emergence of new formats that surpass this in every regard.
Despite their age, DVD’s still is an awesome format for watching videos. It used to be one of the only existing digital formats to support high quality features such as 8 channel surround sound, multi-track audio, 8-bit colour, Dolby surround sound and also featured DVD exclusive bonus content, not available for TV streaming. Which brings me on to an important issue, DVD’s depending on how they are stored, have a limited shell life which degrades over time. The layer that holds the data inside the DVD gets affected by a number of external factors like moisture, humidity, heat and dust on top of the general wear and tear introduced by regular usage, among which scratching is infamous. As a matter of fact, more DVD’s have been dead because of scratching than the other factors, which doesn’t make it convenient for long term storage. So, if you are looking to back up your precious DVD collection, don’t just copy the .vob file, instead use a dedicated DVD backup tool such as the MACX DVD Ripper, for a hassle free, fast, intuitive back up experience.
Why should you choose MACX DVD Ripper?
There are few tools out there that combine versatility of easy DVD backups along with cross platform (Mac OS and Windows) support. Yes, it also has a MAC version.
Also, while we are at it, support for multiple codecs for easy and convenient storage for playback on a range of supported devices.
MACX DVD Ripper uses a lot of technologies that aren’t immediately apparent at first sight. Despite featuring a very user-friendly layout.
For starters, the App features native Level 3 hardware acceleration with support for Intel Quick Sync 3, currently supported by all modern Intel CPU’s. This works best if you have an SSD capable of high bitrate file transfers and encoding but works equally as well with mechanical hard drives. Couple that with CUDA acceleration with Nvidia Graphics Cards, and you have yourself a blistering fast DVD decoder that scales exceedingly well with both high end and low-end computer platforms. You can also dedicate specific number of cores to handle the decoding tasks, if you have a multi-core CPU, thereby freeing up CPU resources for other tasks on the same computer.
A few more key features of the app:
- Lossless conversions: Courtesy of its intelligent demuxing/remuxing kernel engine, there is no loss in content or quality of the source as it makes a 1:1 copy of the DVD first before encoding. This results in the end conversions being not just faster, but it also retains 99% of the original quality from the source.
- Ability to copy multiple tracks/subtitles: If you are worried that this won’t copy the included special features like the subtitles, tracks for different languages, then you are very wrong. There is on such loss of content while using MACX DVD Ripper.
- Supports all disk formats: It has support for all native and non-native DVD formats regardless of the year/region/format, including ones that are region locked. It also works with disks that don’t have UDF extensions, thereby maximising compatibility.
Testing
For our testing, we used the tool to back up my extremely old Jurassic Park special DVD that had all 3 movies with director’s commentary included in the package.
The test RIG that was used to convert the video comprised of the following parts:
Intel i5 6500 @3.2 GHz
16GB DDR4 2400Mhz RAM
Nvidia GTX 1060 6GB GDDR5
Crucial MX500 256GB SSD
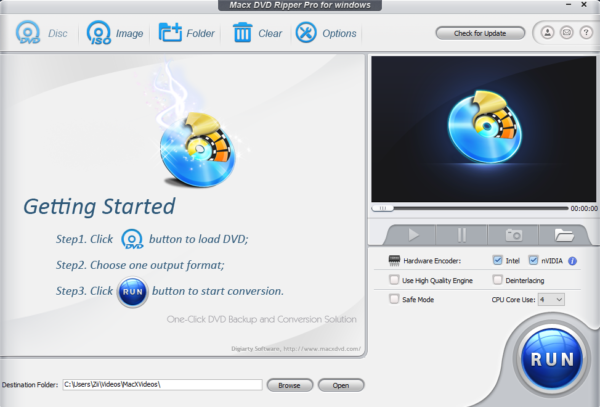
- First, we started by changing our default directory to our SSD to get the best possible speeds. The default directory being “C:\Users\’UserName’\Videos\MacXVideos\”
It can be changed very easily, by clicking on “Browse” on the Destination Folder Tab and navigating to the desired directory.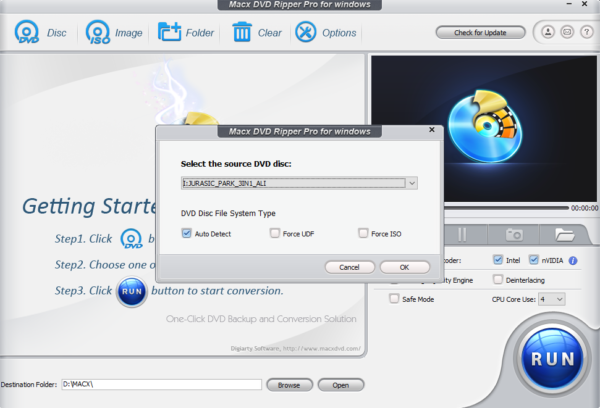
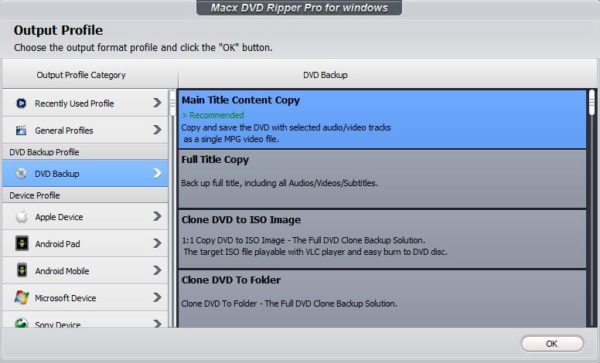
- Next, we picked a profile that suited our requirements for the conversion.
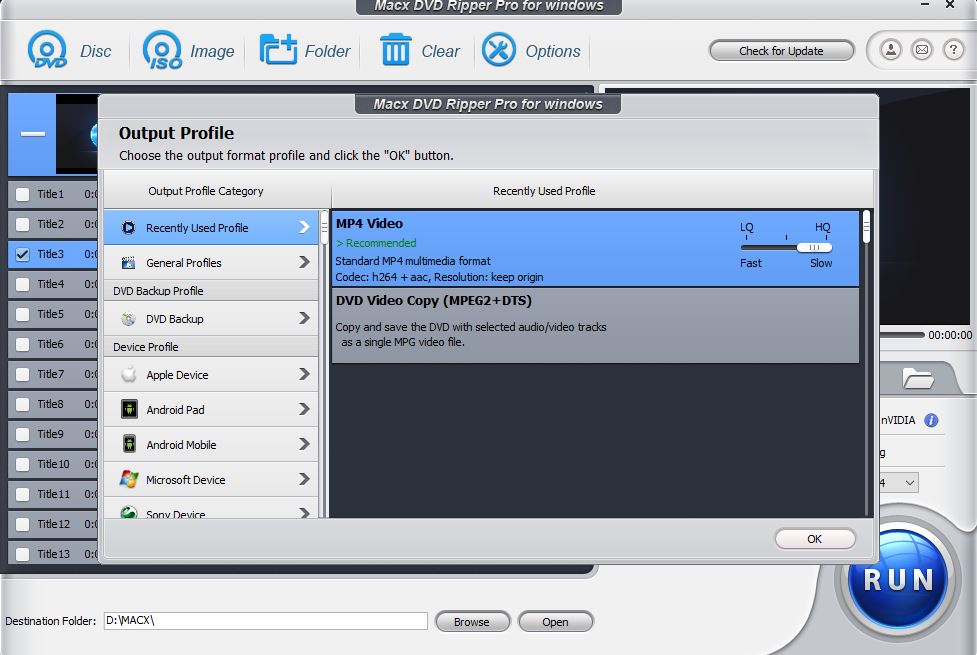
For conversion purposes, we decided to preserve the movie files from DVD by selecting the mp4 h.264 codec, preserving the original resolution of the video as well as making the file compatible with modern hardware.
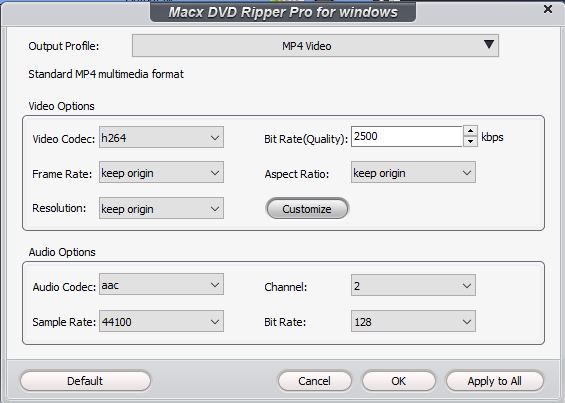
There are presets for Android, Microsoft, iOS and other legacy devices, so if you are unsure about which format your device supports, just chose one from the Output Profile Menu an it pretty much guaranteed to work. Apart from that MacX DVD Ripper can convert to MP4, H.264, MOV, M4V, MPEG, AVI, FLV and MP3 formats.
Let’s Begin with the conversion process
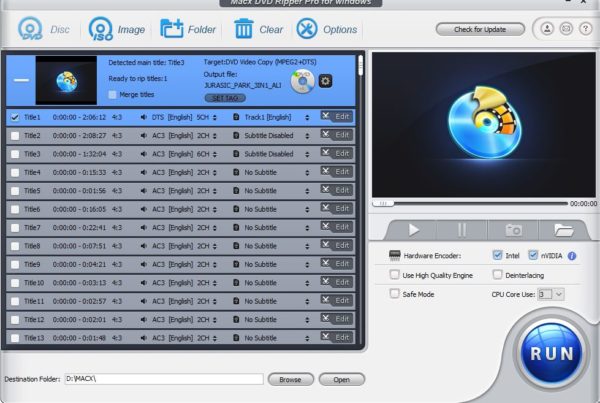
As you can see with the screenshot below, our DVD contains a lot of media files. For the demonstration we are going to copy and convert one of the main movie files to our PC with the presets shown in the screenshot below.
Additional Tweaks (Optional)
- You can also save the embedded subtitles from the disc (if any) from the file selection menu.
- You can either keep the original audio or convert it to 2.1 channels as per your requirements.
- You can select the Intel/Nvidia toggles if you wish to use hardware acceleration during the conversion process. This boots the encoding process and as a result you have faster encoding times.
- You can tick the toggle for “High Quality Engine” which does make the conversion more stable and lossless but it is slower.
- You can also specify the number of CPU cores that you want to dedicate, so during the conversion process your system doesn’t freeze up or lag due to resource usage by the app. We dedicated 3 of our 4 physical cores to the conversion task, but you can use more cores if you have a newer CPU with more cores.
- You can also tweak the final output settings, so that the file size can be kept in check. For best results, keep everything at the original settings.
With our settings selected, it’s time to begin the conversion process, hit “RUN”
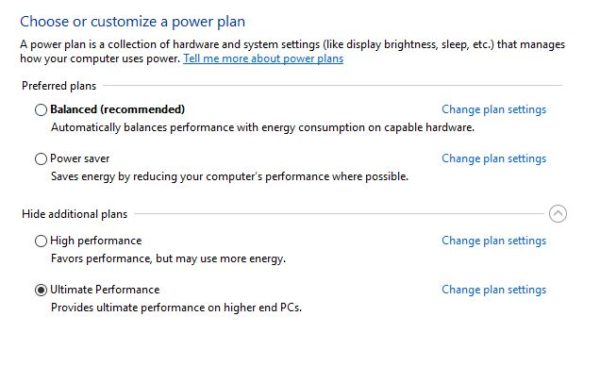
A small note, don’t forget to enable Ultimate/High performance mode in your Windows power settings as we noticed a significant hit in overall speed because ours was set to Power Saver Mode.
The conversion process should begin immediately and it shouldn’t take too long, depending on the selected preset.
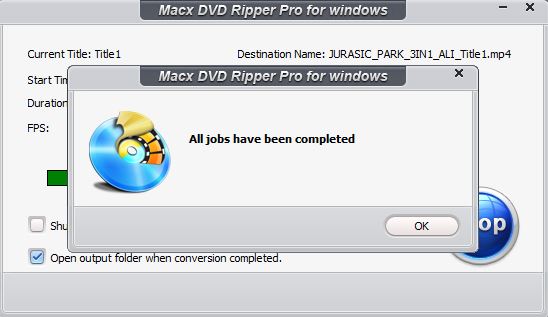
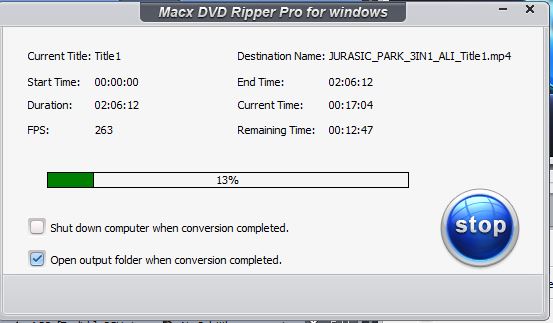
After the conversion is done, it’ll give you a pop-up window notifying you of the task completion.
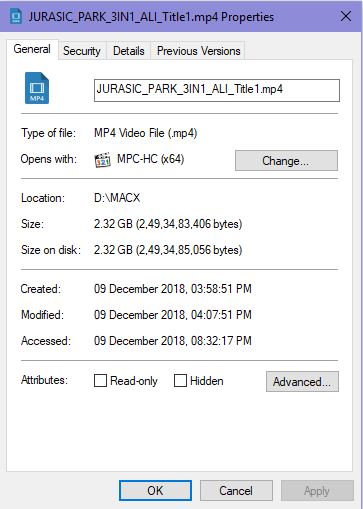
In our case, the conversion process completed in about 10 minutes with a file size of 2.32GB, using 3 cores and hardware acceleration enabled. Faster hardware will have better results.

Additional functionality of the MACX DVD Ripper
So, you might be wondering, what else can you do with this app?
Fortunately, the list of features doesn’t end there and there is indeed a lot more that you can do with this app.
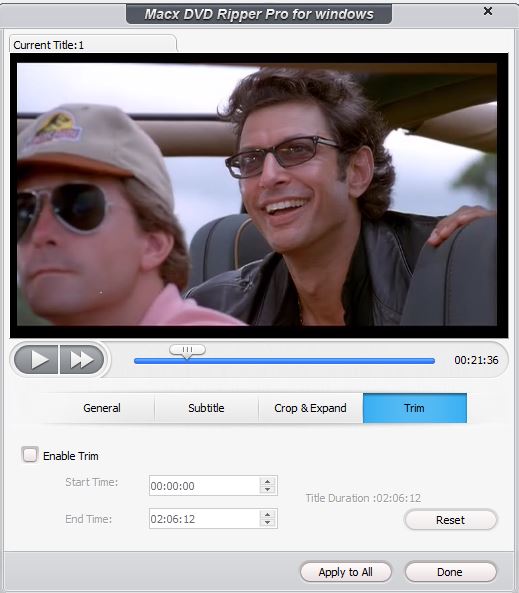
Let’s begin by exploring the edit options that you can find right of the file selection menu by pressing the option that resembles a switch. These can be used prior to converting the video.
It has 4 options, beginning with volume adjustments, subtitle editing, video frame cropping and trimming parts of the video.
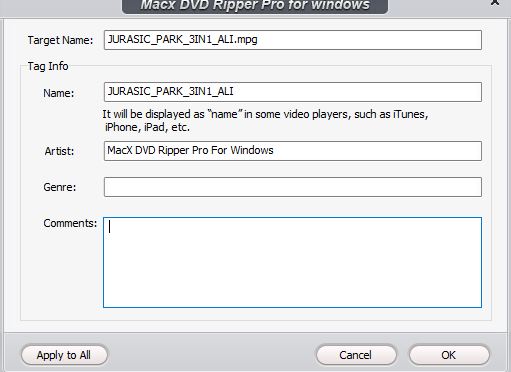
You can easily do that with MACX DVD Ripper. It allows you to make a host of changes to the output file including name tags, artist, genre and additional information that you wish to add.
-
Editing subtitles?
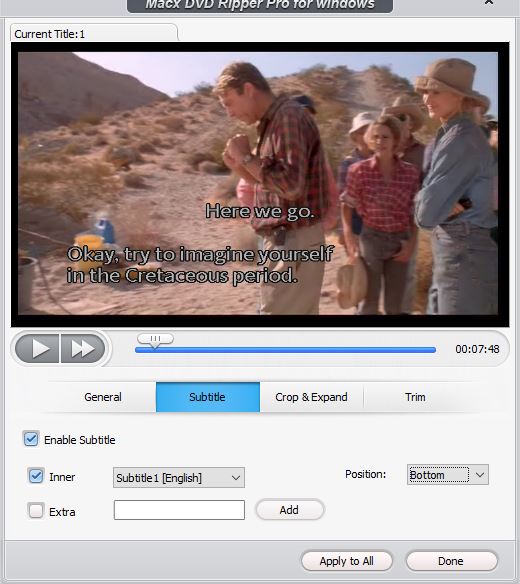 It’s as easy as adding the files and clicking a few options. The UI is very self-explanatory and MACX has done a great deal of work to obscure/eliminate any unnecessary options that the average user might not need.
-
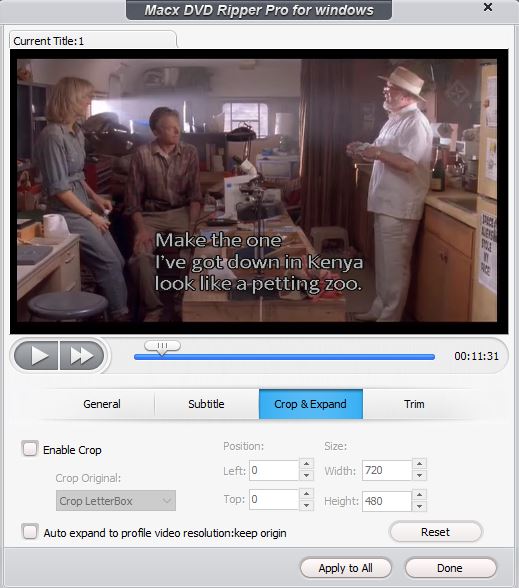
Video Cropping
Although we had no need to use this option, it is still available in the app, if you want to do some minor adjustments to the video frame. The UI here too is very basic and easy to use.
-
Video Trimming
This is another great feature of the MACX DVD Ripper. This is particularly useful if you wish to remove certain segments from the video to make the overall size shorter or save a bit of space when you are thinking of storing the video in your mobile. You just have to specify a start time and a end time from the video preview and apply the trim.
-
Edit Video Tags
MACX DVD Ripper can also help you add and edit video tags. The options include editing the following tags such as Name, Artist, Genre and also add Additional information if you want to.
-
Convert video from saved DVD .iso/.cdr files.
There are very few tools that allow you to convert videos directly from disk image files. This makes the MACX DVD Ripper all the more special as you can effectively directly convert the videos stored in your PC as disk images to different formats for using with other devices or directly playing with an installed media player on your computer.
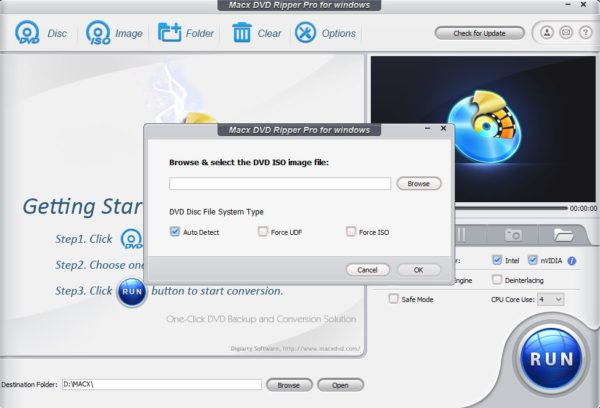
The steps for initiating the process are as simple as:
- Clicking on the “ISO icon” on the main menu
- Navigating to the stored DVD image in the form of either a .iso or .cdr file.
- Selecting an output format and then starting the conversion.
The process is very similar to copying from the DVD.
-
Merging Multiple Video Files into one single file
As you know by now that our DVD indeed comes with a lot of extra stuff and most of them are separated into different clips. This might be a bit inconvenient as sometimes it’s really hard to keep track of these extra special features and multiple small files can cause fragmentation in the hard drive sectors, especially in windows. Fortunately, we could select the clips and merge them into a single file using MACX DVD Ripper, which very convenient for people with huge libraries of media.
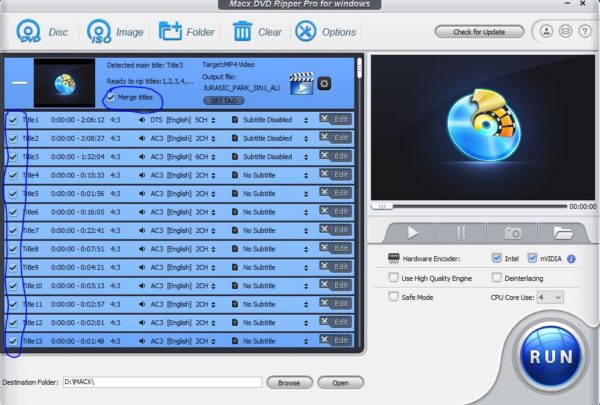
This can be done when you are selecting the videos for conversion. There is a dedicated “Merge Files” option which can be selected if you want the clips selected for conversion to be merged into a single file.
-
Backing up DVD’s for burning into other Disks
MACX DVD Ripper also gives you the option to chose how you want to copy your DVD contents. The options include:
- Backing up single files
- Backing up the entire DVD as a single media file
- Making clones of your DVD
- Copying the DVD contents to a desired folder inside your PC
This is in my opinion a fantastic option as it alleviates the requirement to install multiple other tools that would normally be required to perform a few of the above mentioned options such as cloning the disk to a perfect 1:1 image.
Conclusion
I have used a number of different tools over the years to convert/rip DVD’s but they were always excellent in one area while being flawed in another. MACX DVD Ripper Pro, while not the best, is the most stable and consistent among all the options that I have used previously. It has a healthy blend of useful features and a powerful video conversion engine that aids in speedy conversion of videos while making the best use of the available hardware. With that said, let’s move on to some pros and cons:
Pros
- Really fast conversion speeds, managing to convert a 2-hour long video in about 10 minutes.
- Healthy dose of useful features that doesn’t overwhelm the user.
- Intuitive and easy to navigate UI.
- Easy selection of quick toggles.
- Supports conversion to a wide array of video/audio formats.
- Ability to use Intel QuickSync and Nvidia CUDA for faster video.
Cons
- While there are lot of features, it doesn’t introduce anything new to the segment.
- No advanced video editing features like timeline, colour correction or filters.
- No option for conversion to h.265 codec.
- While the UI is exceedingly easy to use, the graphics looks a little dated, especially on Windows 10.
All things concluded though, this is a really good tool that you should have if you wish to backup your old DVD’s. Also one very special reason to get this now is because MACX is giving away free keys in the spirit of Christmas, details of which can be found on their thanksgiving giveaway page where there are other special offers on a few of their products too, so don’t miss this steal deal.