Why is the Mac camera light on? How can I fix it?
Is it normal to have the Mac camera always on? It certainly feels creepy, and like someone is watching you. However, that might not be the case. There are many reasons why the camera light is active. It’s important to narrow down what causes this issue, but also what you can do to fix it. Thankfully, fixing this problem is not that difficult.
Why does the camera light stay on?
It can be due to a variety of reasons. The most common one is that a feature or app you used (and don’t use anymore) still has access to the camera. It can also be that you are hacked, and someone has access to your camera. Or you might have malware, which tries to capture a live feed of what you are doing via the camera.
Restart your device
One of the things you can do is to try and restart your device. It’s ideally the first step that you take, and it will make it easy to start eliminating any possibilities. You will notice that sometimes the camera light issue can be solved with a single restart. However, it’s not a guarantee. Yet it never hurts to test it out, and see if it works or not.
Use a cleanup tool
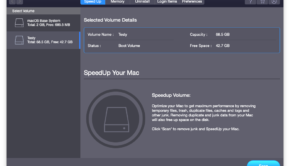
When you see the camera light on, the best approach is to open a Mac cleanup tool. This is a great solution because it allows you to identify any malware instances and remove all of them. It can also clear up your memory, remove temporary files and so on. In general, this is one of the best maintenance tasks and it can alleviate a lot of potential problems.
See what apps have camera access
If you go to the System Settings, Privacy and Security, you can check the Camera section. Here you will have a list with all apps that have access to the camera. You want to stop access to any app you don’t know. Turning off access to all apps and only allowing them access upon use can also be a strict, yet very useful measure.
Restart your Mac’s camera
Sometimes, it might be possible that the camera is on due to a software glitch. In that situation, you should go to Applications/Utilities and open the Terminal. In order to restart the camera, you want to insert this command in the terminal:
sudo killall VDCAssistant; sudo killall AppleCameraAssistant
You will need to insert your administrator password to confirm. What this command does is it helps stop the camera process and then automatically restarts your camera. Normally, this is the best approach because it solves the issue, without having to deal with any challenges. Whenever you encounter this camera light issue, using the Terminal command and restarting the process tends to be the preferred solution.
Update your software
One of the reasons why the Mac camera is always on might have to do with the software you use. If the software is out of date, it might not be using the camera as intended. So it might keep the camera on, even if it doesn’t get access to the content. It always helps if you update your software if you can. Doing so will not only ensure you have the latest features, but some bugs like the camera light staying always on might be solved as well.
Try to manually clean the camera
It’s rare, but sometimes the camera might be on due to debris and dirt accumulation. It never hurts to clean it anyway, so we highly recommend using a microfiber cloth and slowly remove any type of dust or dirt from the camera. You should make this a consistent habit, so the image quality is always clear for your camera.
Perform a factory reset
It might be the most extreme solution, but sometimes you just can’t do anything other than fully reset your Mac. Make sure that you create a backup for all the content that you have on your device, sign out of the Apple accounts, and also unpair Bluetooth devices. You will also have to reset the NVRAM by turning off the Mac, then turning on and then pressing as well as holding Option+Command+P+R, then release after 20 seconds.
· Turn off your Mac, then you turn it back on and hold Command+R, release only when you see the Apple logo
· Choose the Disk Utility, click on the Macintosh HD and press Erase
· Now you want to choose the desired format, APFS or Mac OS Extended if you have an older MacBook
· Choose Erase Volume Group, and that initiates the factory reset. Press Done when it’s finished
· Quit the Disk Utilities, that brings you to the Mac OS Utilities screen. And here you want to press Reinstall Mac OS and follow the instructions shown on-screen.
Conclusion
Of course, other things like installing an anti-malware tool on your device can also work. The idea is to always monitor your device and see if there’s any strange activity. If that’s the case, then you have to address it right away. Check your Mac for malware, and also remove any strange/unknown apps from the device. Safeguarding and backing up your data would be just as important. It’s imperative to always ensure that you monitor your Mac camera and don’t just cover it with a sticker when it stays on all the time!
Cover Image by Freepik


