Why do you take a photo?
For me, it’s to immortalize a moment when time stood still and everything is exactly where you want it to be. Catching those moments, those small bits and pieces of life are tantamount for people with a limited lifespan. We want to treasure them as long as we can. They offer our stories and experiences. A playbook of sorts on how we went through life. I put in a little bit of poetic flair in my reason. But, I think it is also an apt description of what photography offers.
But, adding another level to your photography by mastering composition, could make your photos not only a chronological device but an aesthetic interpretation of your artistic side. You’ll decide how each element in the photograph will be placed and how they correlate to one another. Thus, creating your perfect visual.
A great composition will bring out the beauty of your photos. It would highlight the best parts and will draw everyone’s attention to focus on your photos. This will create a much more powerful image. And will help greatly in the delivery of your message.
There are numerous rules of photography composition. They offer guides, especially for beginners, on how to compose a shot that is visually pleasing. The following rules are just some of the most common rules you have to master to be proficient in your skills.
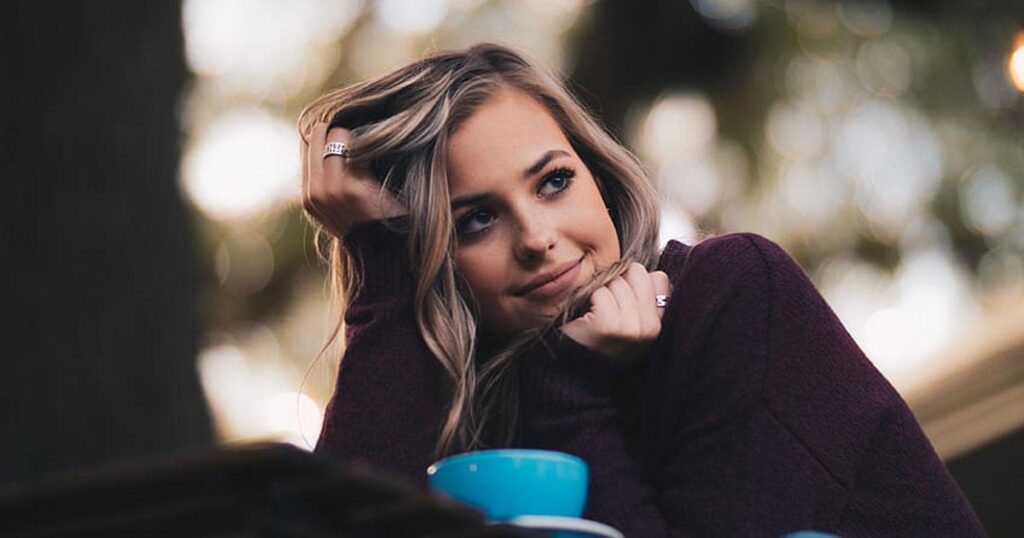
RULE 1- FILL THE FRAME WITH YOUR SUBJECT
Filling the frame is a technique in photography composition that urges photographers to limit the negative space in the frame. Usually, the subject is framed in closed-up to fill -in as much space as possible.
By doing this, you exclude unnecessary elements that can cause clutter and add no additional meaning to the subject. It makes for a powerful image because the viewer is not distracted and is solely focused on your subject.
Look closely at these examples

Brooke Tasovac | Photoh

Kirsten Bühne | Pexels
Study the framing of your subject. If you are using a digital camera, there are options or scene modes that your camera can be adjusted/set into. They help in choosing the right settings for your camera to be in focus and take the best shot.
If you need to be closer, you can do this physically or with the use of a zoom lens. Make sure that there is ample light to help the image to be clearer.
Your aperture should be smaller like f/5.6 to have enough depth-of-field. If you like taking close-ups of small objects use macro lenses.
RULE 2- USE LEADING LINE TO DRAW EYE INTO THE PHOTO
Leading lines are subtle, organic lines that naturally draw your eye to the main focal point of the photo. You make use of your surrounding environment to create a dynamic photo. Examples of leading lines are rivers, tree tops or tree lines, mountain edges, or anything that creates a continuing line within your frame.
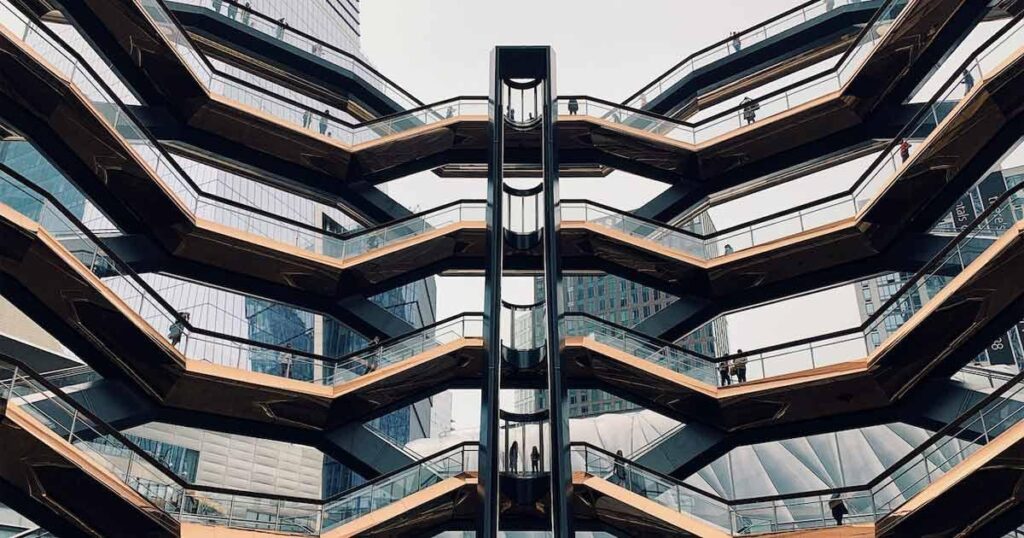
There are also manmade leading lines such as structures like bridges, train tracks, staircases and edges of buildings. These lines are very popular with street photography since the majority of them are done in urban settings.
Here is an example of natural leading lines

Joshua Cripps | Joshua Cripps Photography
Here is an example of manmade natural lines.

Georgie Pauwels | Flickr
Leading lines always point towards or converge into the main subject of the photo. The lines are used to draw the viewer’s focus and lead them to your main subject.
First, be aware of your surroundings. Are you in a city or in a park? Do you want to choose natural lines or those that are man-made? When you’ve chosen what to use, observe which time of day is the best to take photos. In photography composition, look for the best natural light which will highlight the lines more. You can add a little play of light and shadow to further accentuate the lines.
Choose a focal point. Determine which lines will best serve your subject matter. If the lines do not align with the subject matter, do not use it as they will only distract your audience. Align your camera wherein the lines lead your eye to the focal point. Take your time and take the shot. Here is one to add to your photography tips, do take multiple shots so that you can have options later on.
RULE 3- CREATE BALANCE IN YOUR PHOTOS
If there is balance, there is order. And, order is important when you are trying to get a message across using visual mediums. A chaotic photo creates confusion and unpleasantness. It takes the focus away from the narrative you wanted to convey.
Balance is achieved when the distribution of the elements in images feels stable and also aesthetically pleasing. There should be a balance of unity and variety in your photos.
Try looking at these examples

Bess Hamiti | Pixabay

Cottonbro Studio | Pexels
One of the easiest ways to achieve balance is to put the main subject in the middle of the frame. Then acting as the fulcrum, you evenly distributed the other elements on each of its sides. Their visual weight needs to balance out.
But that is not the only way to achieve this. You can use color, light and shadow. You can place large bright elements to even out the darker areas of your frame. Have a dominant color temperature. A cool color temperature can be balanced by a small warm area or vice versa.
Asymmetrical objects could also achieve balance. As tips for photographers, if you have a large object, place it nearer in the middle of the frame. A smaller object will then be placed on the far end of the frame. This creates balance.
RULE 4- LOOK FOR PATTERNS IN YOUR SCENES
A pattern in photography is a scene that predictably repeats itself. It could be color, shape or texture. By including these in your photography composition, you are adding more interest in your photos. They are eye-catching and captivating to look at.
You can find patterns in everyday life. You can see it from nature to man-made constructions. The repetition of this element is quite enthralling and if taken correctly, makes a statement.
Take a look at these examples

Erik Törner | Flickr
Michael Giugliano | Pexels
We see patterns everyday and everywhere. We are just not aware of them as photographic subjects. The wide expanse of the windows of the buildings we passed by as we went to work. The pedestrian lane that we walk at. The intricate design of the wrought-iron fences that line up the parks. Even the children with identical uniforms passing us by can be a subject. And, yes, even the occasional ducklings that waddle in the park can be used. Try to be more aware of your surroundings and you’ll realize the many photographic opportunities you have missed.
Composition in photography should vary, so try shooting from different perspectives. You’ll discover various interpretations of the same pattern. You can shoot further or closer to your subject. Try shooting from above your subject or crouch low to have close-ups.
Add into your tips for photographers, and fill the frame with your pattern. This makes your photo have more impact. But, be aware that distortions could appear. So shoot at a focal length close to 50mm. You can also fix the distortion through editing or as an option, outsource image editing services.
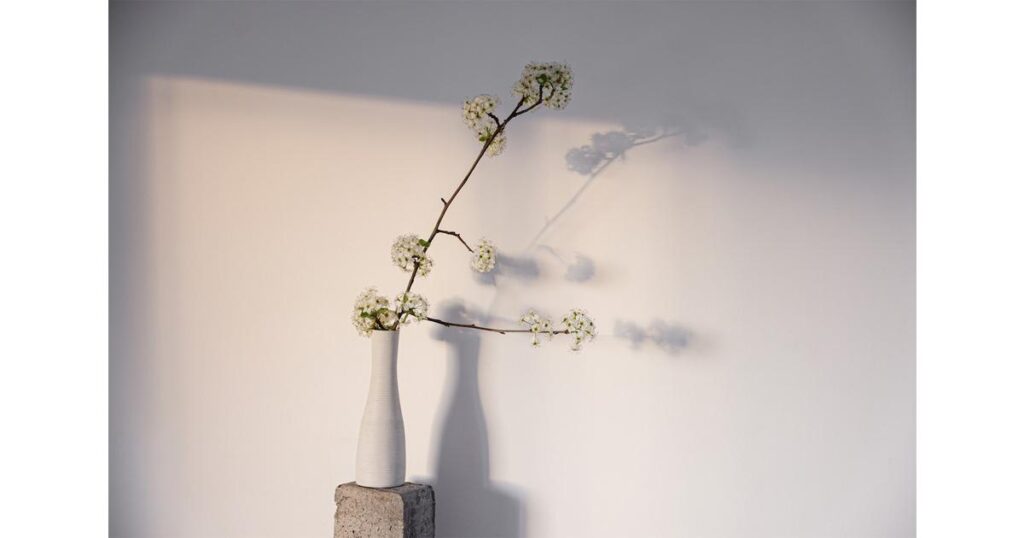
RULE 5 – USE FRAMING TO MAKE A STATEMENT
Framing in photography composition is to surround some parts of the frame using elements in the scene. You could achieve this by taking a picture through an archway, doorway, window, curtains, ivy trellis, or anything that can create a frame effect.
This composition is used to direct the viewer’s focus on the subject. To an extent, you are creating a desired response from the people who see your photo. Framing could be used to highlight the importance of the subject. It could also convey a specific meaning or narrative to your audience. It can create an illusion of depth or other layers in the photograph.
Here are some examples
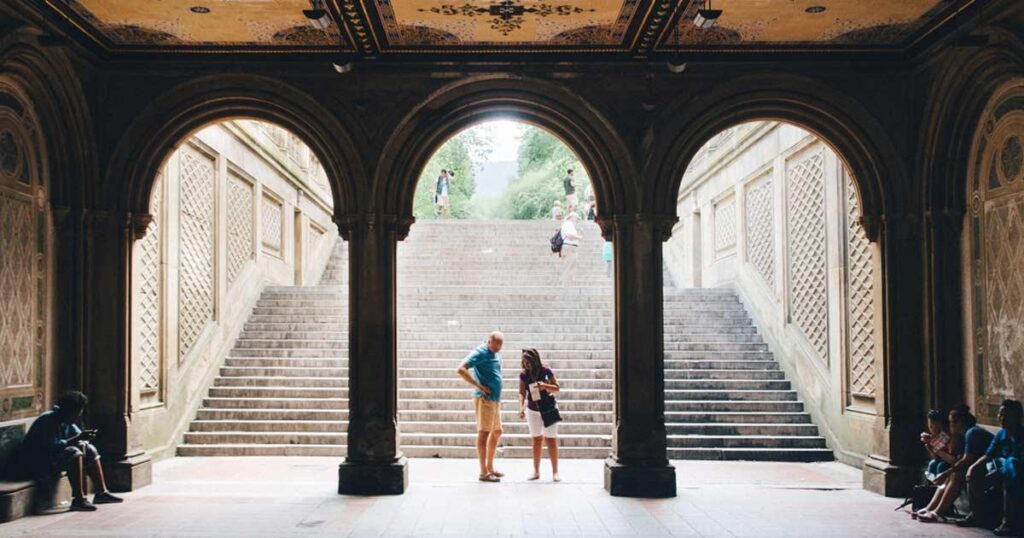
Ray Su | Unsplash
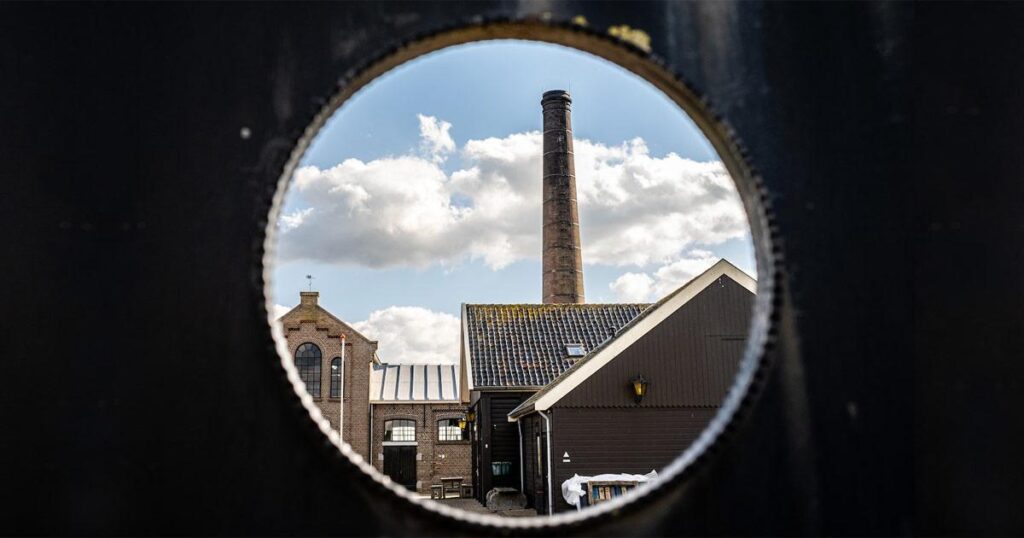
Fieke van Slooten | Pexels
When you use framing in your photograph, try to think of the context behind the shot and not just the aesthetics. What message do you want to convey? Are you telling your audience about your perspectives on things? Why does the shot have to be done through this? Is the frame thematically related to the object being framed?
RULE 6 – UTILIZE THE GOLDEN TRIANGLE COMPOSITIONAL TECHNIQUE
This rule is the same as the rule of thirds, wherein your frame is divided by two horizontal lines intersected by two vertical lines. You place your subject on the intersecting lines.
In the golden triangle, you draw a diagonal line from the top left corner and draw it down to the bottom right corner. It can go either way also.
Then draw two lines from the other two corners that meet that line at a 90-degree angle. You essentially have four triangles in the frame. And like the rules of thirds, you place the point of interest on the intersection.
See the following examples with the golden triangle lines drawn
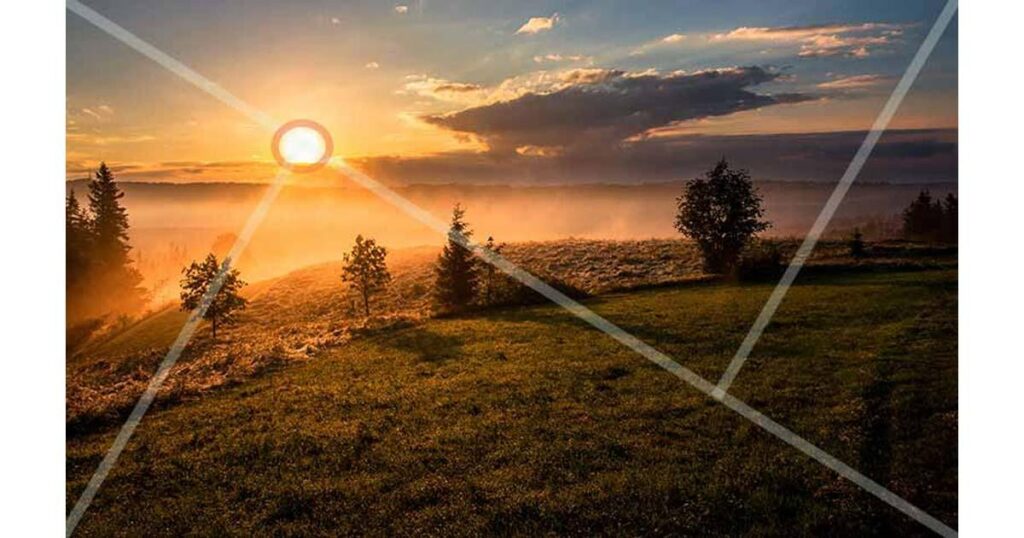
Govind Vijayakumar | Photography Axis
Brent Mail | Brent Mail Photography
When using this technique, you need to be aware of your point of interest and your leading lines. Your point of interest is the main subject in the photo. For landscapes, place the lone tree or house at the intersection point.
Leading lines are lines that lead to your subject. For example, a train track that runs diagonally to your main subject could be ideal.
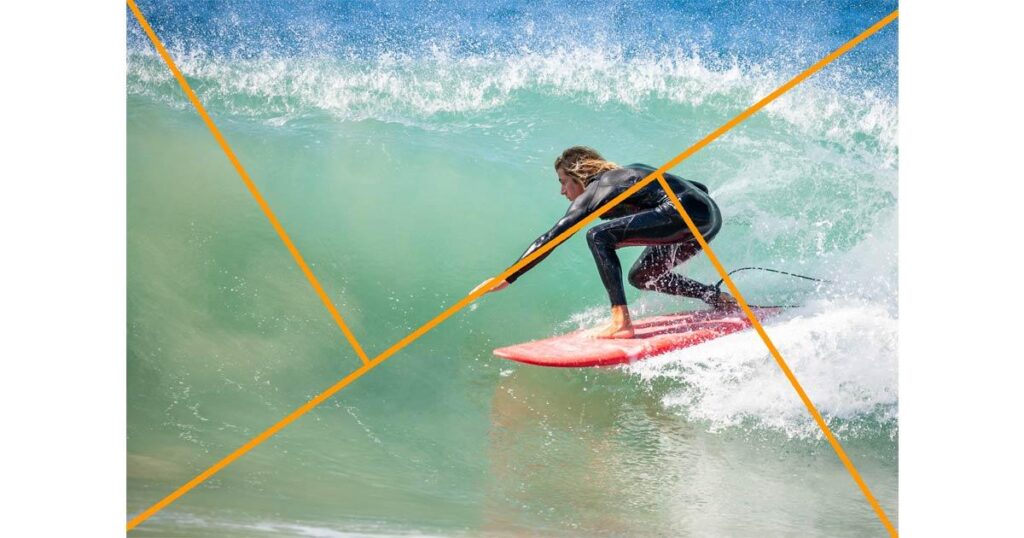
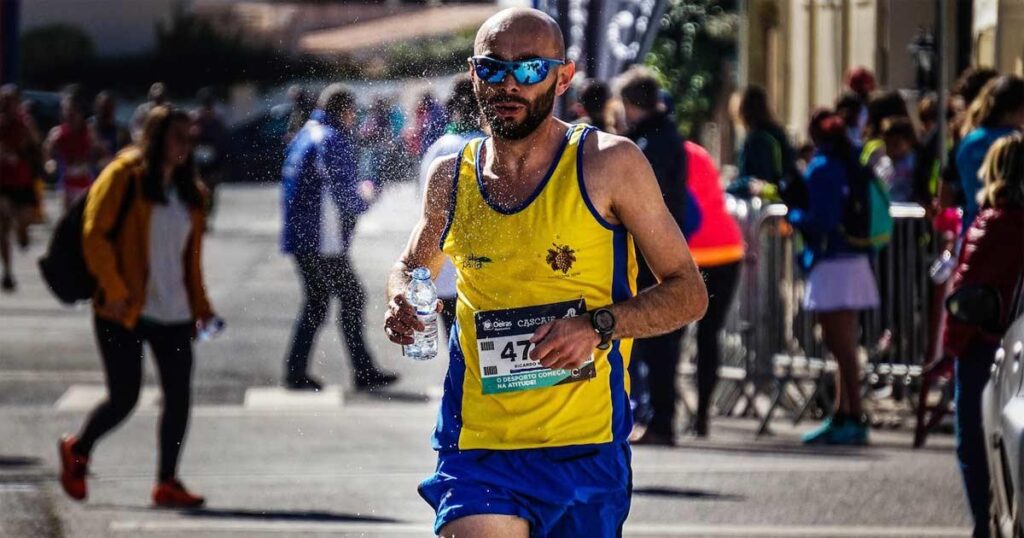
RULE 7 – CAPTURE THE DECISIVE MOMENT
The camera has the power to freeze time. A nanosecond worth of time captured in stills. That fraction of a second is called the decisive moment. In other words, you were at the right place and at the right time to take a photo of something momentous.
This composition is best in featuring people in motion. There is something powerful when you take a photo of an Olympic runner mid-run. There is more strength in that movement as you can see the details. How muscles on their legs constrict in preparation for its impact on the ground. And, the focus and determination on their facial expression.
There is something magical when you capture moments that are so fast like a blink of an eye. Take a look at the following examples.
Jen Bilodeau | Jen Bilodeau Photography
RUN 4 FFWPU | Pexels
Everything is in motion. To have that decisive moment is not to take photos randomly in hopes that you’ll catch something. It is by observing and waiting patiently that you can capture the perfect photo.
Perfect timing and luck could help you tremendously. But by observing and learning more about your subject can you predict what their actions are going to be next.
But do be aware that even though the photos are taken in a split of time, still observe compositional elements like lighting, balance etc.
RULE 8 – AVOID CLUTTER IN YOUR PHOTOS
Clutter in photos are various elements that distract your viewers from the main object. Your main subject must not fight for attention with the other things included in the photo. This could cause confusion to your viewers and may affect the message you want to convey.
Your background should be simple and clutter-free. The eyes do like things that are simple.
Jon Ly | Unsplash
Cup of Couple | Pexels
In order to reduce clutter, get in closer when taking photos of your subject. Try to fill the frame with just your subject. This will make your viewers focus solely on the subject since nothing is distracting them. You wouldn’t be able to fit anything else than your subject. You won’t have the space for it.
Photo editing software is also available if you want a background remover to remove the cluttered background.
RULE 9 – CHOOSE THE RIGHT APERTURE FOR YOUR SHOT
Aperture refers to the opening of the lens’s diagram which is used to control the amount of light that passes through the lens. It affects the depth of field and the sharpness of the image. It is calibrated in f/stops such as 1.4, 2, 2.8, 4,5, 6, 8, 11, and so on.
A large aperture means more light is reaching your camera sensors. This is best used in low-light environments. This also reduces the depth of field which makes your subject in focus but the background will be blurry.
A smaller aperture is best for landscape photography as it makes both the foreground and background sharper and in focus.
Taken with small apertures | Vinci Palad | Pixels and Wanderlust

Taken with a bigger aperture | Iurie Belegurschi | Iceland Photo Tours
To efficiently use apertures, you should understand the role of distance. Depth of field is very important. The farther away you are from your subject the easier it is to get in focus. You can move your subject away from the background to create a softer background without adjusting your aperture.
RULE 10 – EXPERIMENT WITH LIGHTING
Lighting not only determines brightness and darkness in your photos. But, it can only set the tone, mood and atmosphere. The position and quality of light can affect your photos’ clarity, emotions, meaning and much more. That is why you need to know the various lighting and its effects to improve your composition in photography. Here are some examples.
- Natural Light – the most accessible and the most cost-effective. You are using the sun as the main source of light. Be mindful of the angle of the sun because it will affect your composition. If the sun is directly on top, this produces intense shadows. If it’s cloudy, the light will be diffused and be less harsh
- Soft Light – you’ll be using a diffusion panel from your light source. This gives less intense shadows. If you are shooting portraits, this gives a softer light resulting in a youthful portrait.
- Hard Light – on the opposite of soft light, your light source is directly on the subject. It is high-intensity and contrasting. Whites are captured very bright and shadows are very dark.
- Backlight – the source of light is behind the subject. This is best for capturing dramatic silhouettes.
Roman Odintsov | Pexels
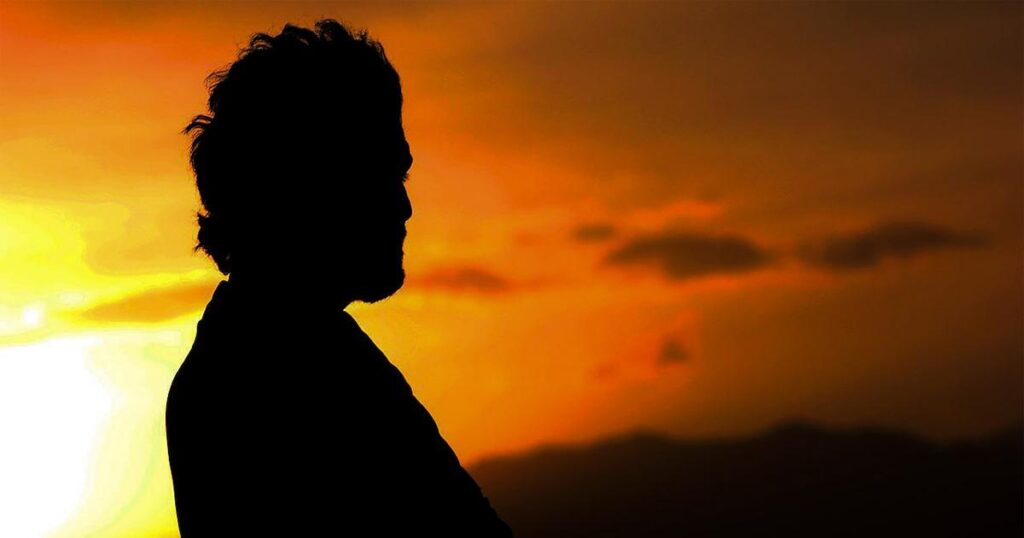
Ajmal Gharwal | Pexels
Adding to your photography tips, the best way to start experimenting with lighting in your photos is to start with natural lighting. It is free which is the best and you don’t need additional equipment to use. There are also the ever-changing conditions of the weather that can help you practice taking photos in different lighting conditions.
CONCLUSION
For a beginner photographer, the best way to upgrade your skills is to practice. You can learn as much from books, videos, and workshops, but if it is not applied, it all goes to waste. Take your camera with you and explore the place you live in. Take as many photos as you can and apply all the rules of composition you have learned. You’ll find out the things that you can use that reflect your style of photography and what other skills you need to improve.
By doing this, you are learning more about yourself and what you are capable of. Embrace what you have accomplished and have room for more improvements.
There are 1.81 trillion photos taken worldwide every year, add yours into the mix.
So grab your camera and start taking photos.
Cover Image Credits Avonne Stalling | Pexels