
In today’s mostly digitalized world effective online communication matters for businesses like never before. That’s why clever company owners and teams opt for smart tools to improve interactions with colleagues and customers. Azure Communication Services For Jira is one of them. So, let’s see how you can use this app to make the most of it.

Why Integrate Jira And Azure Communication Services
Beyond a doubt, Jira is one of the most widespread applications used by software and servicing teams for project management, fixing issues, and connecting with customers and other stakeholders. However, its in-built communication capabilities are limited. Therefore, usually, if any online meeting or voice consultation is needed, teams may need to use third-party means of communication or software.
Delay in providing support for the customer or failure of the team members to solve a burning issue immediately may have dangerous side effects for your business. That’s why it is critically important to always have proper communication tools ready at hand.
With that knowledge, Microsoft has developed Azure Communication Services (ACS). It is a solution allowing the deployment of video, voice, and SMS text chats basically on any device or platform. And Alpha Serve team brought that innovative product for Jira users.
With Azure Communication Services for Jira, you will no longer need to switch to any other software to have a voice call, a video meeting, or a screen sharing session. Just press one button to reach your teammates, customers, and any other parties in interest directly from the Jira Software issue or Jira Service Management ticket.
A number of other useful services are also at your disposal for easy and effective communication. For example, you can schedule a meeting for a suitable time in the future, notify the other partners in conversation by email, invite more participants to join the talk, and see the history in comments.
How To Configure And Use Azure Communication Services For Jira
If that sounds convincing enough for you to give the app a try, let’s see how to install, configure and use it properly.
Install Azure Communication Services For Jira
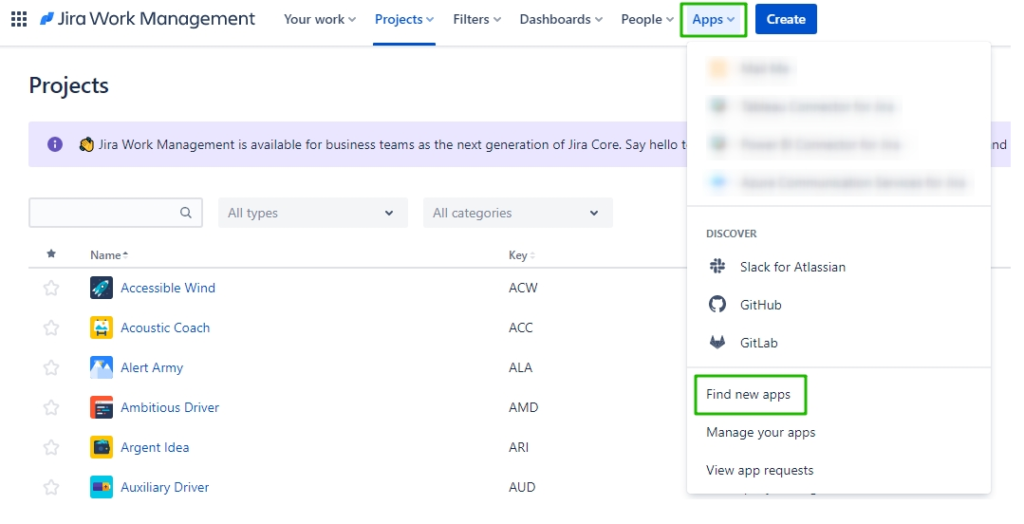
Before starting, make sure you have Jira Administrator rights. There are two ways to install Azure Communication Services for Jira. You can either do it from the Jira’s App tab or directly from the corresponding Atlassian Marketplace.
If you opt for the first method, simply tap the Azure Communication Services for Jira in the search results in the Find new apps section.
Otherwise, you can install the app directly from this page. Then choose the suitable subscription option. You can either try the app for free for 30 days, or purchase it right off the bat. After that, start the installation wizard and follow the instructions.
Configure Azure Communication Services For Jira
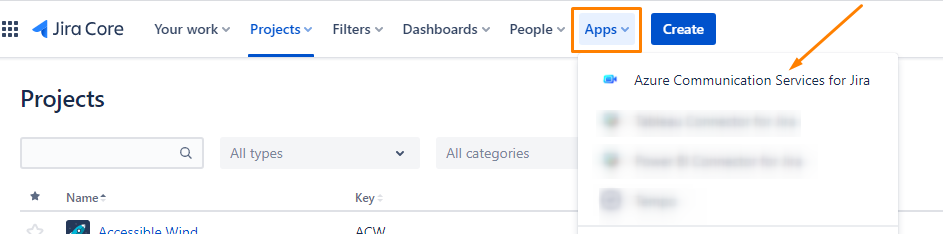
To use the app more effectively, you can configure some of its settings according to your business needs. To access the page where you can do this, simply click Apps on Jira’s main menu and select Azure Communication Services for Jira.
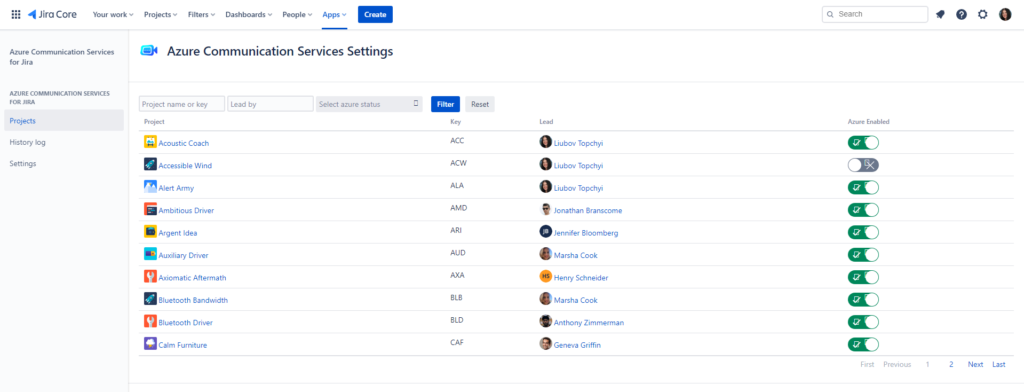
All the plugin options available for configuration are located on the left side menu. They include the following:
- Projects. Here you can choose the projects for which you would like to enable or disable Azure Communication Services for Jira.
- History Log. Shows the history of the meetings.
- Settings. Allows you to clear the log history period and add a Connection string. The latter helps to connect and authenticate to Azure. For connection procedure see Where can I create Azure Key (connection string)?
Use Azure Communication Services For Jira
Now, when you are ready with all your settings, it’s time to see how you can use the app to boost your company’s productivity.
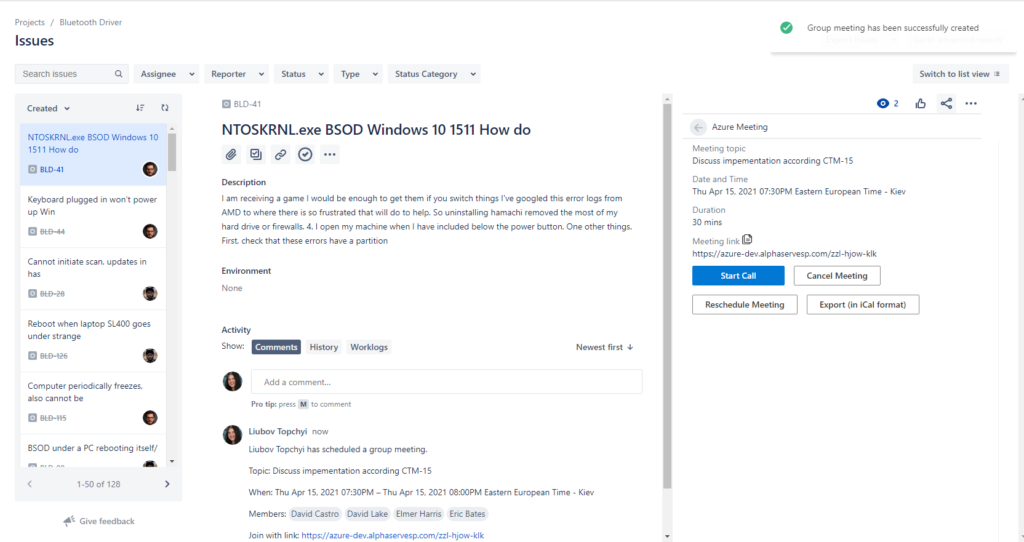
App’s main feature, instant meetings can be started from any issue when the Azure Communication Services for Jira plugin is enabled for the project. All you need is to click on the Open Azure Meeting button. You can find it in the issue details section on the right.
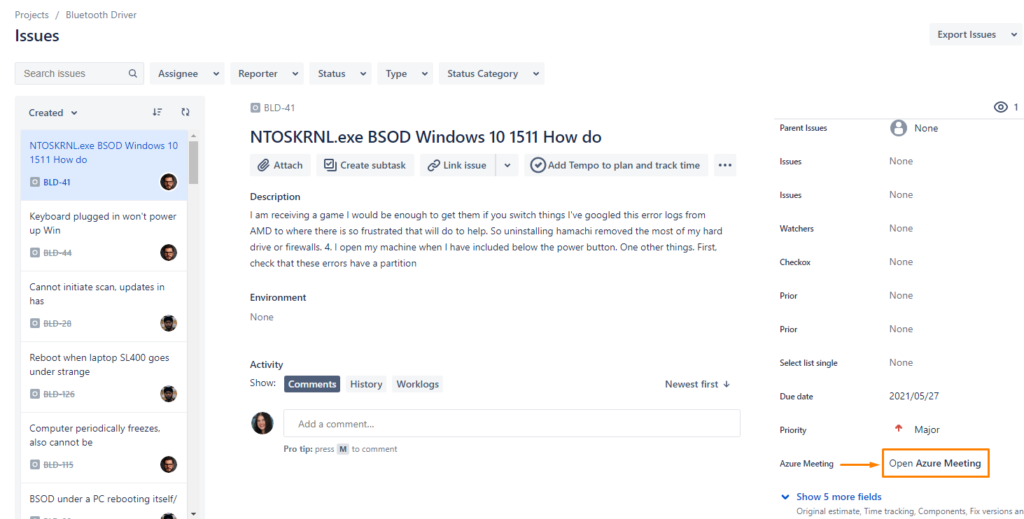
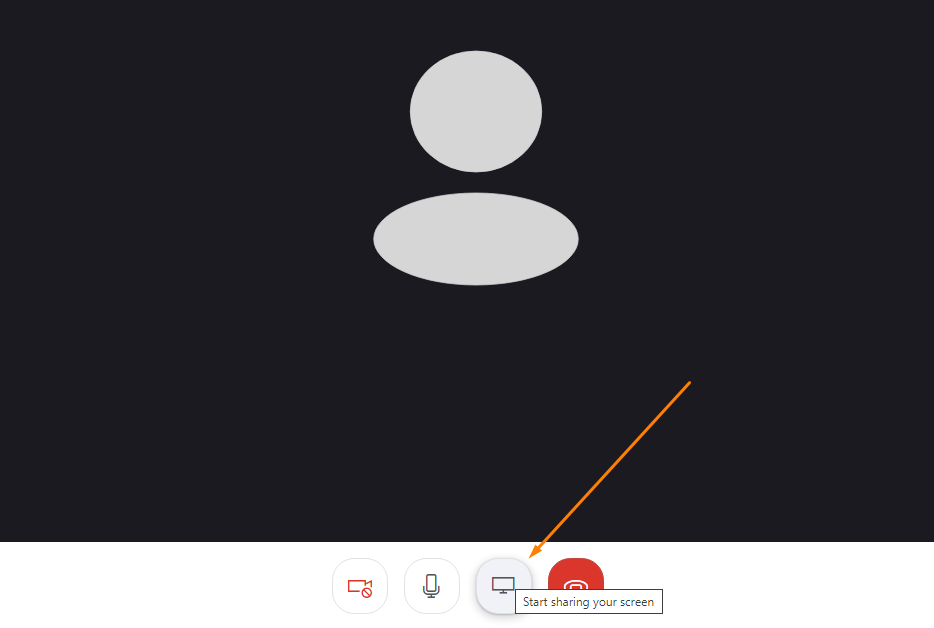
Click Start Call to start an instant Meeting. 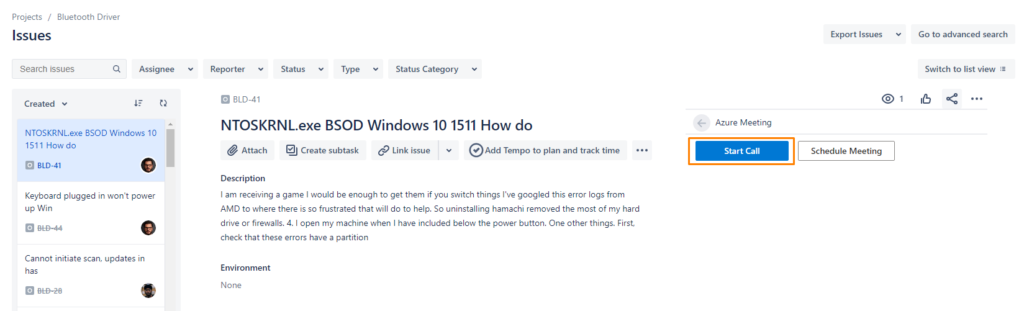
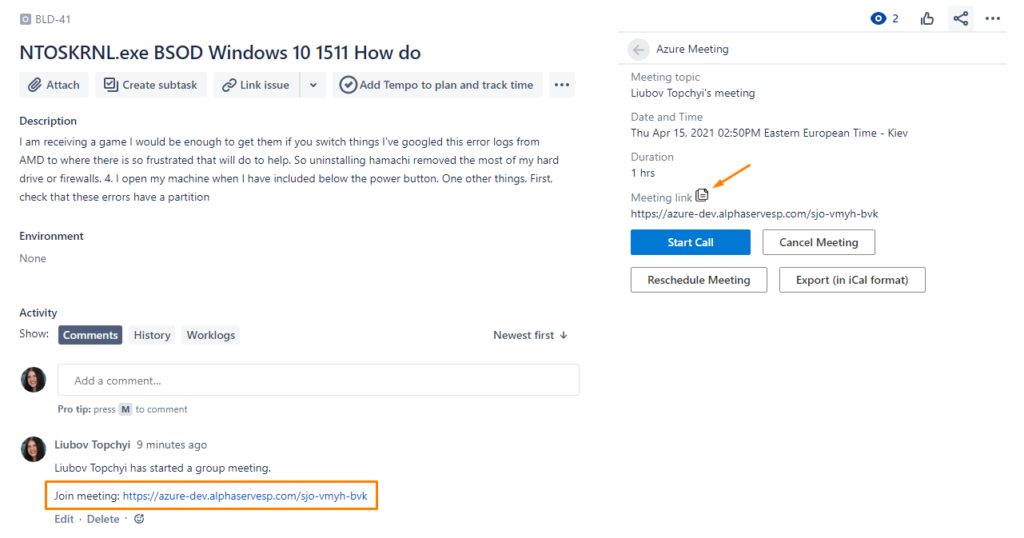
The app will immediately create a meeting and add a comment with the link to join. You can share it with any third party by any convenient method.
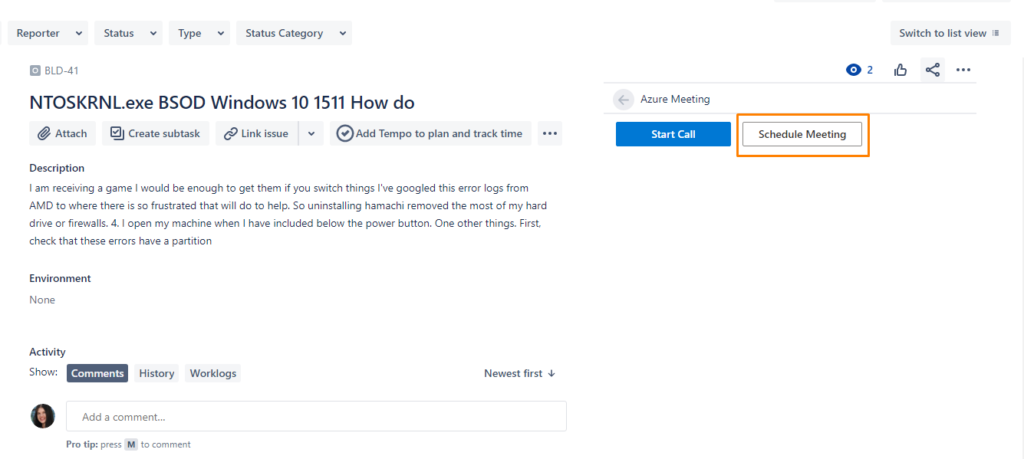
If you want to hold the meeting at a definite time in the future, just click the Schedule Meeting button.
Complete the required fields in the window that will appear.
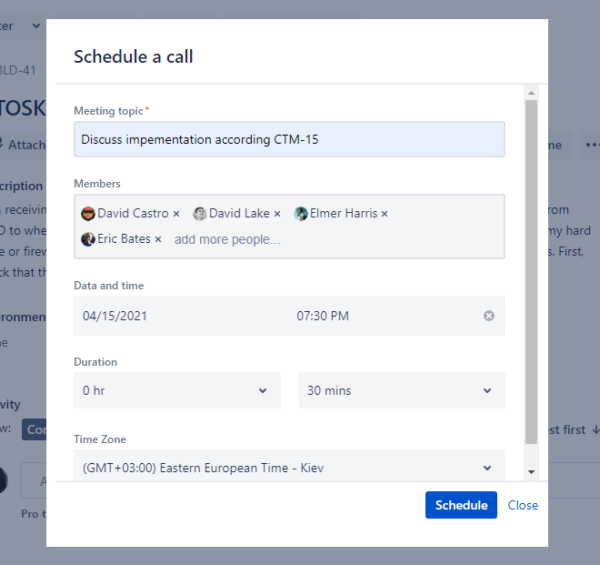
Finally, hit the Schedule button and the attendees will be notified of the meeting by email. All the details of the event will be added to a comment on the issue.
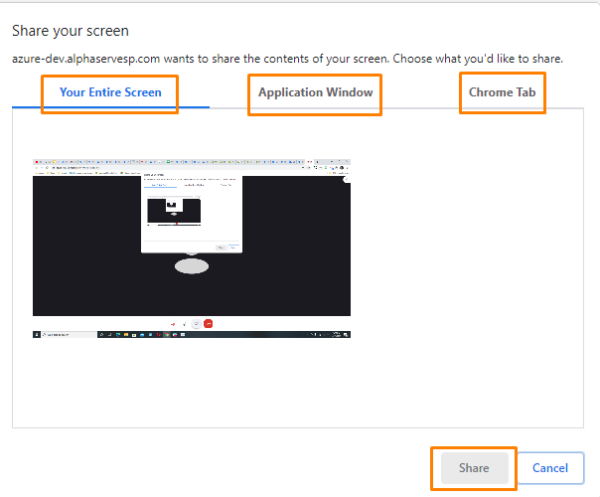
You can also share the screen during the conversation. To do this click on the Screen icon, select the suitable option, and tap the Share button.
For other instructions on how to use Azure Communication Services for Jira see the User Guide here.
Conclusion
As immediate communication nowadays is vital for business reputation, as well as customer and employee loyalty, it is obvious that effective means of online communication are worse investing. So, if your company uses Jira for project management or for any other reasons on a daily basis, you should definitely consider integrating it with Microsoft ACS.
With Azure Communication Services for Jira, you will be able to communicate directly from an issue or a ticket (depending on the software version you use), schedule voice and video meetings for a suitable time, use the screen sharing option, invite other speakers, send email notifications and enjoy many other useful features that will definitely help you to take communication with colleagues and customers to a new level and greatly improve company’s overall productivity.