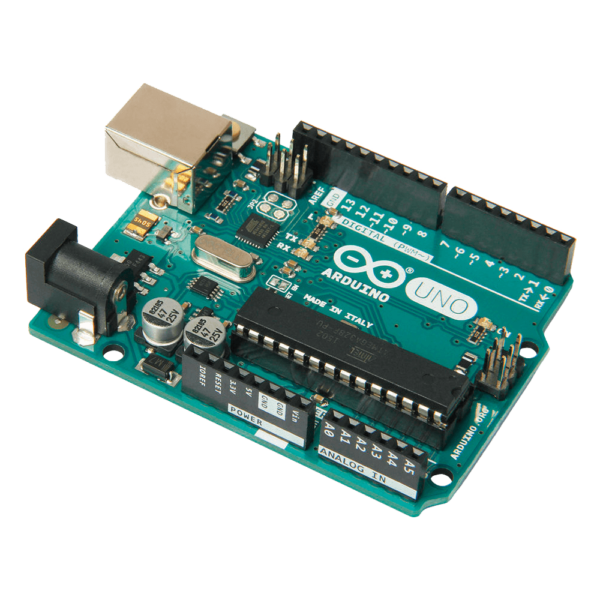
Arduino is a computing platform that provides single-board microcontrollers and microcontroller kits. Arduino’s products are used in the development of electronics.
Many hardware hobbyists, veteran and new to the trade, enjoy using the Arduino platform to create responsive interactive devices or intriguing projects involving electronics.
The Arduino platform provides easy-to-use hardware such as a small open-source circuit board(known as a “Microcontroller”), as well as a flexible IDE(Integrated Development Environment). IDE is a software part that is designed for writing computer codes that can then be uploaded to the physical circuit board(microcontroller).
Through the use of a simple USB connection, Arduino negates the traditional hassle users of other competitor programmable circuit boards have been forced to deal with in the past. Alternatives to Arduino require additional hardware in order to upload a newly written code from a computer to a circuit board.
As mentioned earlier, all Arduino needs to transfer code data is a USB cable.
One of the other impressive features that sets Arduino apart is that it’s IDE was developed as a simplified variant of C++. This allows users the capability to do useful little tricks while working on their electrical projects, regardless of their experience level.
All of these features make Arduino one of the easiest-to-use platforms on the market. Arduino’s highly-regarded experimental tools are a favorite amongst artists, designers, hackers, and hobbyists across the board.
Regardless of whether someone wants to create circuit board communications with GPS units, LEDs, cameras, internet, or even a smartphone, Arduino is the perfect tool for easily working with interactive environments. With just a few lines of code and a little practice, anyone can master Arduino.
The Arduino Serial Monitor
One of most useful features provided by the Arduino platform is that it utilizes RS232 serial communication in order to interact with computer systems.
What does that mean?
It means that users are given the ability to send commands to an Arduino circuit board from the computer they are using, as well as receive messages sent/returned from the Arduino circuit board via the easy USB connection.
In order for this feature to be utilized, the user must open the Arduino Serial Monitor pop-up window. This is an easy step, as it is built into the platform’s software, and can be accessed simply by locating it on the toolbar on the Arduino IDE. Accessing the utility allows users to effortlessly read and control the devices that are interfaced with the Arduino circuit board.
In addition to displaying the data generated with the board, Arduino Serial Monitor is a great tool in the development and debugging of an Arduino sketch.
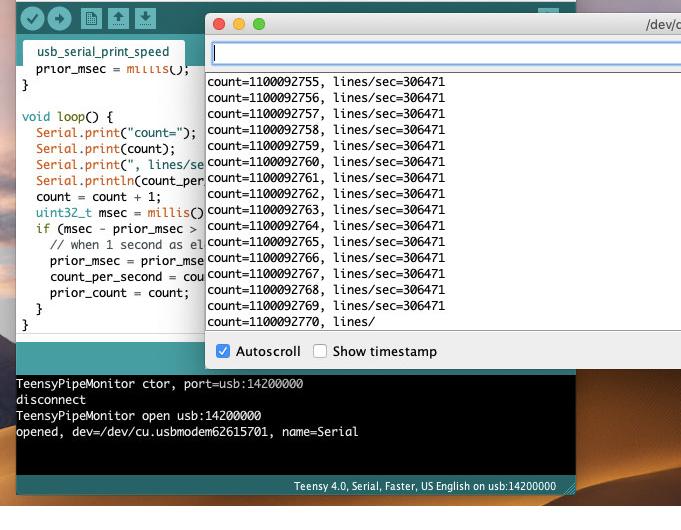
By providing users with the Serial.print() function, they can enjoy the convenience of Arduino serial output transmitted to their PC and displayed on its monitor.
Wondering why is this preferred when developing Arduino sketches?
Simply put: once code has been uploaded to the Arduino board, the user’s results can be different than what was initially expected.
As an example, we’ll use an LED. Say that it isn’t behaving as expected, perhaps blinking too frequently (or, at least, more often than the user intended). The source of the issue might be just a variable being incremented on and off, and Arduino Serial Monitor is the easiest and most effective way to check for the LED’s change in values.
When Arduino Serial Monitor Doesn’t Work: An Alternative Solution
While Arduino Serial Monitor is a fantastic tool for supporting basic serial communications, there are limits to its functionality. Concerning things like data logging or “real-time” COM port monitoring, Arduino Serial Monitor, unfortunately, won’t be any help.
However, users are not left without another user-friendly and reliable serial monitor option, and that is all thanks to Serial Port Monitor by Eltima (SPM)!
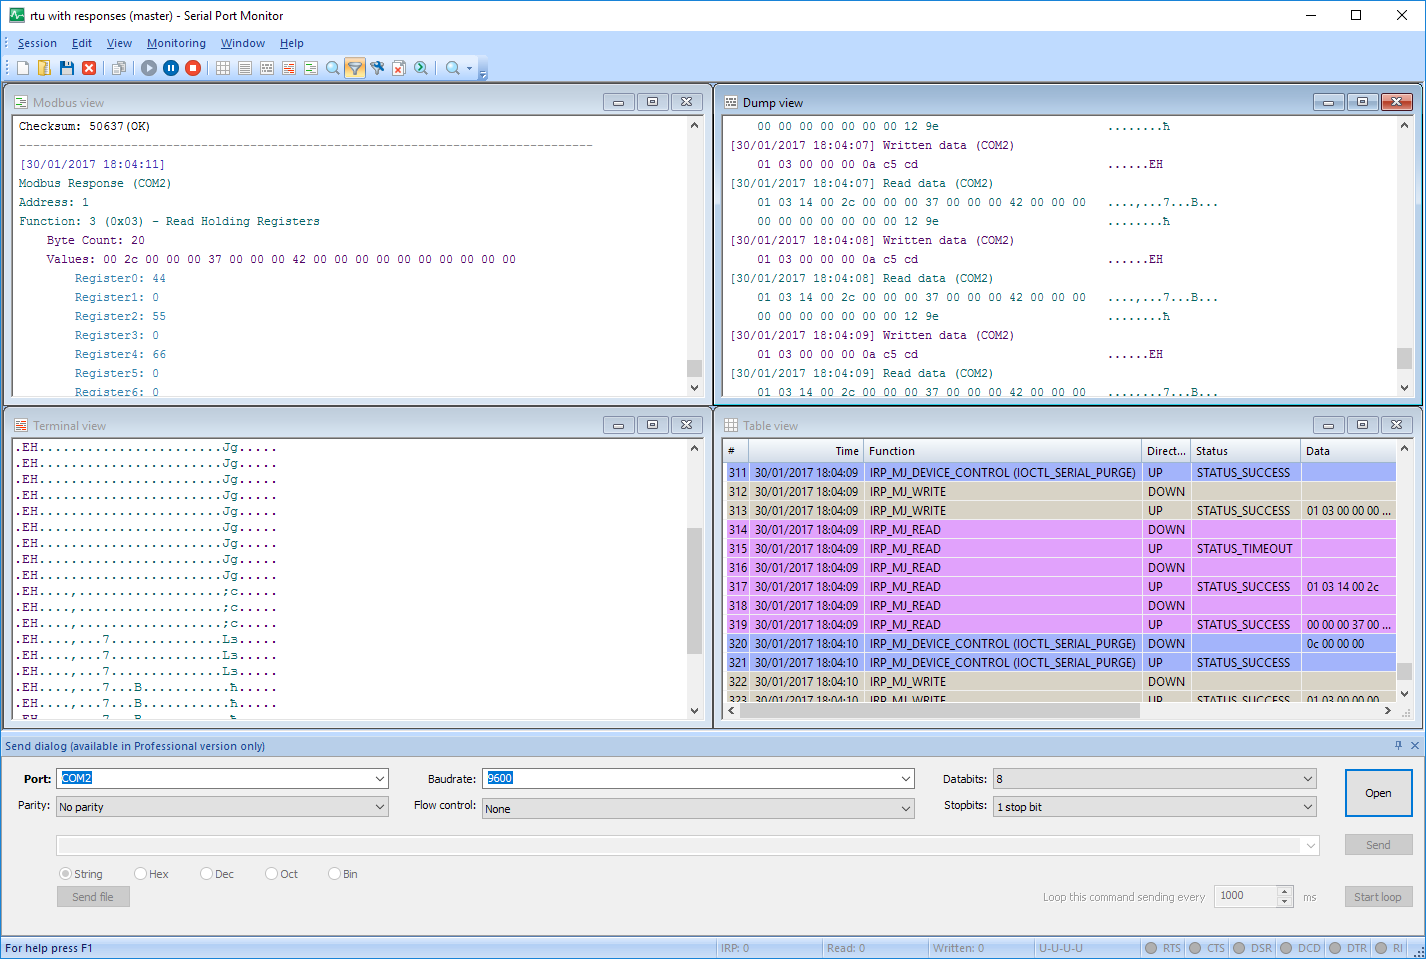
With Serial Port Monitor by Eltima, everyone, regardless of their skill-level, can manage all of their COM ports. Whether it’s needed for opening and closing ports, setting and changing their perimeters- or even communicating data in multiple formats (like string, binary, octal, decimal, and hexadecimal- for example), Eltima makes it easy.
Even if a user wants to transmit binary data via “block”, using Eltima’s Serial Port Monitor makes it a piece of cake!
Serial Port Monitor by Eltima is perfect for comparing and analyzing information transmitted between your computer and an Arduino circuit board. Eltima’s SPM application logs all received serial data and saves it to a separate file, that way it is always available for review later on if necessary.
Serial Port Monitor also lets users alter “flow control” settings, which means that operators can change the Arduino platform functionality when required! The concept behind it is simple: as long as the user sets the “flow control” to “none”, access to the serial becomes possible without ever having to reset the circuit board.
This is most helpful when one is in the process of debugging an Arduino sketch, as all they need to do is attach a connector, and then monitor the data without the need to restart the sketch.