Most packaged products have some sort of labels on them. Whether it’s a toy, some technological device, a cosmetics product or a beer bottle, the label on it will tell you more about what’s inside the packaging. Not only do labels give you important information about the product, they can also be very beautifully designed, so people are more inclined to buy them or at least take them into consideration for future use.
The amazing development of the new technologies and Internet now allows people to create labels for any purpose without needing to know any particular and specialized design software, such as Photoshop. Becoming a real designer takes a lot of time and practice, but people who do other things in life don’t have time to learn how to design. Basically, anyone can create and print labels using standard free software, like Google Sheets. Then the question ‘How to print labels from Google Sheets?’ arises. By downloading various addons, you can easily create labels based on Google Documents and Tables. Hence, if you need labels for anything you create yourself, and you don’t want to pay a designer to do it for you, you can simply use free online label makers such as Labeley. This particular tool is recommended here because it is very user-friendly and provides more options to users than many other similar tools. It has more custom shapes to choose from, more illustrations and background templates, so you can make your label original and attractive. In fact, your label can be completely personalized and unique, because Labeley has an option to upload any photo from your computer and use it as your main design.
The following is a tutorial on how to use Labeley. The instructions are very easy and straightforward.
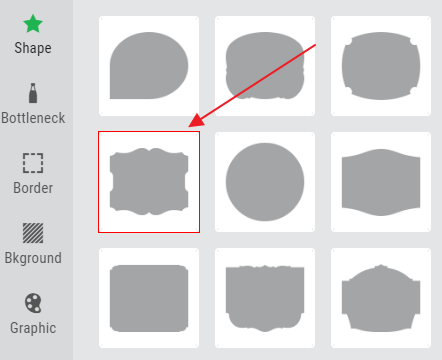
Let’s say you brew your own beer and you need labels for your bottles. Go to Labeley’s beer labels page and take a look at the selection of shapes that you’ll see on the right. Choose one.
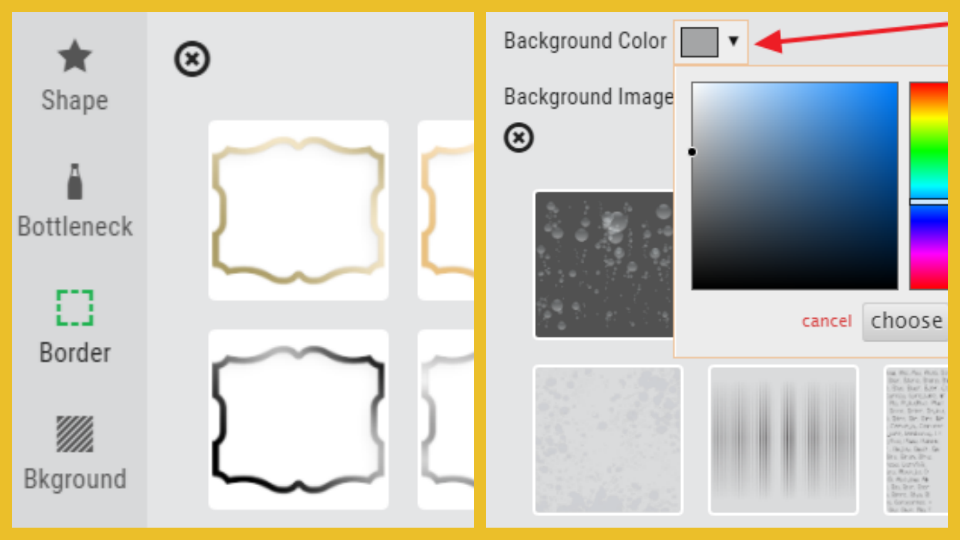
Now, click on the Border option and choose any border you wish. This step is optional, which means you can leave your shape without a border if you want. The same goes for the Background.
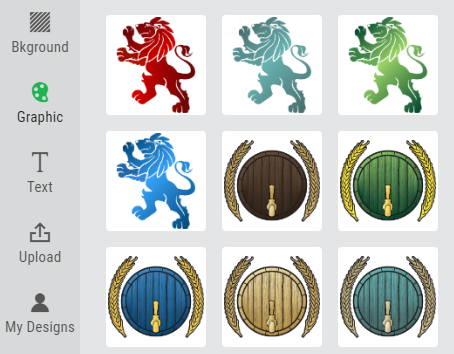
The next step is either to upload an image from your computer (a photo of you, your logo if you have it, etc.), or to choose from any of the graphics that are offered within the software. Click on the Graphic option and explore offered illustrations. You can insert more than one illustration if you want.
When you insert an illustration in your label, you’ll see two arrows that appear next to the graphic. Use them to reposition and resize your illustration.
Finally, add text to your label. Click on the Text option, and then on the Create Text that will appear as a green button. Then you’ll see a list of different fonts and some other text options underneath the fonts. Note that you need to click on each font in order to see what it will look like on the label.
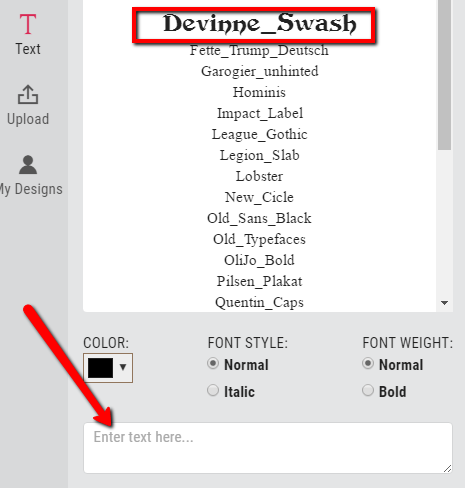
Now write your text in the Enter text here field and save your label. You can either save it in your Labeley account (if you created one) or you can save it on your computer. For this second option you need to click on the Save Label button, and when the label appears on the right, right-click on it and use the Save image as option.
Labeley currently has five label categories: holidays, kids, beer, wine and general. However, don’t feel limited by these categories because you can use the tool to create any sort of labels. It provides all kinds of label shapes and dimensions that can match any purpose.
Feel free to explore the tool and make as many labels as you need. After only a few tries, you’ll become skilled and be able to create really neat looking and professional stickers.