Introduction
Kids can really run wild with their imaginations and for the most part, it is lovely seeing them go wild with their imaginations. After all, kids are god’s own gifts bestowed upon mankind. Unfortunate kids and technology don’t mix together very well and we take every precaution to make sure that they don’t accidentally electrocute themselves on open circuits or accidentally delete the contents of your computer. While there are physical measures available for restricting access to devices that have a wire and a plug, we have another very lethal electrical equipment that has become an integral part of us in our daily lives. I’m of course talking about the mobile devices like Tablets and Phones. Kids seem to have an unusual amount of attachment with these for some reason and that is a big reason to stay vigilant about their activities on your mobile.
Because modern UI’s are so simple and easy to use, it doesn’t need much brainstorming to figure out how to get acquainted to them and that leaves the device vulnerable to unintended usage by children. But the problem isn’t letting the children use the device but rather that they might stumble into something that isn’t appropriate for them or accidentally make purchases using saved card details for apps and games (because who doesn’t want to level up their clash of clans base). This in turn creates a lot of trouble for the parents as companies don’t generally have refund policies for apps and games that are accidentally purchased by kids.
Preventive measures, anyone?
Well why not try a simple app called Kidslox for Android and iOS?
Kidslox is a very advanced and easy to use app for controlling your iOS and Android devices. It can help you safeguard your device from any intended personnel by allowing you to basically take control of the primary access of your device. Thereby eliminating access to sensitive information or inappropriate content.
Testing
For this review, I’ll be using the App to show you a demonstration of how you can use the app in your device. The app will be running on a Xiaomi Mi A1 with Android 8.0 update and no other conflicting apps of similar nature.
Disclaimer:
This is just a simple demonstration to show and explain the app and it’s features. This shouldn’t be followed exactly as as shown and users are required to further tweak the app according to their requirements. We will not be liable for any lost data or the app not working as intended, as it is a concern for the developer.
Getting Started
Download the app from the App store or Play Store, depending on your device.
Inside the App
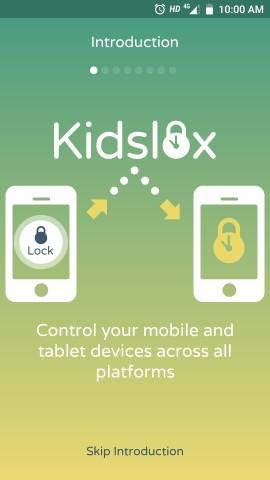
The app will greet you with this splash screen, where you’ll find a few pages that introduce you to the app. You can also skip the introduction altogether but for first time users, I highly suggest that you go through it. I’ll also leave screenshots here for the intro in case you want to see it again.

As you can see, the app offers three modes to control the device and we’ll explain each mode in details further in the review.
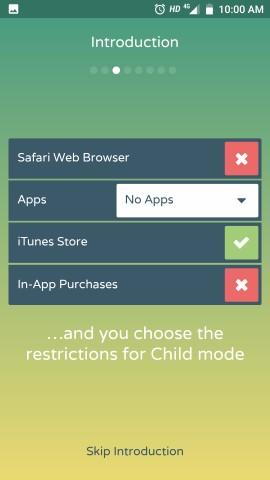
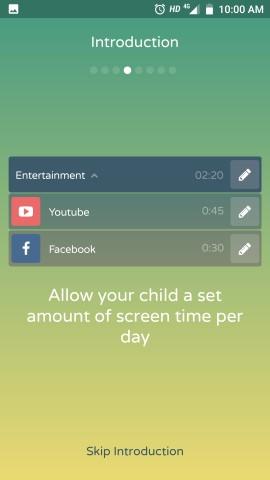
You can customise the app to control almost any app of the device, including the screen time that you want to allot to your kid for each app.
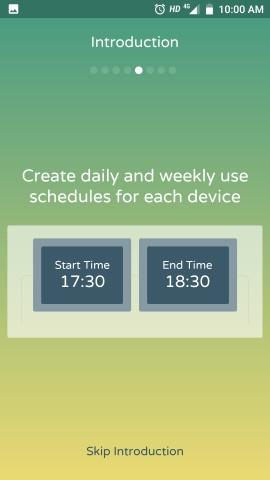
One of the App’s best features is that it allows you to create schedules for when you want the app to start working. Say you leave for work at 10AM and come home at 7PM, you an set a timer for the app to start working at 7:30PM and leave it on till 10:AM for the next day.
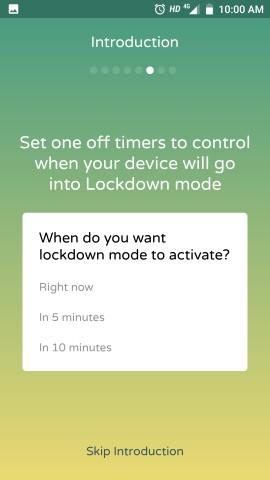
A preview of how you can control the lockdown mode on the intro. More details below.

Block online content in real time using kidslox.
The next screen contains a link to open the address of kidslox which I haven’t included. And that concludes the intro screen.
Registration for Kidslox
During the first run, you might need to create an account with Kidslox if you are new to the app. Or if you already have an account you can skip right to the login. For review purposes I’m going to start from scratch and show you the complete procedure.

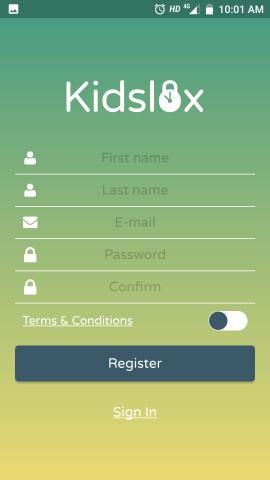
Step 1: Click on Register
Step 2: Fill in your details as asked by the app. You’ll need to have a valid email account for completing the registration process.
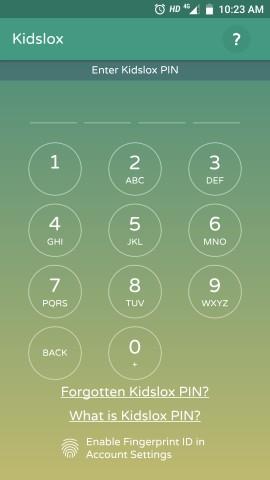
Step 3: When you sign in, you will be prompted to enter a pin for the app that would serve as a defense so that the in-app settings cannot be altered. Along with that, one of the unique features of this app is that it can be locked with the fingerprint reader too if your device has it. So you can have a two way protection for the app.
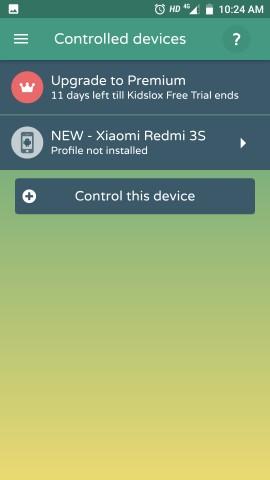
Multiple devices can be controlled via the same app interface in one single account. I have successfully set up another profile for my other phone which is a Xiaomi Redmi 3S.
On initial registration, you’ll be given a trial period for two weeks or 14 days, after which you’ll have to get a subscription for the app.
Step 5: In the controlled devices menu, , click on the “+ Control this device” tab to set up a new device.
Slide down to refresh the device list if by default all synced devices aren’t appearing.

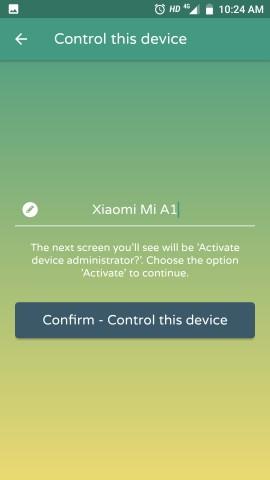
Step 5: Let’s set up a profile for my Mi A1. The app you will prompt you for a device name. By default it is whatever the name of your device that the app is installed on (Ex. Xiaomi Mi A1 in my case).
But you can give a different name for the device if you wish so and when you are done with this, tap on “Confirm – Control this device” after which you’ll need to change a few settings in the android system settings.
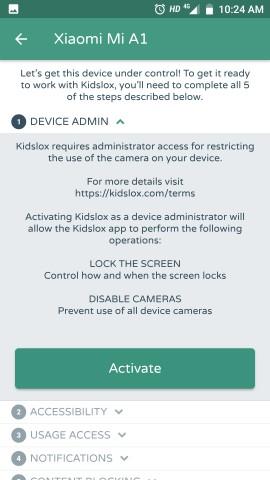
Step 6: In order to get the app working properly, you’ll need to grant the app device administrator access. The administrator access prevents the app from uninstalling and gives it elevated privileges over other apps which is essential for it to work properly.
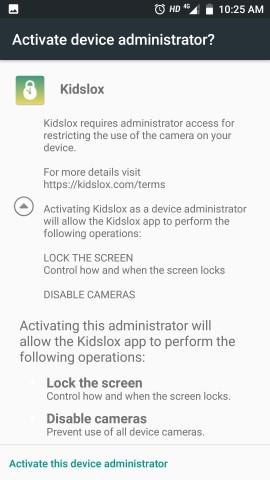
Step 6.1: After the app has sent the request to the OS, the device will prompt if you want to enable device administrator access for the app. Click on “Activate this device administrator”
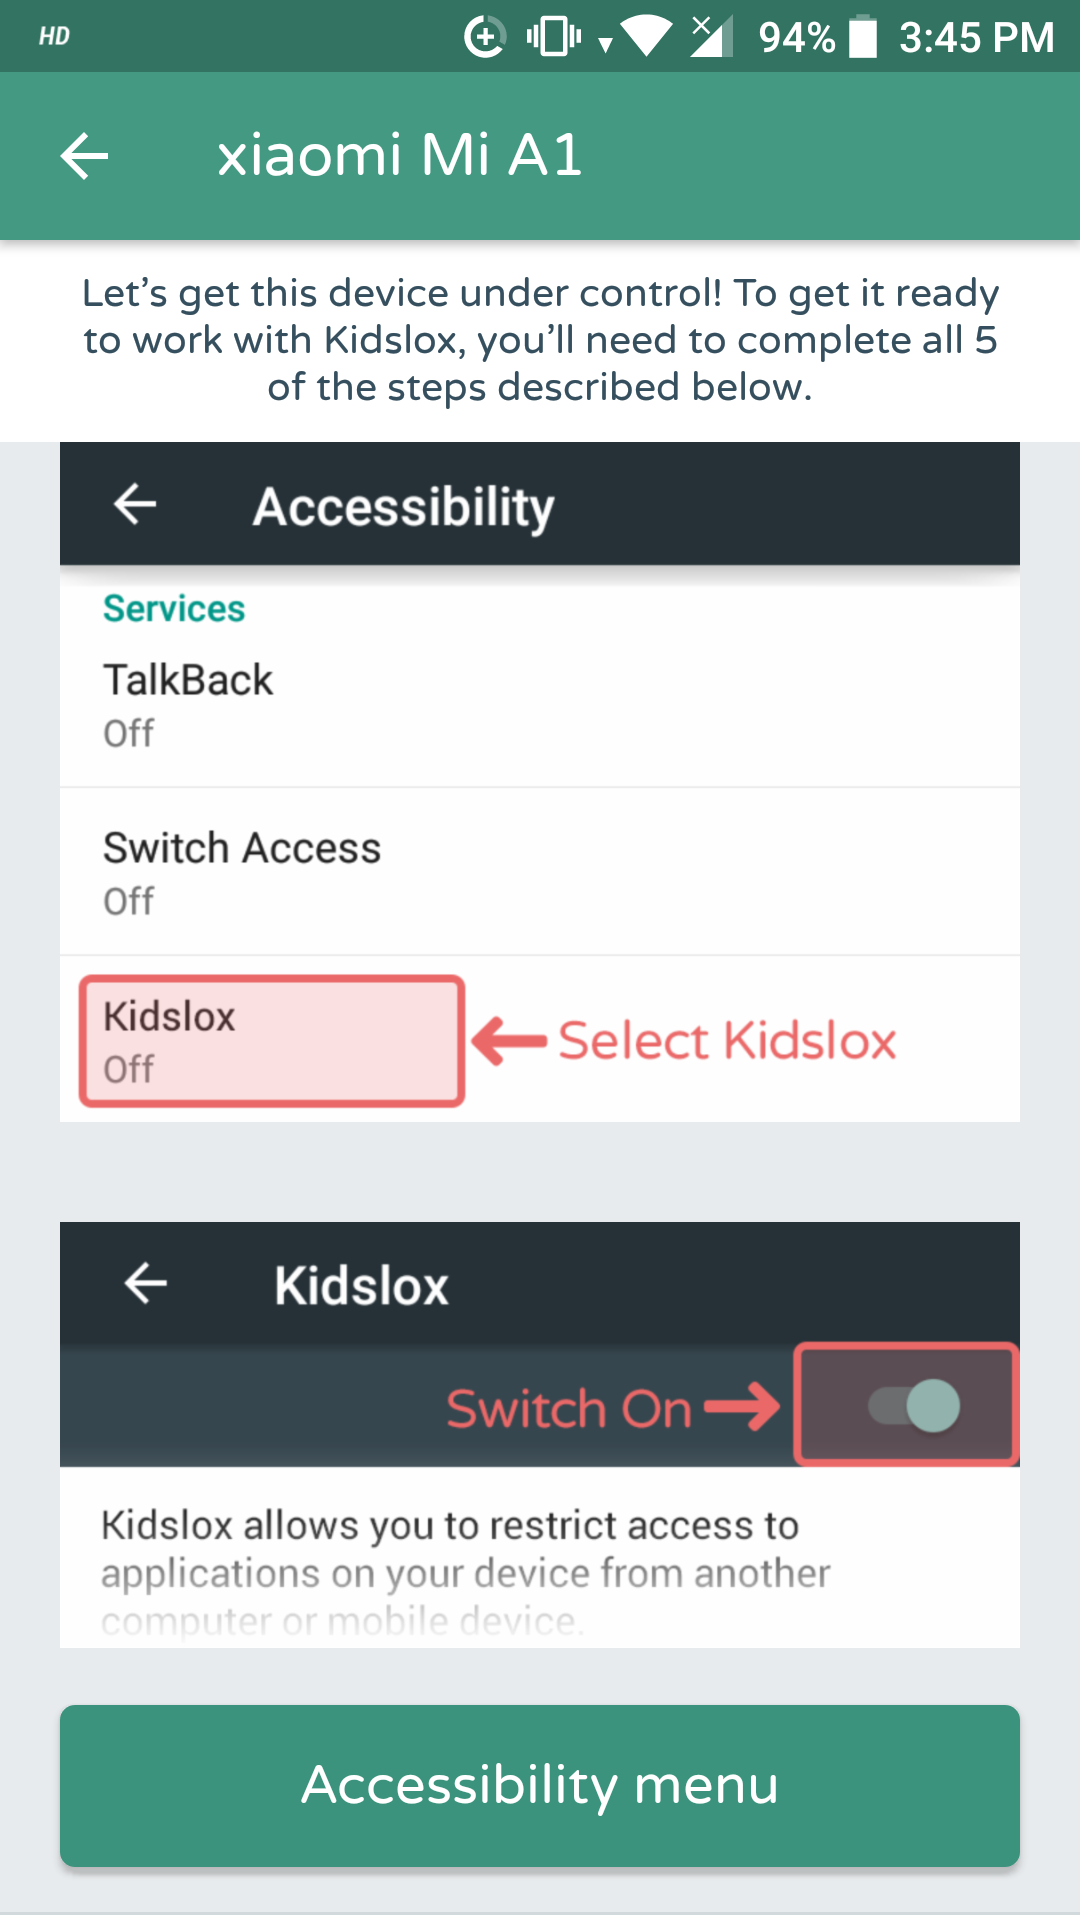
Step 7: Next up is the accessibility toggle. Click on “Accessibility Menu” and then clock on the kidslox app and turn on accessibility for the app.
The accessibility toggle is needed be the app to:
- Observe your actions: Receive notifications when you’re interacting with an app.
- Retrieve window content: Inspect the content of a window that you’re interacting with.
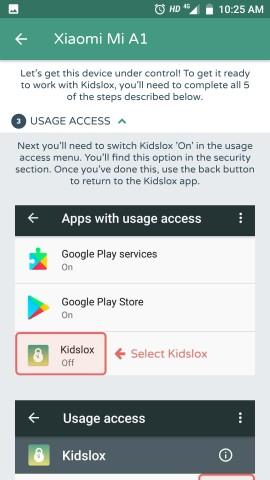
Step 8: Next up, you’ll be asked permission for granting usage access to the app. It basically allows the app to monitor and track other apps and their usage patterns.
Tap on the accessibility menu option and then click on the kidslox app.
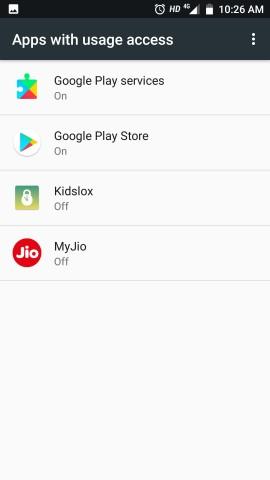
Afterwards, click on “Permit usage access” inside the menu.
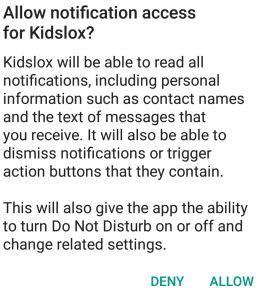
Step 9: Next up is allowing it notification access. It is a simple enough procedure. Just tap on the “notifications menu” toggle in the app and it’ll bring you right to the menu with apps that require notification access. Click on the kidslox app and then click on allow.
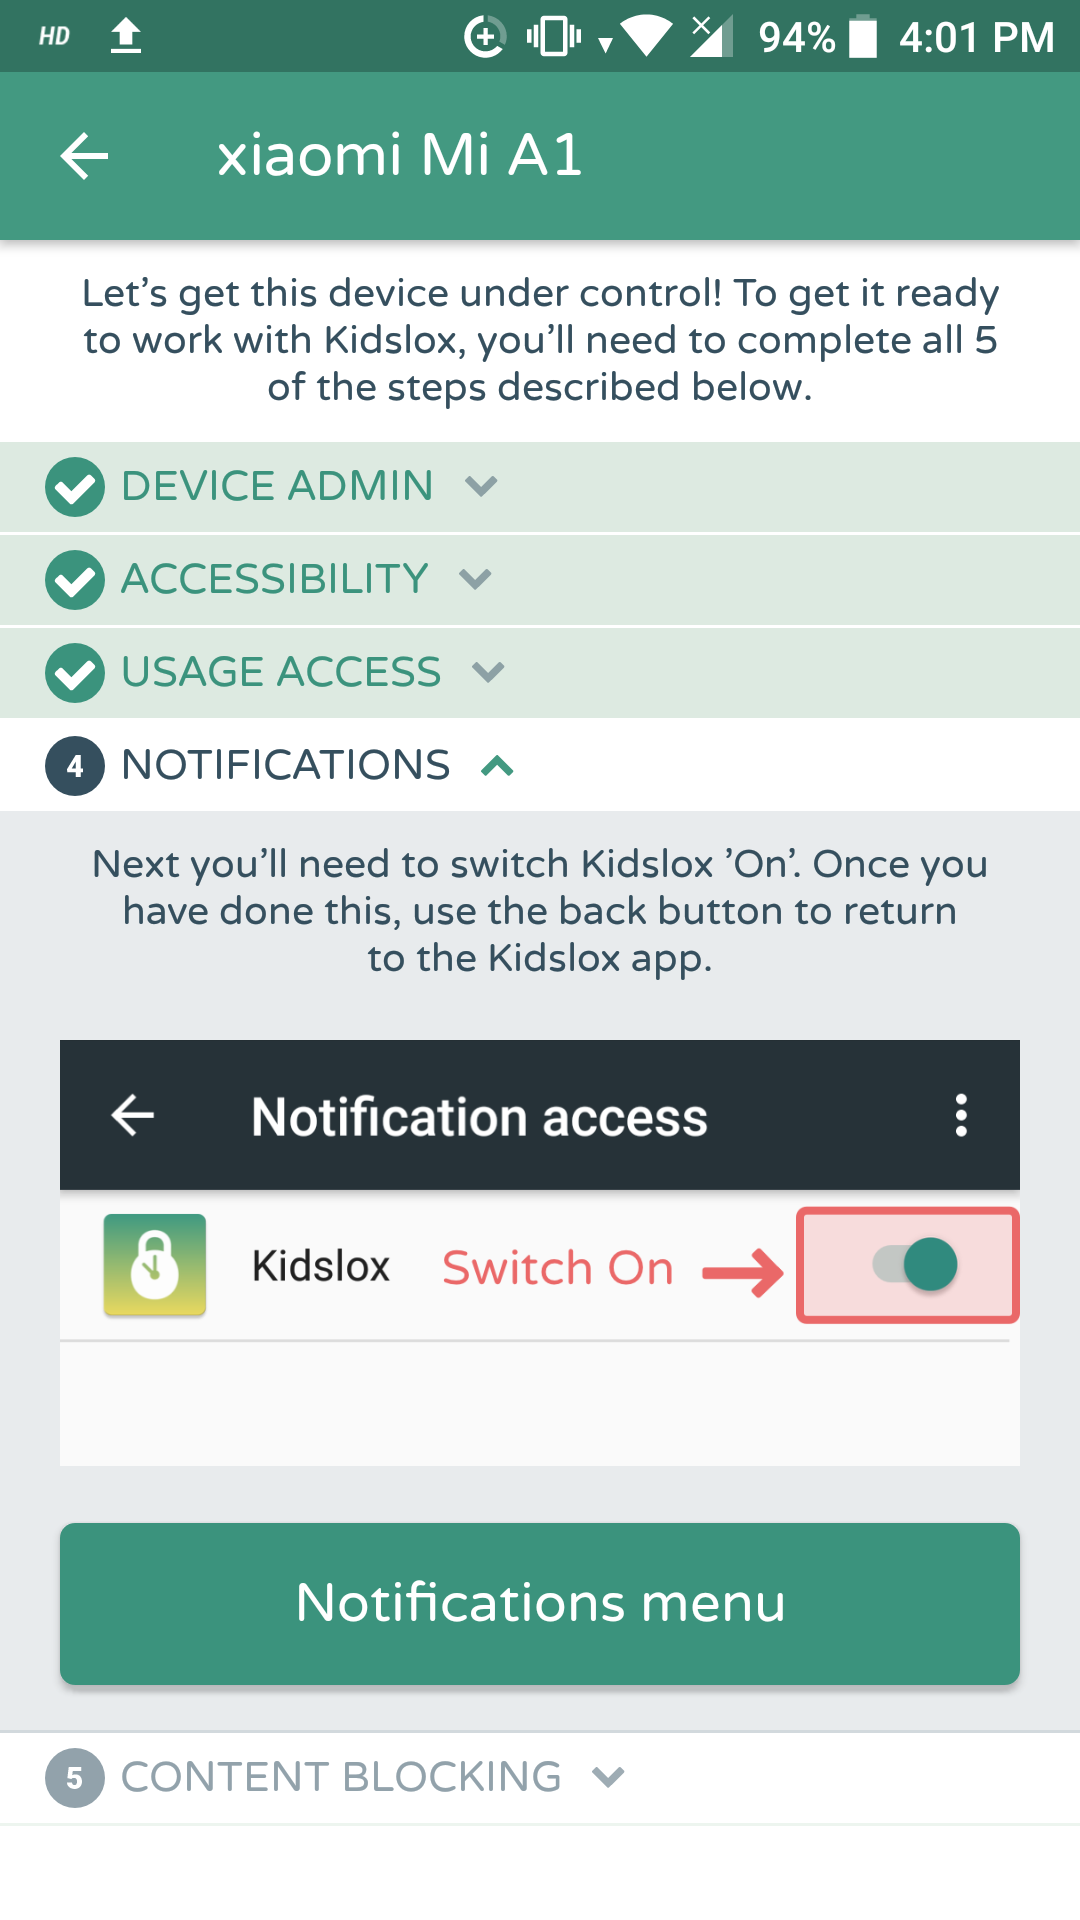
You might be presented with the following disclaimer when granting it notification access.