Do you wonder how to keep your solar panels efficient after the purchase and beyond? For that purpose, there are 3 essential steps to pay attention to. These steps include professional installation, considerate cleaning, and attentive maintenance. To make the acknowledgment of these procedures enjoyable and worthwhile, an overview of solar energy and solar panel system is a must. So, what is solar energy? The sun’s energy is a limitless, environmentally friendly, and affordable renewable resource. It gets supplied to your house through a photovoltaic (PV) panel. Is that all the PV system does? Of course no! The PV panel system has a solar panel battery bank, which takes care of efficient energy consumption. If extra energy gets generated by the PV panel, the storage equipment conserves it for later use upon demand. See – savvy and efficient! Now, after overviewing the sun’s energy and its suppliers, just sit back and let me guide you through each step in a detailed manner.
Solar Panel Installation

Professional solar panel installation is key to further panel performance. By the way, professional doesn’t mean that it should be done by the professional crew sent by a solar panel company like Bay Solar Group. Instead, it should be done according to the guidance given by the company. After deciding on the solar panel size, supplementary equipment, and monthly fixed electricity bills, you can proceed with 7 steps of installation.
Step 1 – Mount Installation
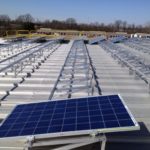
Without a supporting base, the installation of the main equipment – PV panels, is not possible. Either a racking system – mounting on the roof, or a ground mount solar – mounting on the ground are available to opt. You ensure firm PV panel installation with either type of mounting. The only difference is that you may go for fixed or tracking ground mount solar systems. The fixed one is firmly established on the ground and absorbs sunlight at the right angle facing south. In contrast, tracking one moves according to the sun’s direction.
Step 2 – Solar Panel Installation
As long as we have the mounting system prepared, it is time to fix the PV panels. Just secure the equipment with bolts and nuts, and voila – ready to go!
Step 3 – Electrical Wiring
Then comes the electrical wiring. MC4 types of connectors are mostly used for this step. PV panels should be wired to one another either through a series connection or parallel connection. The former requires connecting a positive wire to a negative one. In comparison, the latter requires linking a positive wire to a positive one and a negative wire to a negative one. Easy as pie!
Step 4 – Connecting the PV system to the Inverter
Similar to electrical wiring’s parallel connection, linking a PV system to an inverter requires connecting the positive wire of the PV system to a positive terminal of an inverter. Accordingly, the same operations should be performed for the negative ones.
Step 5 – Linking Inverter to Battery
For this step, we repeat actions of Step 4 accordingly for positive and negative terminals of an inverter and a battery.
Step 6 – Connecting Inverter to the Grid
Here, what you need to do is just plug an output wire in an electric board to sustain the power supply.
Step 7 – Switch On The Inverter
The seventh step is the easiest one! Only start the inverter and let your solar journey begin!
See, professional installation is theoretically done. In practice, theory, combined with considerable attention, performs magic!
Solar Panel Cleaning
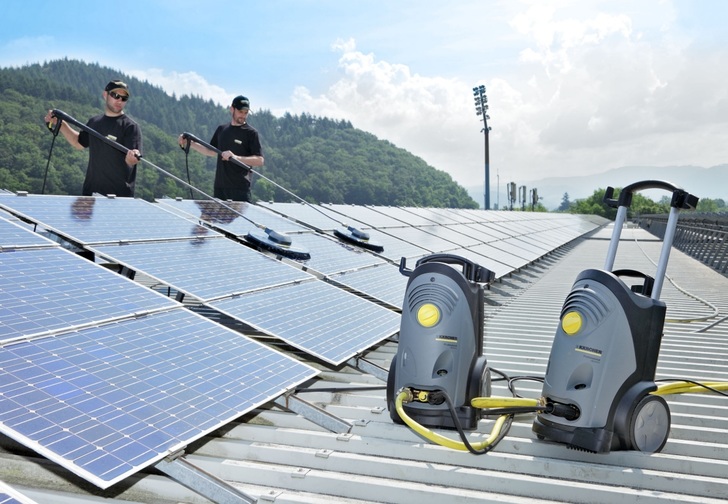
Can you imagine how dirty your PV panels may get? Why? Because they are open to dust, pollen, bird droppings, and rain depending on your area of residence. Good news – although PV panels may get dirty, their ideal cleaning framework is once a year. Relative to the climate of your residence, inspections of the system are advised to conduct. Why? These will prevent further costs for cleaning services from the company’s professional staff. The procedure requires only a piece of cloth, soap, and water. Clean them like windows: soak a piece of cloth into the water with soap and gently swipe along the panel. Repeat as many times as required to ensure complete cleanliness of solar panels.
Solar Panel Maintenance

To your benefit, I would like to tell you that PV panels don’t require much maintenance. Indeed, let me highlight that little maintenance requirements are due to occasional cleaning procedures. Here you may ask, “Then, when should serious maintenance procedures be conducted?” Concerning weather conditions – when heavy snowfalls occur. Relative to photovoltaic (PV) panel performance – when poor performance gets noticeable. Now, let’s see how we can prevent professional maintenance services in these cases. Professionals of the industry advise conducting light cleaning procedures 2-4 times per year. I guess that you may be confused at this point. Let me explain what’s the difference between this type of cleaning procedure and the annual cleaning procedure. The former requires only the utilization of a quick spray or a leaf blower during hot seasons. In winter, you need to use lukewarm water and a long handled squeegee because of the snow. See, simple and affordable! The latter is much more detailed, as explained above. That means that with a leaf blower or a quick spray, lukewarm water and long-handled squeegee you prevent further costs on maintenance services. An advice from me is to be careful towards the maintenance of solar panels as if something is overlooked, professional intervention would be necessary with hefty maintenance costs.
Be careful with the installation, cleaning, and maintenance of your solar panel system. Attentive behavior creates a prosperous and sunny experience.