We’ve all done it. Its no secret.
One day you think of clearing out some of that junk that has accumulated on your hard drive, meaninglessly taking up space and suddenly you delete an important file or folder.
Adding salt to injury, you “Shit+Delete” the app from your Windows OS.
Despair ensues!
You will never see Tiddles or Tom again in the photos, ever again.
What do you do next?
Obvious, you immediately let Google know “how to un-delete that file or folder” and you are presented with a ton of internet garbage or lengthy guides on how to remove your inner guilt by recovering the deleted data. In return Google records that data to use it as ads the next time you are opening a website.
In the worst case scenario, you simply call up some expensive data recovery company and pay them through the nose to get your data back.
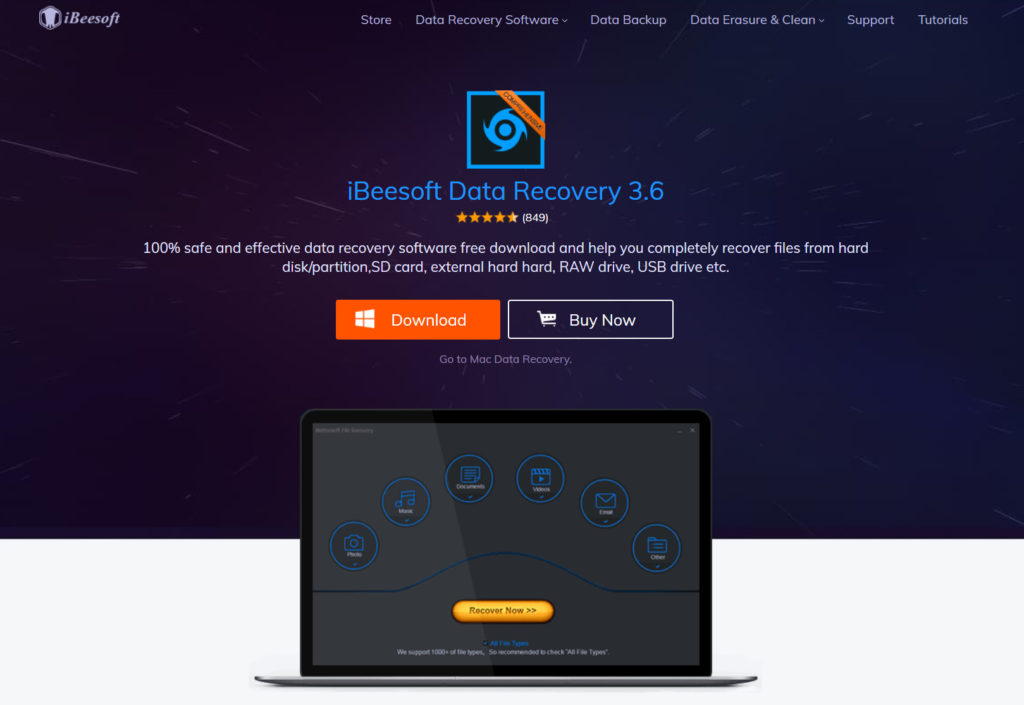
Well hold on a bit. Fortunately there are easier ways that you can explore to recover that precious data with recovery tools like iBeesoft Data Recovery, that doesn’t require you to mortgage your home or go through a crucible of frustration.
Data recovery Guide
A little jargon before you do anything else; after an accidental deletion do not under any circumstances perform the following actions to the same Drive or Partition.
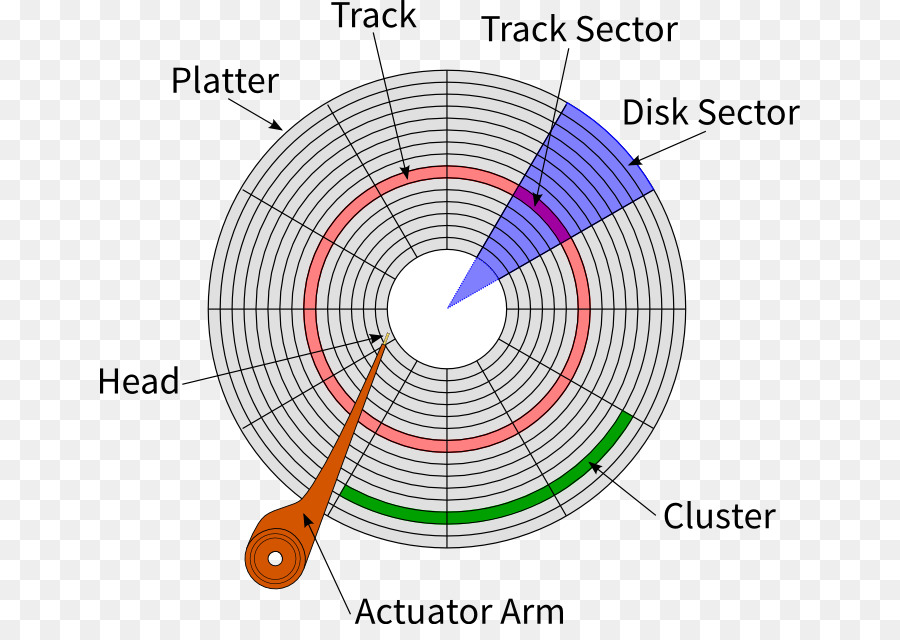
- Do not copy any new data : Traditional Mechanical hard drive data is stored in disk sectors and data in SSD is stored in cells. These are basically data locations scattered in the disk and these sectors or cells are what store the data. When you delete a piece of data, it isn’t actually deleted, but rather the addresses to these sectors are removed. So the data might still be intact. But if you copy a new set of files, these addresses get re-validated with the new data, thereby overwriting the old files.
- Do not Format the Disk : I think there is little need to explain why formatting a disk is a bad idea, if you want to recover data from it. Similar to copying data, what a format does is over writes the addresses and makes them vacant. So the data stored in the sectors or cells get damaged beyond recovery. In this stage, its is exceedingly difficult to recover data without professional help.
- Do not use any cleanup utilities : Yes, you heard that right. If you are the sort that still likes to clean windows registries and use odd tools to delete temporary data, stop. Do not do it until your data is recovered. Some disk utilities actually might contain functions like “free space wipers” which is useful if you are purposefully trying to make any data irrecoverable but if you are trying to get it back do not use it. Also while we are at it, DO NOT run Windows DISK DEFRAGMENTATION!
In case of SSD’s, its best to start the recovery process immediately, before windows initiates the “Trim Command” on the SSD. Its basically disk de-fragment but for SSD’s. It is on by default in windows settings. - Do not perform data recovery on the same disk : Again, recovering data to the same drive will overwrite the de-listed data. Always recover to a different drive, possibly another physical drive altogether.
- Do not physically damage the disk : Does it even need an explanation? Do not play football with the disk. Any physical damage can render all data irrecoverable.
With that out of the way, let’s move on to getting pictures of Granny Back.
How can you recover the data easily at home?
Provided that the above precautions have been followed, here is a simple solution to recover your data.
First Download and install iBeesoft Data recovery from : https://www.ibeesoft.com/data-recovery-software/data-recovery.html
Done?
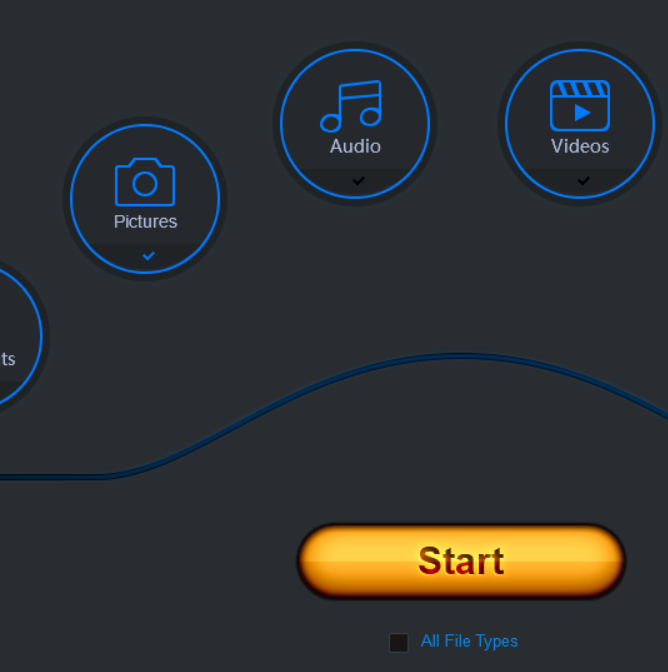
The next step is to open the app and you’ll be greeted with a screen like this :
It has a general selection of formats that are used on a daily basis – Pictures, videos, Audio…etc
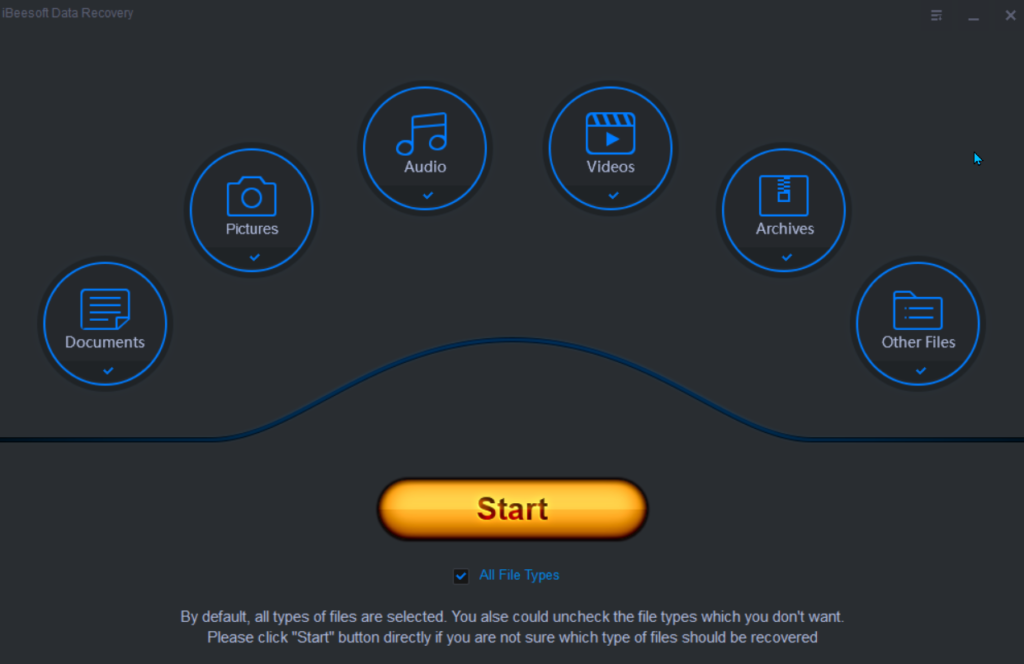
Now if you aren’t sure of all the files that got deleted, make sure that “All File Types” is enabled on the main menu. Or if you are Louis Rossman, or consider yourself as versed in file types, you may select individual formats.
The difference would be that selecting individual formats would save you the trouble of shuffling through multiple data formats, so you have to go through less clutter when it comes to the recovery process.
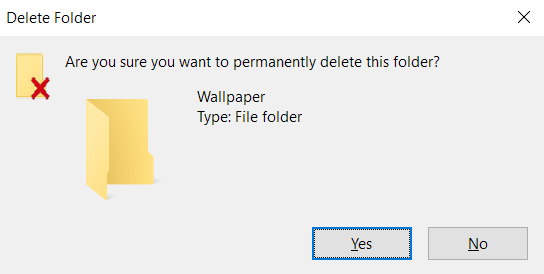
For demonstration purposes I will purposefully sacrifice some “very important data” and show you how to get it back!
So let’s delete something!
Okay so now I have deleted some pictures, here’s how to recover photos from PC. Its the most typical example of accidental of data deletion.
So since I know that the folder contained only images, I will simply select the “Photos” option in the iBeesoft app to get it all back.
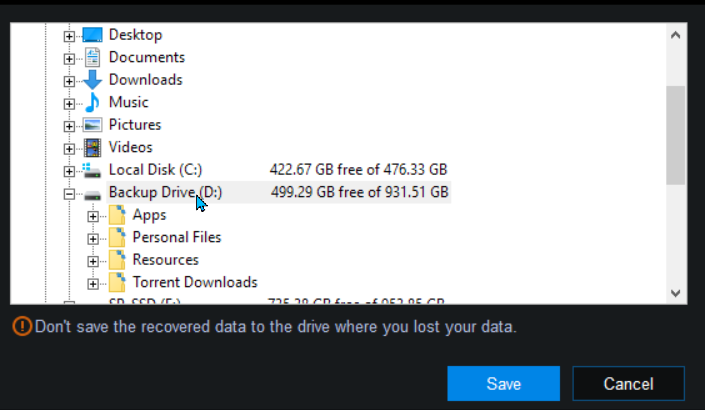
So once you hit “Start” in the recovery app, you are presented to choose the location of where you want to look for the deleted files.
Pro Tip:
If the file was in the following locations [Windows] :
- Desktop
- My Documents
- Desktop Folders
- Music
- Videos
- Pictures

Then the default drive for these locations is always the C:\ Drive. So if any files that you had on the main desktop was deleted, then you need to search in the C:\ drive of your PC.
The files that I deleted were in a USB stick named “SANDISK128”. So I’m going to select that specific drive from the menu to recover the data from.

Once that’s done, click “Scan from the Top Right”

After clicking scan, depending on the amount of deleted data, you will be presented with the option to recover the said data inside its deleted directory. In my case, the folder that I had my deleted data in was named “Wallpaper Backup”. You can double click to open the directory and see if all the files are present and intact.
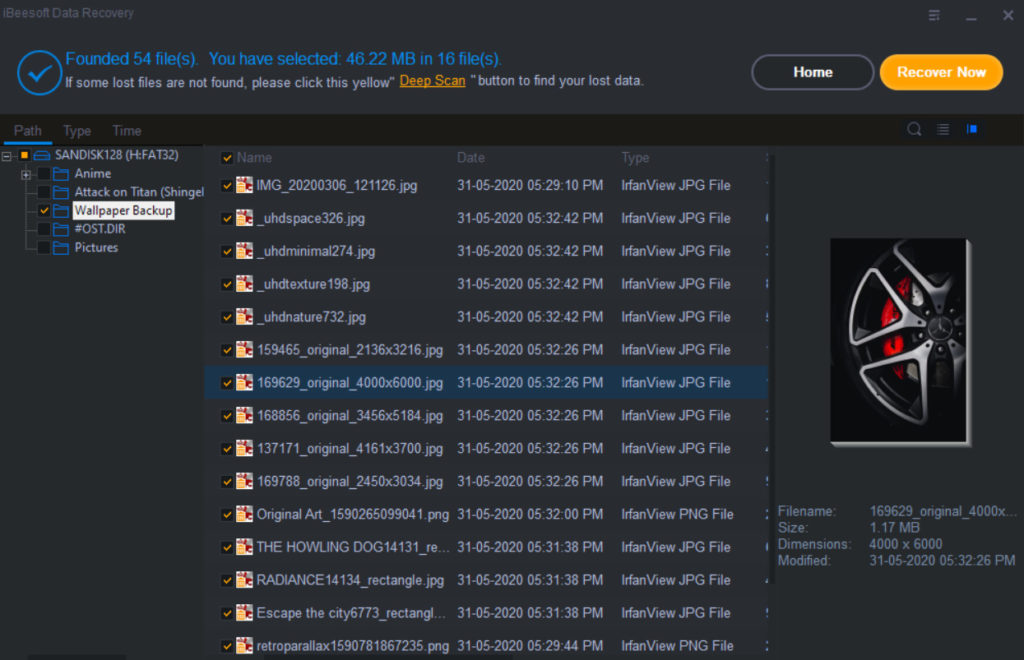
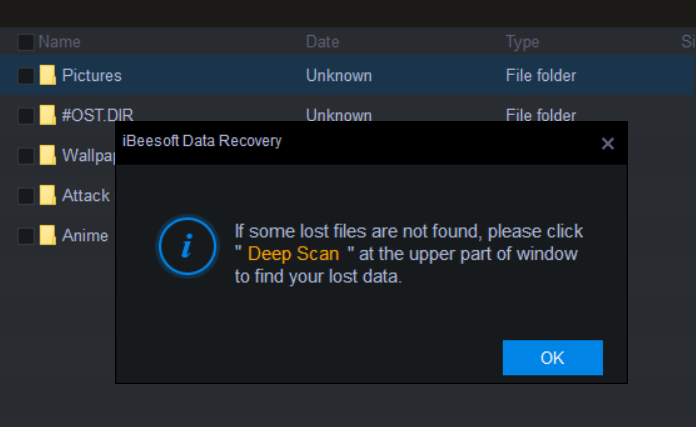
If for some reason, the data isn’t showing up, then its possible that the integrity of that data has been compromised and you will need to run a deep scan if you want to recover it. Deep scan basically delves deep into every cell/sector of the drive in order to searched for lost data. It is usually not required unless the data is very big or the file sizes are too small.
With that said, its time to recover
Select whatever data you want to restore inside the app and hit “Recover Now” from the top Right.
Alternatively, just tick the entire folder to recover and sort out the files later [if you are too lazy]. Regardless, depending on what you do, the recovery process should begin begin after you specify a recovery directory to store all the deleted files.
This also brings me onto a something important, data can be recovered from any external device, provided that you can connect it to a PC.
Here is an interesting guide on Cannon photo recovery for recovering files from an external camera.
Pro Tip: Always recover to a different drive than the one where you are recovering the data from
The recovery process can take time depending on the file size, so it was a huge chunk of data, then it can take some time, depending on the file state and disk copying speed. But rest assured, the data will be recovered.

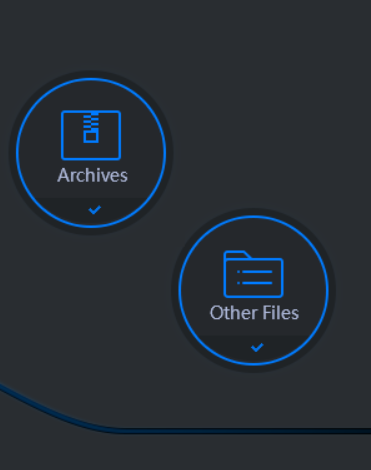
Now, suppose you do not know what files you deleted?
Well when you open the app, just select all the file formats, including “Archives and Other File Types” and then start the process.It is as simple as that.
Data recovery attempt from a formatted drive
Before I even begin this, let me tell you that it has a 90% chance of not working.
For demonstrations, I will delete multiple files in with various formats in a USB drive.
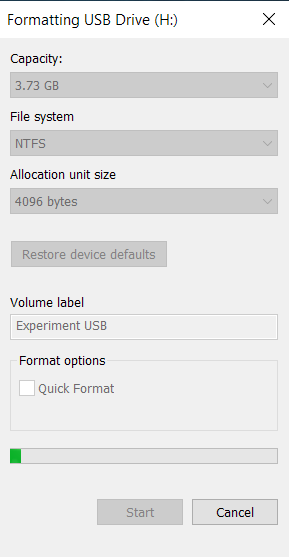
After which, I will format the drive once, without enabling ‘Quick Format’ and then see if we can recover any data [if at all].
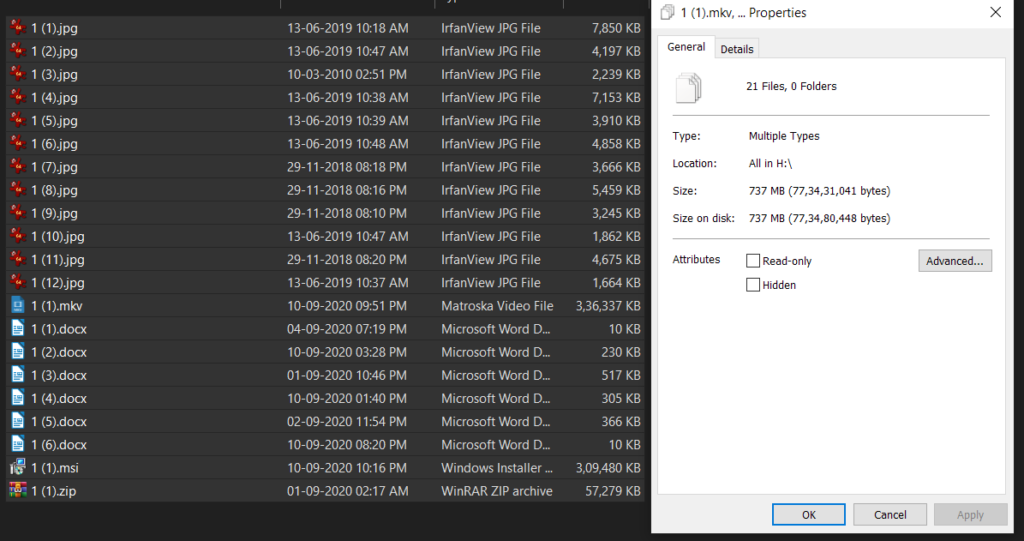
So here are the files in question. Notice the file size before I delete it.
So with that out of the way, the USB was formatted. The reason behind not performing a quick format was to see if a properly formatted drive still has data that can be recovered. While Quick Format more akin to quickly deleting old data, a proper format also wipes off the drives at the sector level.
Recovery on a Formatted drive
- Open iBeesoft Data Recovery and make sure that all format options are enabled.
- Select Start to initiate the process, and generally repeat all steps like before.
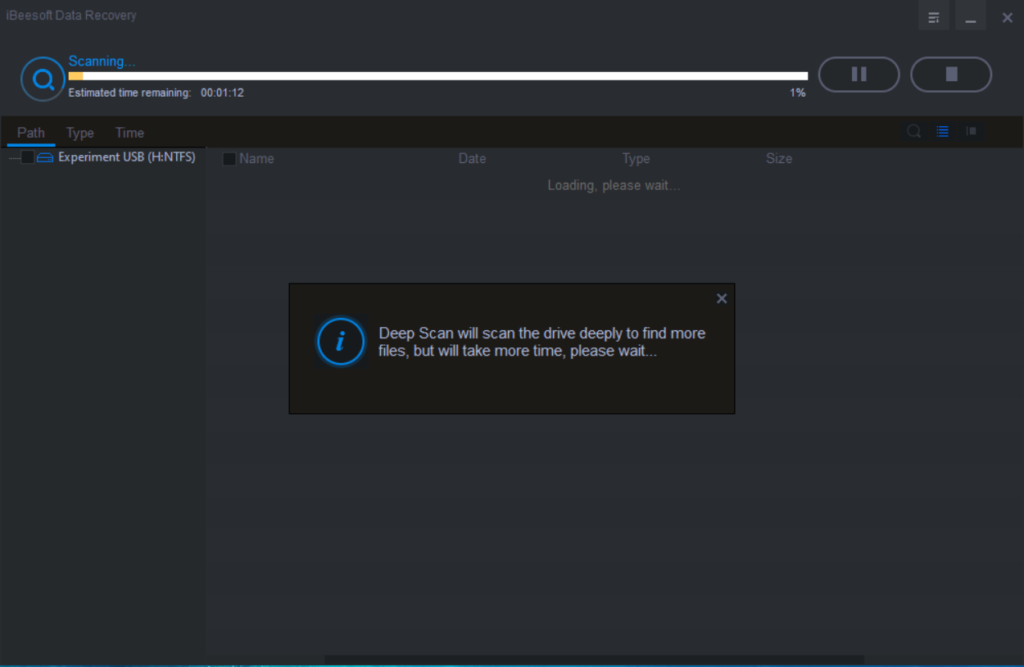
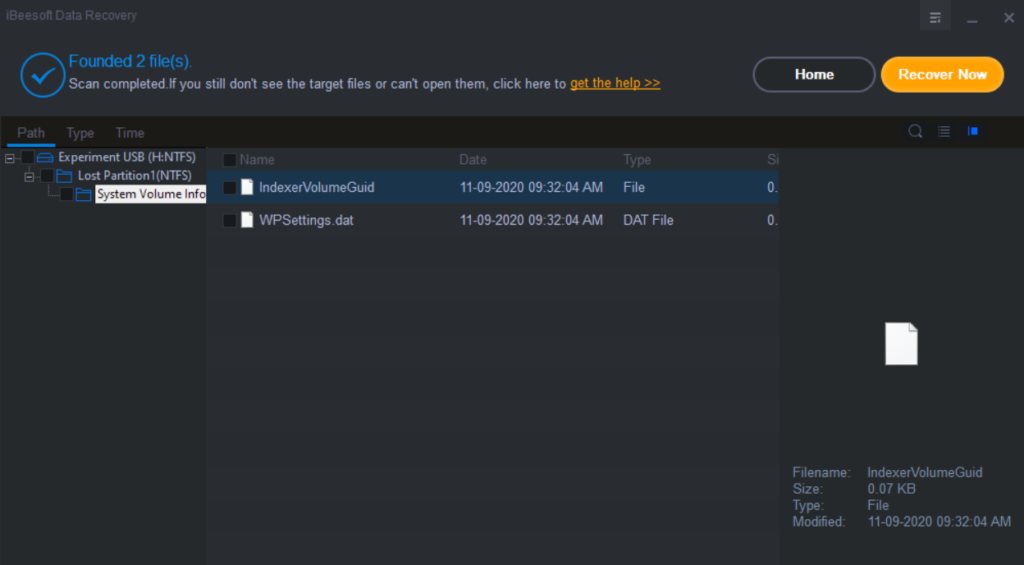
You can see that iBeesoft automatically detected that the drive was empty and initiated “Deep Scan” automatically. While in deep scan, the process is much slower as the app has to look into every cell and sector inside the drive. So depending on the size of your drive, prepare to spend a good deal of time.
After the scan process is complete, you’ll be presented with what can be recovered from the drive. In my case, the format process wiped off everything and not could be recovered. In this stage, if the data was important to you, you are better off exploring more professional options like taking the drive to a data lab, if the deleted files are worth the expense. It can cost hundreds of dollars + the cost of a new USB drive [if yours was damaged in any way].
Conclusion
Recovering accidental data isn’t difficult, considering that the state of the data is intact. The accidentally deleted file is still recoverable and iBeesoft Data Recovery is a decent solution for these tasks. With that said, no amount of software is capable of doing a lab-level data recovery at your home. So if your data was precious, always make sure to keep backup copies of it, as sometimes Data can be much more worthy than any amount of money.