Introduction
Hello everyone! It has been a long time since I last wrote something deeply technical on Techno FAQ. So, here I am and this time I am going to show you something pretty interesting. You’ll like this tutorial if you’re into DIY and use a Raspberry Pi for doing experiments on embedded computing and computer networking.
Before I move on to the guide, let me give you all a bit of a background. For those who are not aware, MPTCP (short for Multipath TCP) is a improvement/extension to TCP that lets you use several different IP addresses or network interfaces for a single TCP session. More information regarding the specs and implementation can be found on Wikipedia and the Linux kernel implementation’s website. In short, however, it means that if a server and a client are both MPTCP enabled and have multiple network interfaces/uplinks, and the client establishes a TCP connection to the server, then the data from the connection will flow across all the interfaces. The flow of data for each combination of server and client interfaces is called a subflow. The advantage of such a configuration is two-fold. First, one can theoretically use the full bandwidth of the all the possible interfaces. For example, if your smartphone has a 4G interface and a WiFi interface, MPTCP can utilize both of them to get higher data transfer rates. This is beneficial if you are doing file transfer as you get high transfer rates. Second, you get more reliability due to the presence of multiple links. If one link fails, the MPTCP session continues without any interruption.

TCP vs MPTCP | Source: Wikimedia Commons

Example of a MPTCP session | Source: Wikimedia Commons
I was building a testbed with 6 devices lately to run some experiments on this hot topic. MPTCP is very straightforward to install on servers and desktops; there is a ready package respository with the MPTCP Linux kernel that can be added to any Debian or Ubuntu based distro. The official 64-bit Intel/AMD architecture based Archlinux has a PKGBUILD in the Arch User Repository that can build and install MPTCP-enabled kernel for you. However, buying multiple PCs or servers for a testbed can be very expensive, especially when high computing capacity is not really needed. So for these experiments with MPTCP, I decided to go with Raspberry Pi 3 units as they are very cheap and have sufficient computing power.
Using a Raspberry Pi has its own challenges, as many software do not have official ARM releases; you need to compile/assemble/build them into binaries yourself. And a lot of them have sparse documentation when it comes to ARM. At this point of time, I wanted to use MPTCP on the Raspberry Pis but there is no official documentation for it. In the Raspberry Pi forum there is a conversation amongst people able to compile Linux kernels with MPTCP on Raspbian. However, I did not find any resource that has any instructions specific to other Linux distributions.
I use Archlinux ARM instead of Raspbian for various reasons. First, Archlinux ARM’s default installation is just a base system and the bash shell, onto which you can add more software if you need. This makes it bloat free and easily manageable. Don’t need GUI? Don’t install it. Second, Archlinux ARM is a rolling release distribution. Researchers often need the latest software along with an easy upgrade path, so the rolling release model makes more sense bleeding edge than upgrading between releases every 6 months. Third, from my personal experience, Archlinux ARM seems to have far lesser bugs and unexpected behaviour compared to other Raspberry Pi Linux distros like Raspbian, Ubuntu and Fedora ARM. Again, this could possibly be because of Archlinux ARM keeping their software packages closer to the vendor upstream instead of applying backports and patches. Some of you might ask now: Why not Gentoo? Well, I haven’t used it on ARM, so I cannot comment on it.
So, for about 5 days, I tried to adapt the MPTCP kernel compiling instructions for Raspbian to work on Archlinux ARM. At first I kept making mistakes. Sometimes the mouse would not work, sometimes the display would not work and sometimes the networking would mess up. But after a lot of trial and error, I found the correct way of making the MPTCP kernel work on Archlinux ARM. And now, I am going to share my method so that I make my fellow researchers’ lives a little bit easier.
Prerequisites
First of all you will require a Raspberry Pi 2 or 3. I have used the Raspberry Pi 3 Model B+.

Raspberry Pi 3 Model B+
You will need a PC or laptop running a recent Linux distribution so that we can use the Raspberry Pi compiler and toolchain to cross-compile the MPTCP Linux kernel for ARM. I assume that you have a working knowledge of Linux to understand the rest of the guide.
You will need at least a 8GB micro-SD memory card. I have use the 64GB Samsung Evo Plus Micro SDXC card so I can safely state that it works well. Archlinux ARM should be installed on it according to the official guide. All other software you need should already be installed beforehand. This is because an improper build may make your Raspberry Pi unbootable unless the SD card is re-imaged back into its working condition.
You will need a memory card reader on your computer. If you have a laptop, it may have a reader included. If you are using a desktop or workstation, you will need to buy an USB operated card reader. I use the Transcend TS-RDF8K USB 3.0 Super Speed Multi-Card Reader.
![]()
Transcend TS-RDF8K USB 3.0 Card Reader
Now that we’re ready, let’s start the process.
Compile and install the MPTCP kernel
Step 1: Back up your working Archlinux ARM system
First of all, shut down your Raspberry Pi from the operating system. Then take out the power cable. Then carefully remove the micro-SD card from the reader.
Boot your PC to Linux. Once it is booted up, put the SD card into the card reader and plug it into the USB port. If your computer has an internal card reader, simply place the SD card inside it.
Once the card is recognized and partitions are being displayed, unmount any auto-mounted partitions. Once that is done, we need to make a backup image of the SD card in case the built kernel is unbootable or has operational issues and the SD card requires restoration to its original contents. Here is how a backup can be made.
First of all, open a terminal window and type lsblk . You will see the available block/storage devices and their partitions. If you have an internal card reader, then you will get an output similar to this
If you have an external card reader, you will see this.
Either way, you will see your memory card as mmcblkX or sdX , where X is a number auto-assigned to it by udev (the Linux device manager).
Now making an image of it is easy. Simply type in the terminal:
cat /dev/mmcblkX > rpi-backup.img
if you have and internal SD card reader or
cat /dev/sdX > rpi-backup.img
if you have an external USB operated card reader.
If you have a very large SD card, like 16GB or greater, then simply making an image of it will take up space of the computer the size of the card itself. However, in reality, the entire card is rarely ever used by most Raspberry Pi users. If we use compression, we can bring the backup image size down to even lower than the actual utilization of the card. My preferred compression utility is XZ Utilities as it uses the state-of-the-art LZMA compression algorithm, giving better compression ratios than ZIP, GZIP or BZIP2.
On Debian or Ubuntu on your PC you can install XZ with
apt-get install xz-utils
On Archlinux you can do it with
pacman -S xz
So with xz you can create a compressed image in the following manner
cat /dev/mmcblkX | xz -z –threads=$(nproc) > rpi-backup.img.xz
for an internal card reader or
cat /dev/sdX | xz -z –threads=$(nproc) > rpi-backup.img.xz
for an external USB card reader.
Now that we have successfully backed up the SD card, any modifications to the contents is safe to do because we can easily restore it if we run into issues.
Restoration of the backed up image is easy. For uncompressed image, it is
cat rpi-backup.img > /dev/device
where device is mmcblkX or sdX .
For a compressed image, it is
xzcat rpi-backup.img.xz > /dev/device
where device is mmcblkX or sdaX .
If you have a spare SD card, test the restoration and check if the restored SD card has the same OS and apps as the original card. This way you can make sure you can always undo your mistakes.
Lets move on to the next steps.
Step 2: Set up git
To fetch the Linux kernel sources and cross-compiling tools, you will need Git version control system as the kernel maintainers ship the kernel source code using Git. If you PC is running Debian or Ubuntu, you can download and install using
sudo apt-get install git
If you are installing on Archlinux, it is
sudo pacman -S git
Once that is done, you need to set up your git profile so that you can merge changes in source code before starting the kernel build process.
git config --global user.email "[email protected]"
git config --global user.name "Your name"
Replace [email protected] with your valid email ID and Your name with your real or pen name.
Once that is done, your Git is ready to use.
Step 3: Install basic requirements for building any software
Most Linux distributions for the PC are oriented towards the installation of binary software packages. The distribution developers usually have the assumption that having tools needed to build software is not needed by the majority of the users. So the default installation skips many of the basic requirements to build software from source. If you have never ever compiled from source on this PC before, then go ahead and install the required tools.
For Debian and Ubuntu:
sudo apt-get install build-essential bc make ncurses-dev wget unzip
For Archlinux:
sudo pacman -S base-devel wget unzip bc
Step 4: Install the Raspberry Pi toolchain for cross compiling
Since we are doing the compilation process on a 64-bit Intel/AMD PC running a Linux distro, compiling the kernel right away will build a kernel for the x86_64 architecture. Instead, what we need to do is use a cross-compiler to build for ARM instead. The Raspberry Pi team provides a cross-compiling toolchain at https://github.com/raspberrypi/tools which we can freely use to compile any program to run on the Raspberry Pi 2 and 3.
The following commands have to be typed into the terminal for fetching the toolchain using Git, putting it into the current user’s executable path and saving in .bashrc , and then importing the new .bashrc settings into the current shell instance:
git clone https://github.com/raspberrypi/tools ~/tools
echo PATH=\$PATH:~/tools/arm-bcm2708/gcc-linaro-arm-linux-gnueabihf-raspbian-x64/bin >> ~/.bashrc
source ~/.bashrc
After this, the ARM C/C++ compiler plus the toolchain will be available in your path for immediate compiling.

Setting up the Raspberry Pi cross compiler and toolchain
Step 5: Fetch Kernel sources
The Raspberry Pi team maintains a specially optimized RPi kernel at https://github.com/raspberrypi/linux. We will use this as our base kernel source on top of which we will make modifications. Fetch it using
git clone https://github.com/raspberrypi/linux.git
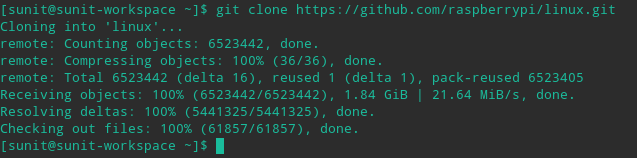
Cloning the Raspberry Pi Linux kernel sources
Navigate to the directory where the kernel sources are placed.
cd linux
The MPTCP developers have their changes to the Linux kernel TCP code at https://github.com/multipath-tcp/mptcp. We need to add that into our Git working directory.
git remote add mptcp https://github.com/multipath-tcp/mptcp.git
git fetch mptcp
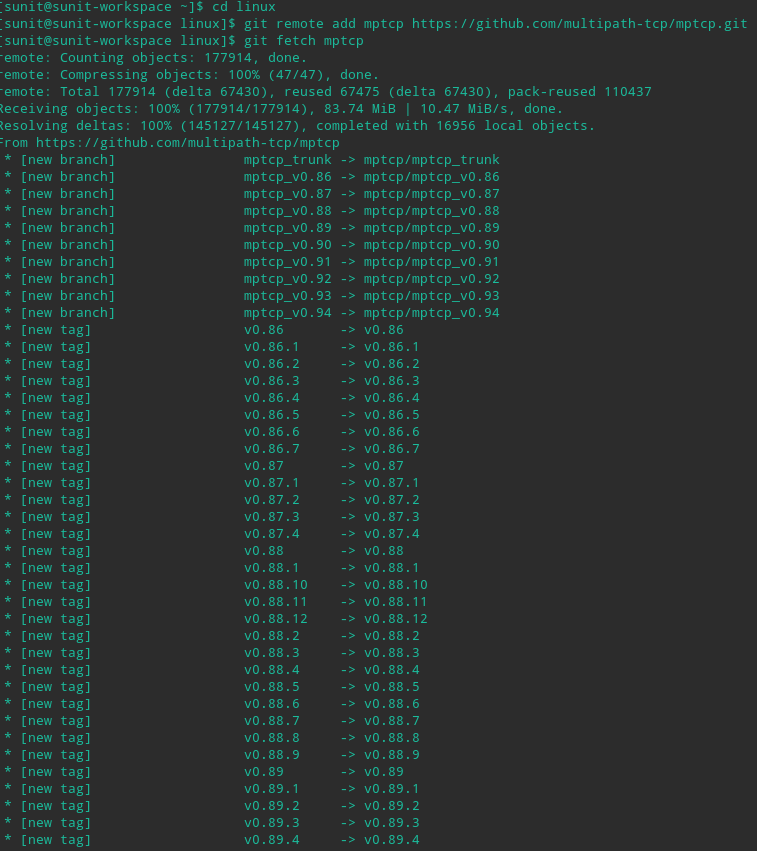
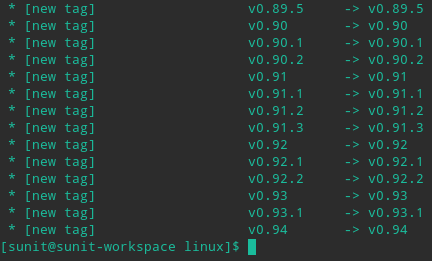
Adding MPTCP to the Raspberry Pi Linux kernel sources
Step 6: Merge changes from MPTCP to the Raspberry Pi kernel
Now that all the kernel sources are ready, we need to create a new version of the kernel sources where the changes from MPTCP are merged into the Raspberry Pi kernel. As of writing this, the latest version of MPTCP, i.e. v0.94, is based on the Linux 4.14 kernel.
So first we need to make a new version of the 4.14 kernel (where we’re going to make changes) by creating a git branch based on Raspberry Pi kernel 4.14.
git checkout -b rpi_mptcp origin/rpi-4.14.y
Then we need to merge changes from MPTCP, favouring MPTCP’s change in case of a merge conflict.
git merge -s recursive -X theirs mptcp/mptcp_v0.94

Making a new branch using Raspberry Pi kernel 4.14 as base and merging MPTCP changes
If you see a text editor asking you to enter some text related to the merge, exit it by typing :wq .
Now that the changes are properly merged as shown in the output below, lets move on to the real deal.
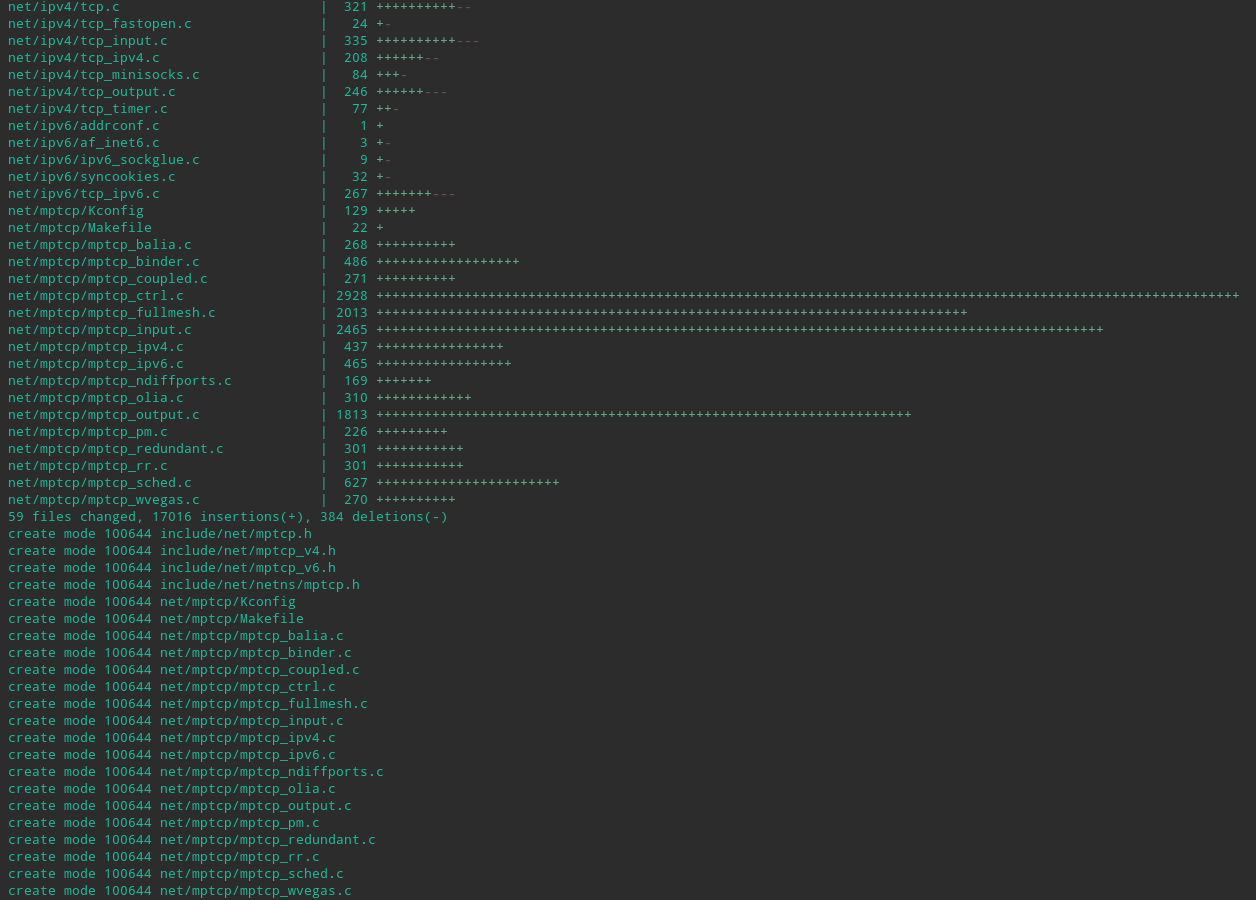
Successful merge of MPTCP into the kernel source files
Step 7: Building the kernel and modules
Prepare the files for compilation with
make mrproper
At this point, the Raspberry Pi custom kernel compilation guide will suggest you to run make ARCH=arm CROSS_COMPILE=arm-linux-gnueabihf- bcm2709_defconfig to generate the default kernel build options but I strongly advise you not to do that. This step is appropriate if you are planning to boot the kernel with Raspbian. However, if you boot it with Archlinux ARM, it is going to cause a kernel panic.
Instead check this link https://archlinuxarm.org/packages/armv7h/linux-raspberrypi/files/config out to see the default configuration for an Archlinux ARM kernel. Make a new file named .config in the current directory and copy and paste everything from the text block in that web page into that file.
You need to copy this part from the webpage
#
# Automatically generated file; DO NOT EDIT.
# Linux/arm 4.14.61-1 Kernel Configuration
#
CONFIG_ARM=y
CONFIG_ARM_HAS_SG_CHAIN=y
CONFIG_MIGHT_HAVE_PCI=y
CONFIG_SYS_SUPPORTS_APM_EMULATION=y

....

CONFIG_SG_POOL=y
CONFIG_ARCH_HAS_SG_CHAIN=y
CONFIG_SBITMAP=y
# CONFIG_STRING_SELFTEST is not set
# CONFIG_VIRTUALIZATION is not set
and paste it into a text editor and save the file as .config .

Saving default Archlinux ARM kernel configuration in .config
Before moving on to the next step, change this line in that file from
CONFIG_LOCALVERSION=”-ARCH”
to
CONFIG_LOCALVERSION=”-MPTCP”
so as to identify that you are indeed running an MPTCP kernel once booted into the system. Without it, you might not be able to tell right away if you are using the correct kernel.
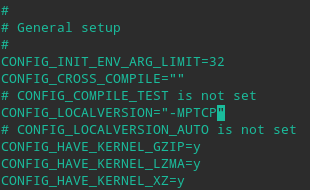
Changing kernel version field
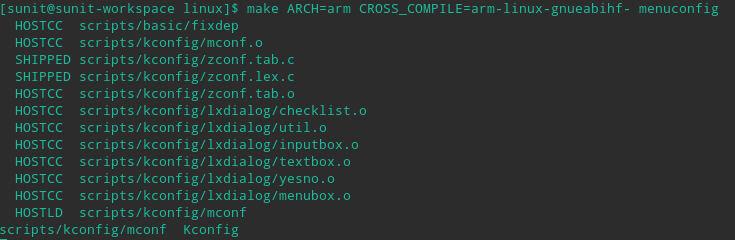
After that enter
make ARCH=arm CROSS_COMPILE=arm-linux-gnueabihf- menuconfig
You’ll see the following output soon followed by a menu.
Preliminary menuconfig output
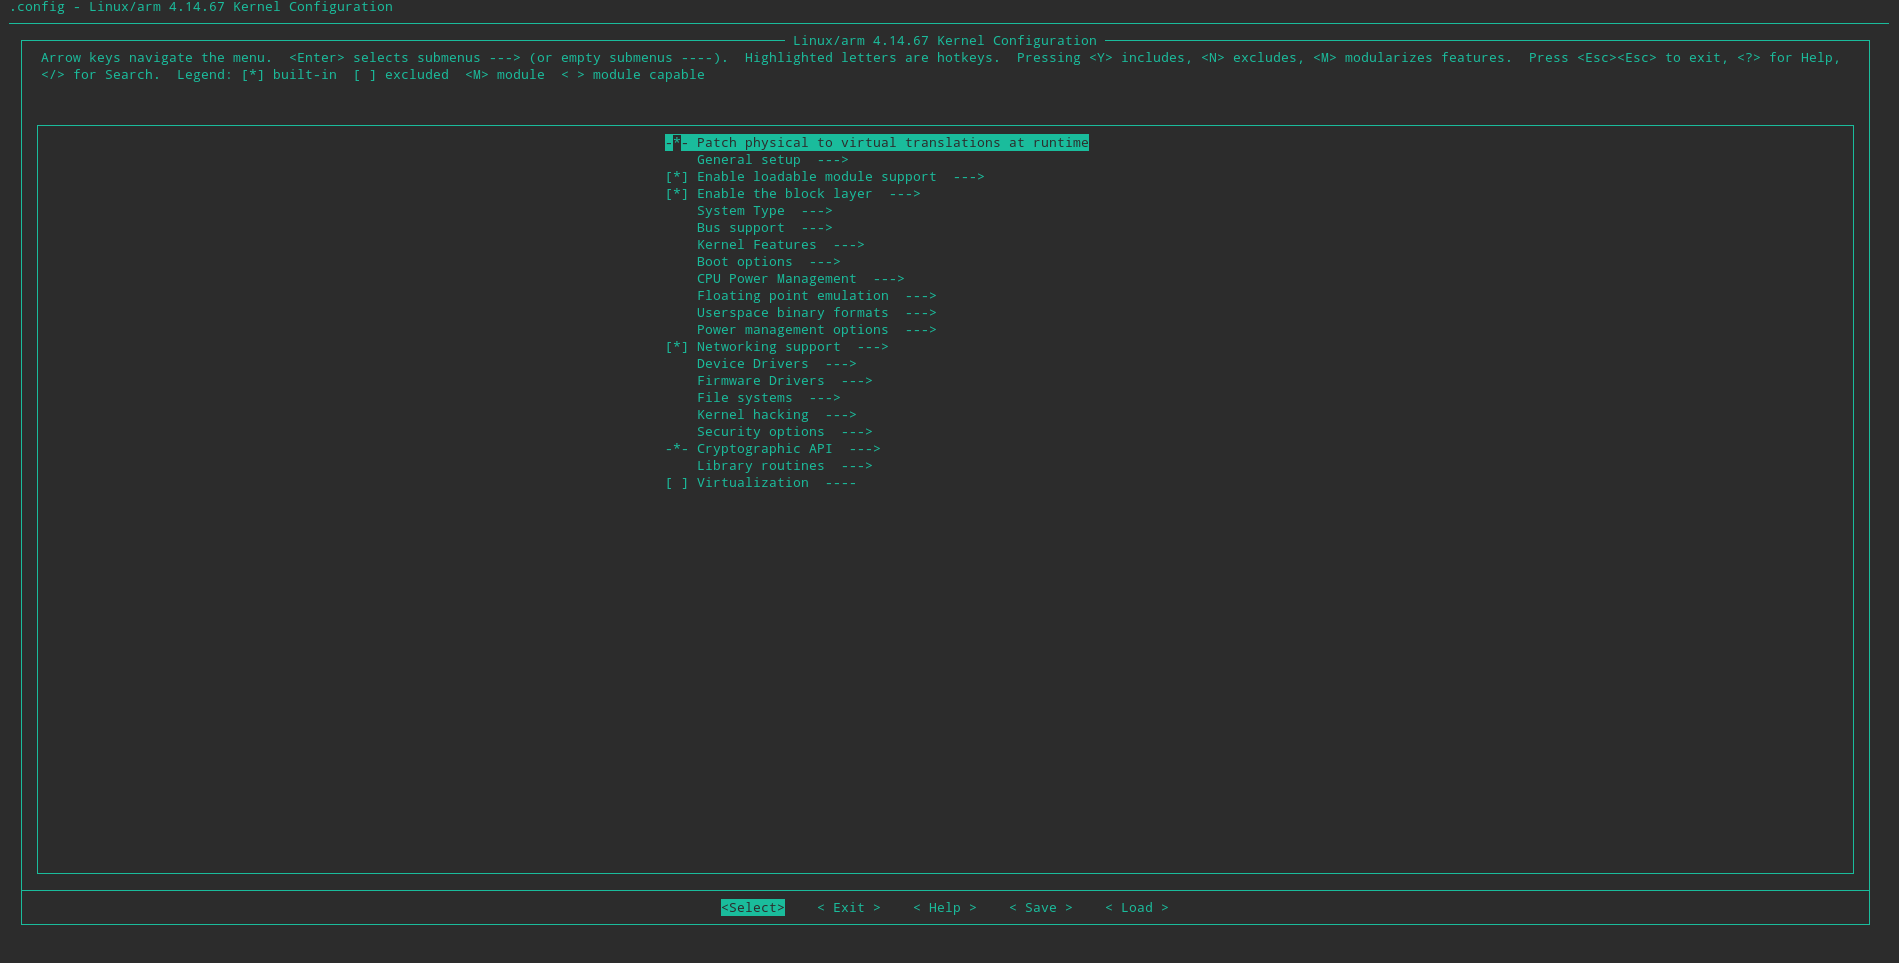
Linux kernel compile configuration menu
This menu can be navigated in the following manner:
- You select a menu option using Space key. The selection will rotate between unchecked [ ], compile into kernel [*] and compile as module [M].
- You can go into a menu sub-option using the Enter key.
- You can go back up an option level up pressing Esc twice in quick succession.
In this menu, enter ‘Networking options’. Scroll down to ‘IP advanced router’ and choose to compile it into kernel. Do the same for ‘Policy routing’.


Enabling IP router and Policy Based Routing
Go to IPv6 protocol and choose to compile into kernel. As soon as you do that, a new menu option ‘MPTCP protocol (NEW)’ will show up. Choose to compile that into kernel. Go to ‘MPTCP: advanced path-manager control (NEW)’ sub-option. Check everything to compile into kernel. Keep default path manager as ‘fullmesh’. Go one level back. Then go into ‘MPTCP: advanced scheduler control (NEW)’. Repeat the same as you did with the last option and keep default scheduler as ‘default’.
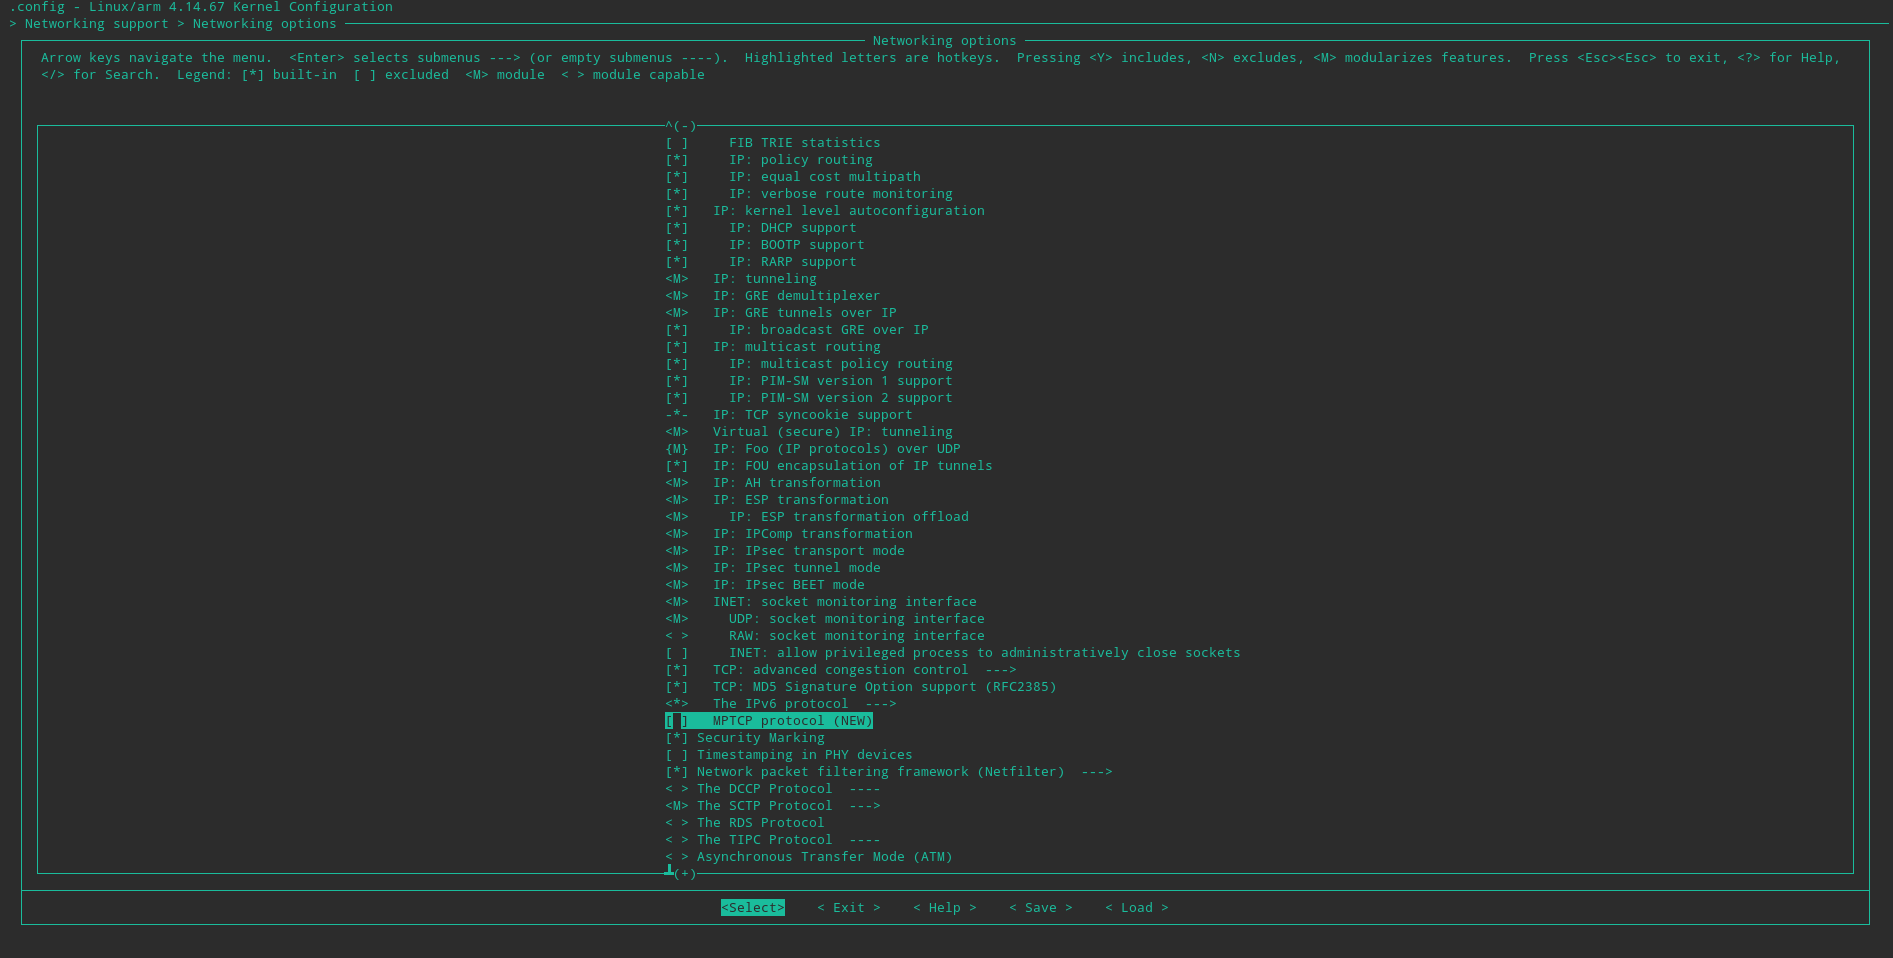
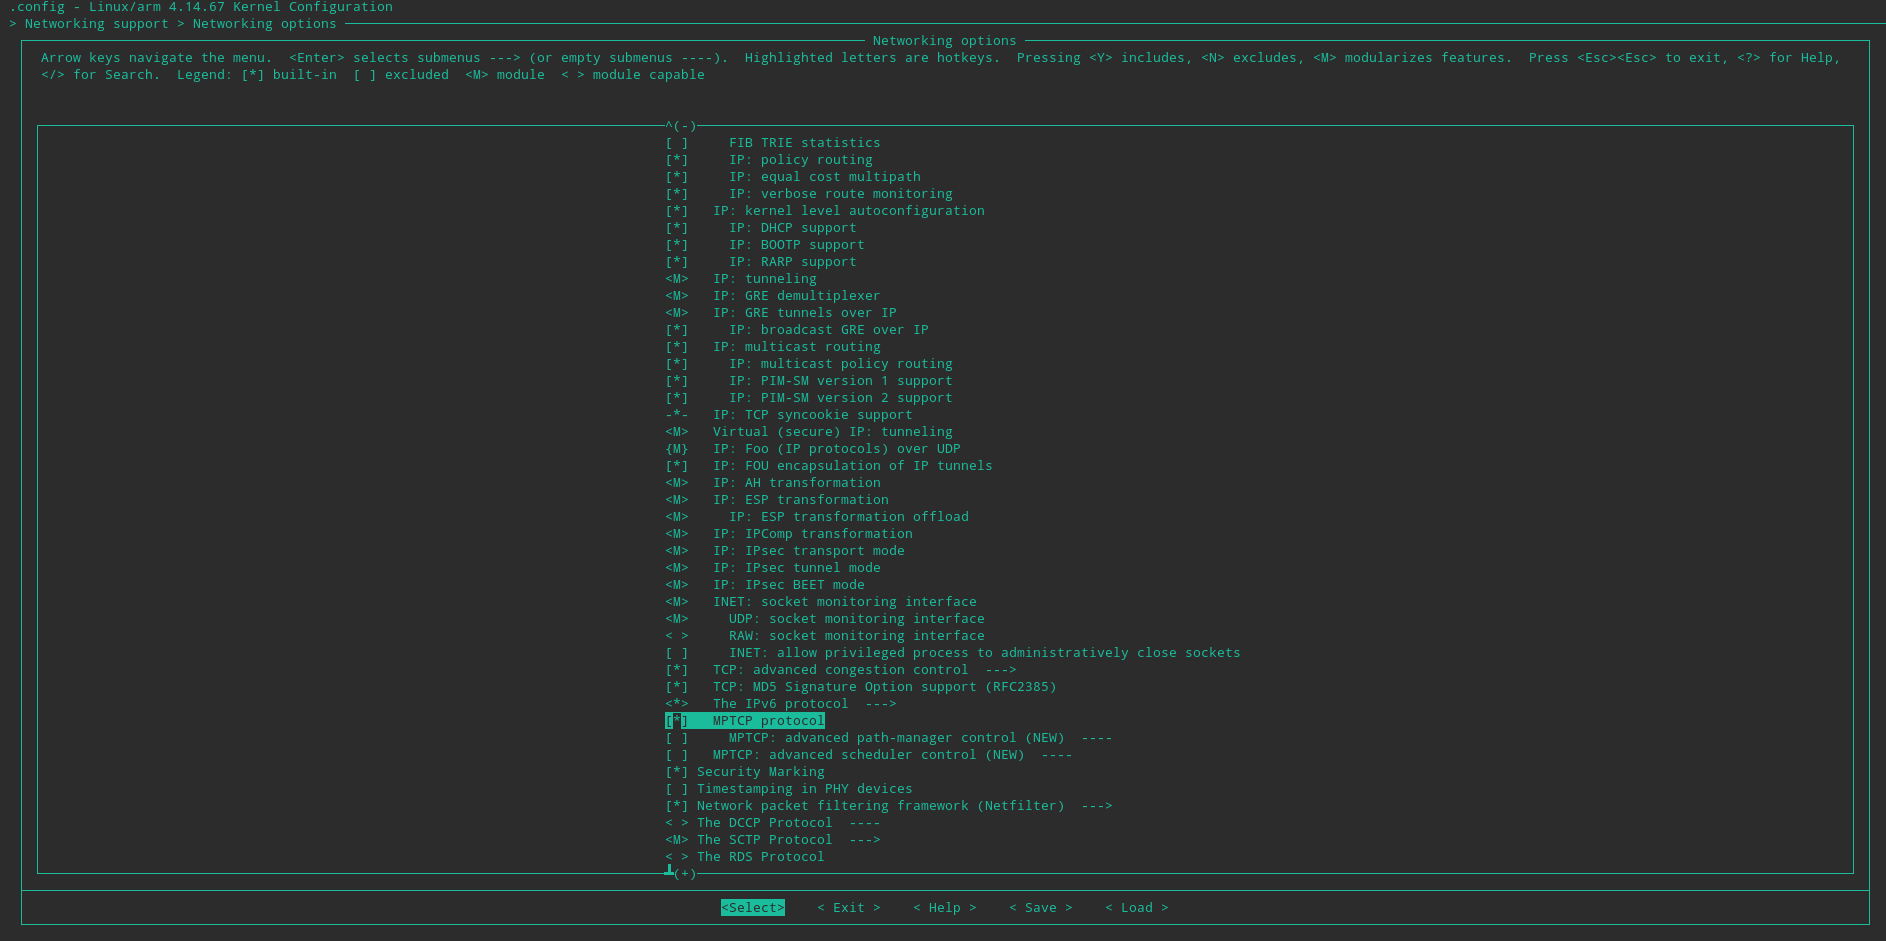


Enabling MPTCP and setting options for path manager and scheduler
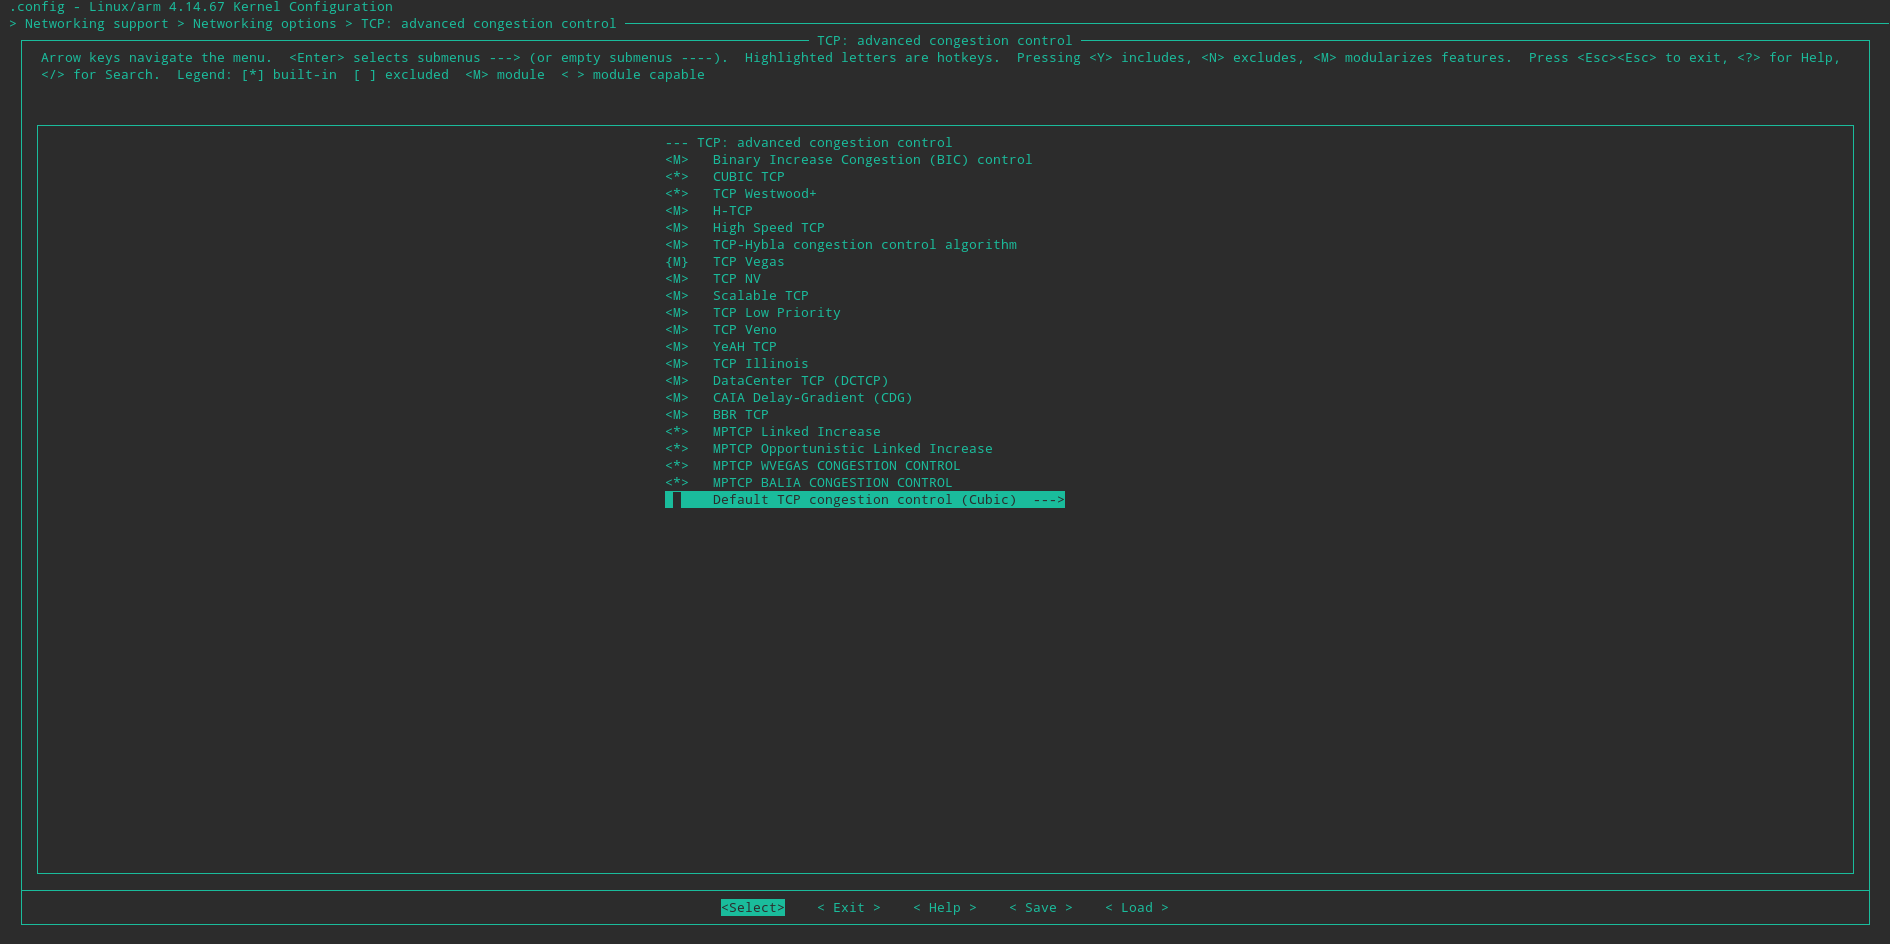
Go one step back. Scroll upwards to ‘TCP: advanced congestion control’ and enter it. Checkmark ‘MPTCP Linked Increase’, ‘MPTCP Opportunistic Linked Increase’, ‘MPTCP WVEGAS CONGESTION CONTROL’ and ‘MPTCP BALIA CONGESTION CONTROL’ to be installed into the kernel. Choose ‘Lia’ as the Default TCP congestion control.

Enabling Multipath TCP linked congestion control algorithms
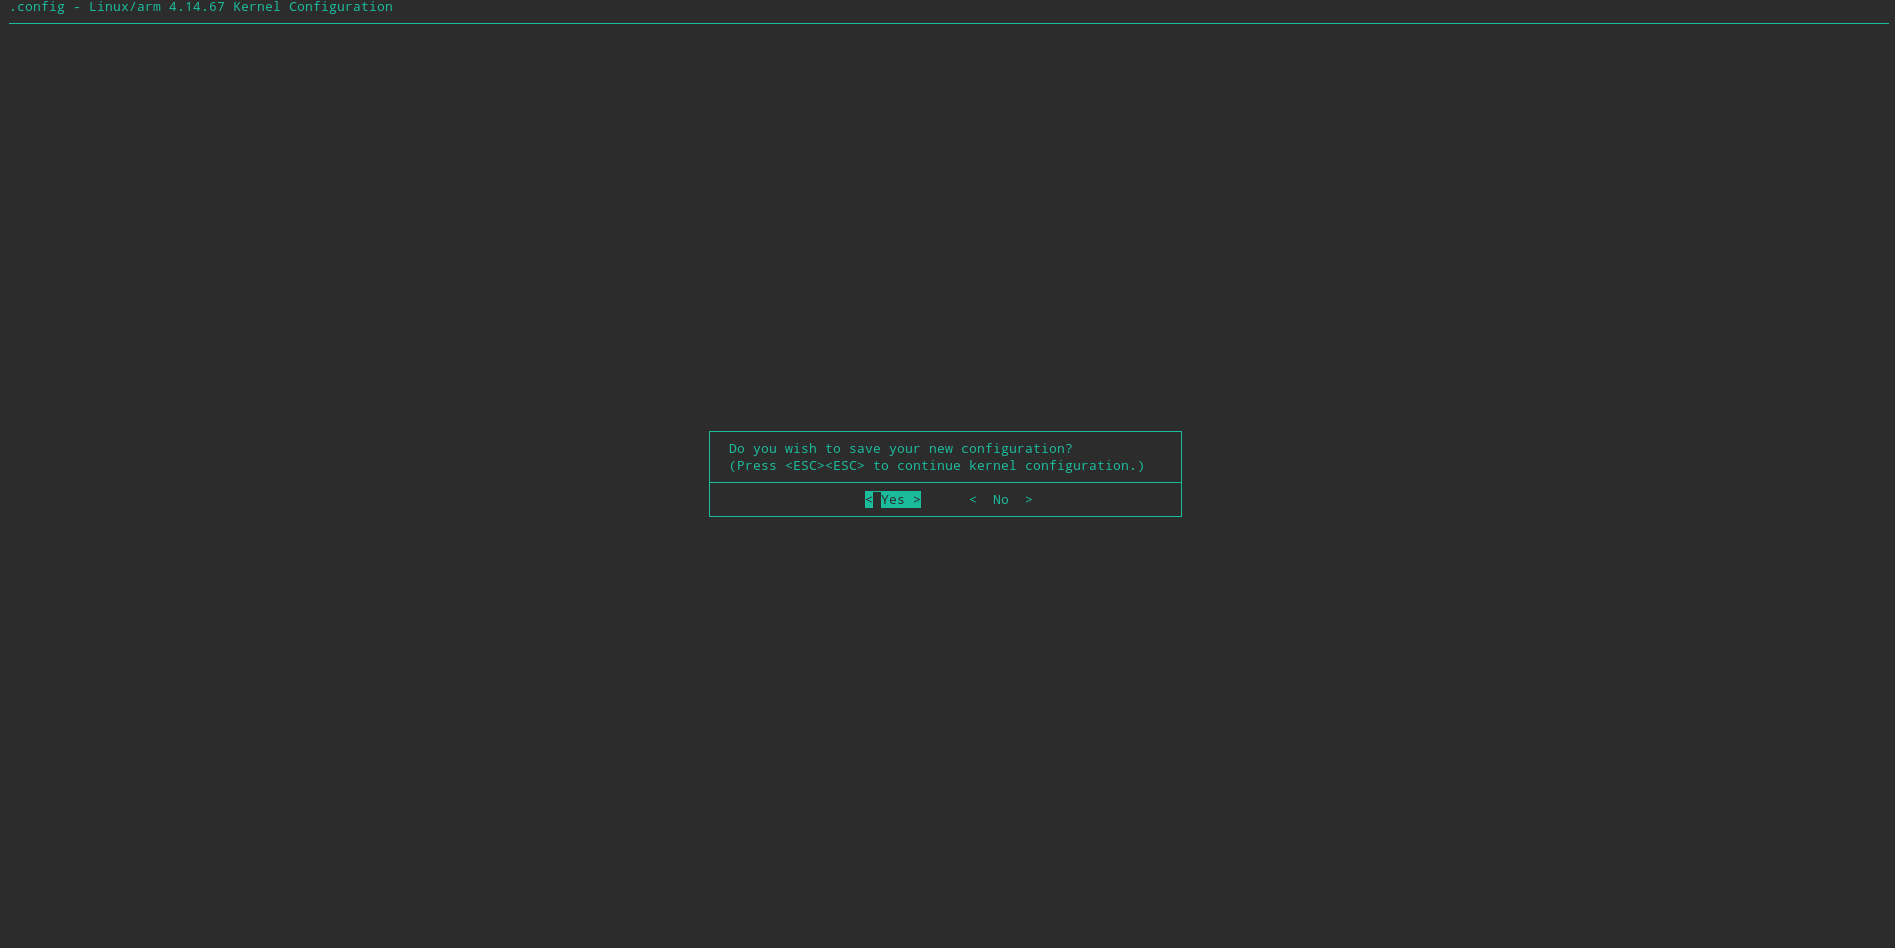
Go back all the way to the home screen of the menu. Then press Esc twice. You will get a screen as shown below.
Menu exit screen
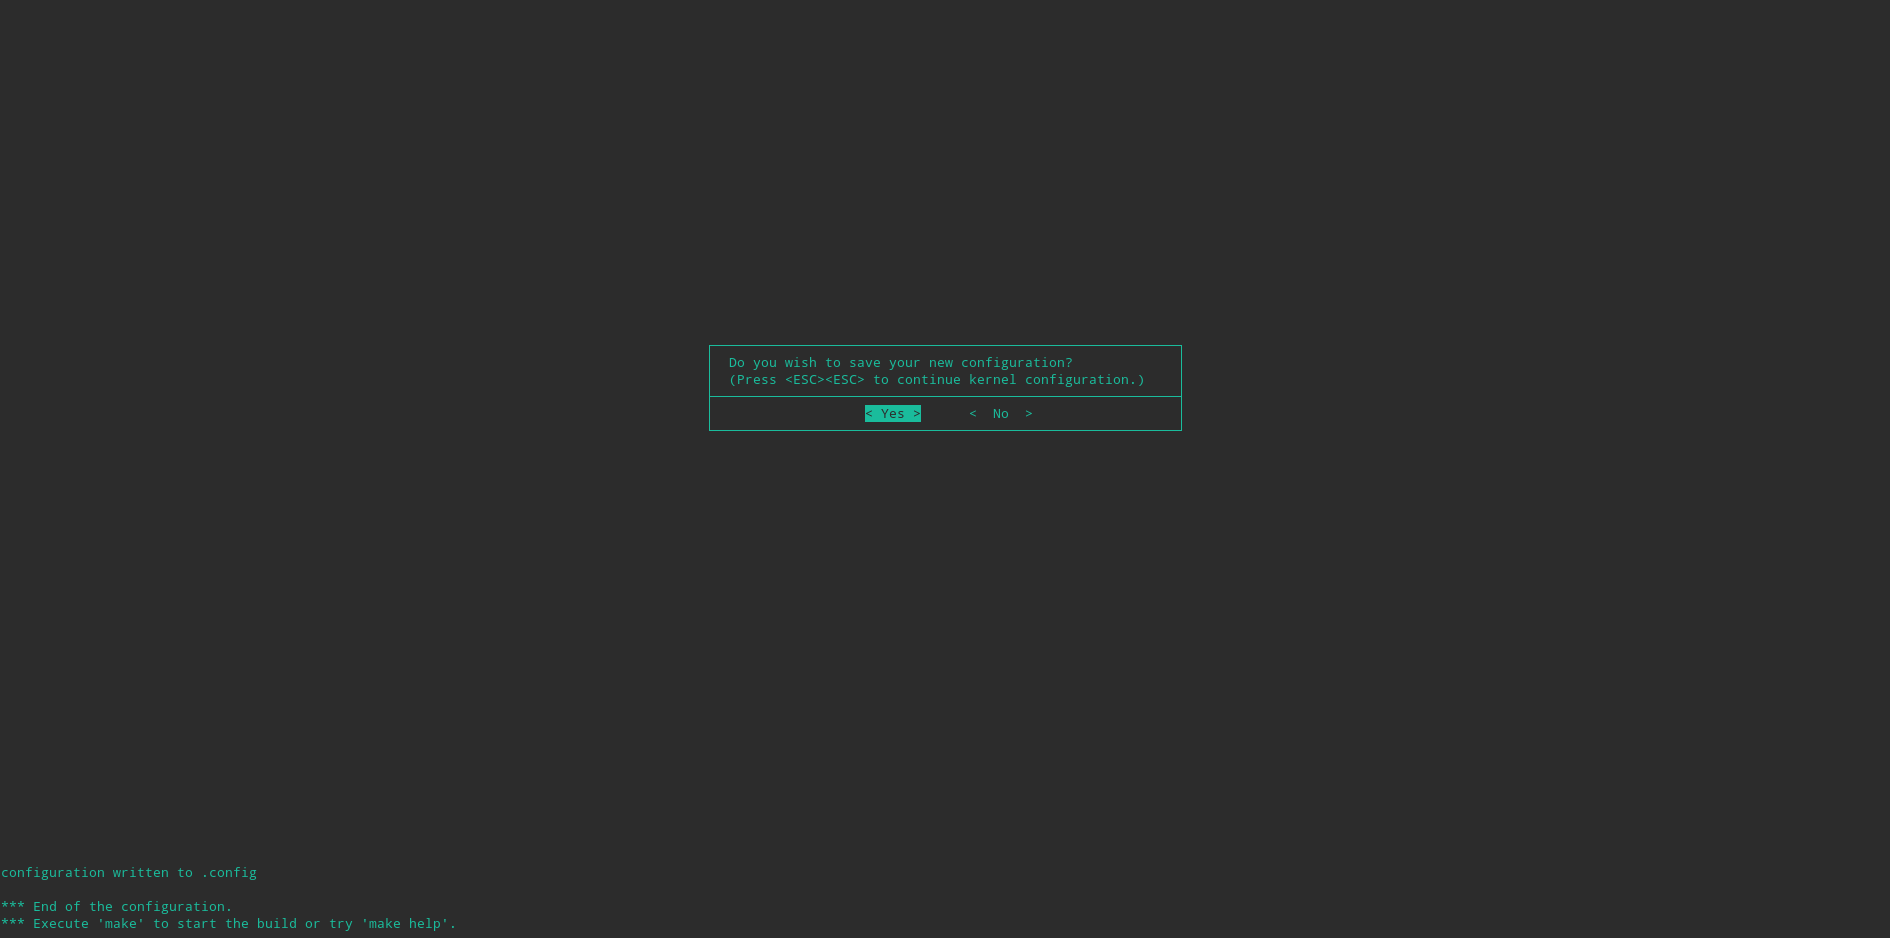
Move the cursor to ‘Yes’ and press Enter to save changes to .config .
Finishing compile configuration
Now that we have made the necessary configuration, type this line into the terminal to compile the kernel, modules and the device tree:
make ARCH=arm CROSS_COMPILE=arm-linux-gnueabihf- -j$(nproc) zImage modules dtbs
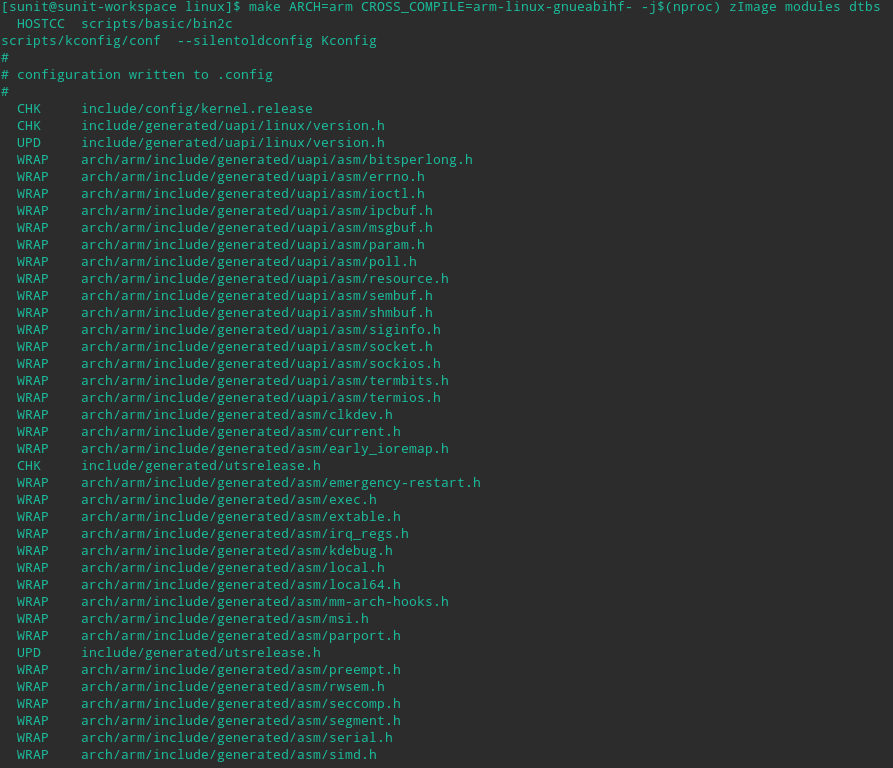
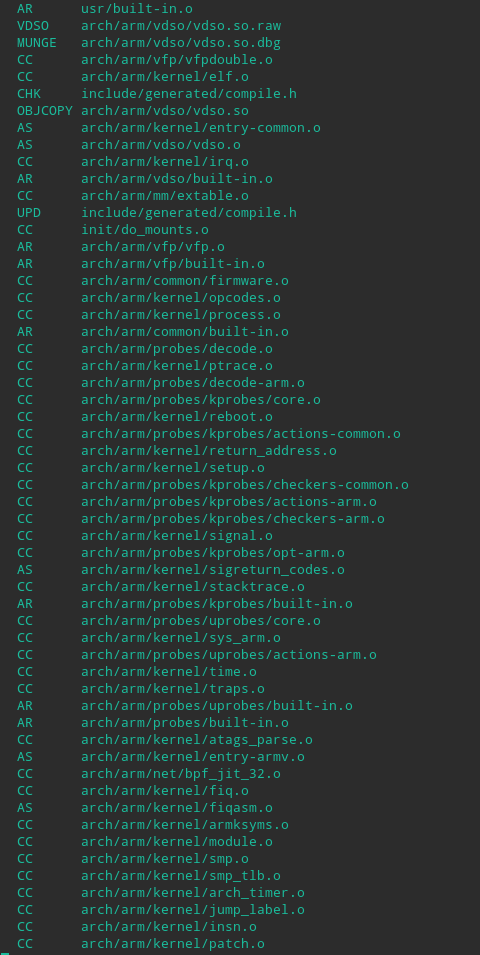

Kernel compilation process
This step can take anywhere from 30 minutes to 2 hours depending on your computer’s processing power. On my PC with a 6th generation desktop Core i7, it takes about 35 minutes to complete. You can go out for a coffee or catch up with your friend on a short walk before moving on to the next step.
Step 8: Installing the freshly compiled MPTCP kernel into the Raspberry Pi
After the last step, the latest and the greatest MPTCP kernel is built and ready for use on your Raspberry Pi. Now, lets install it.
Remember the micro-SD card on which Archlinux ARM is installed? We will need it now. Plug it into your card reader.
Make two folders under /mnt to mount the boot and OS root partitions. You can do it by typing the following commands in a root shell:
mkdir -p /mnt/boot
mkdir -p /mnt/root
Now we need to mount the two SD card partitions. On an Archlinux ARM based system, the first partition (FAT32) is the boot partition and the second one (EXT4) holds the operating system and user files.
If you have an internal card reader, use the following commands in a root shell to mount:
mount -t vfat /dev/mmcblkXp1 /mnt/boot
mount -t ext4 /dev/mmcblkXp2 /mnt/root
Else, if you use an external card reader (like me), then use these instead:
mount -t vfat /dev/sdX1 /mnt/boot
mount -t ext4 /dev/sdX2 /mnt/root
Now that the partitions are mounted, let’s move the old kernel and device tree to a new folder before installing the new one. Use the following commands to do it.
mkdir /mnt/boot/oldkernel
mv /mnt/boot/kernel7.img /mnt/boot/oldkernel/
mv /mnt/boot/*.dtb /mnt/boot/oldkernel/
mv /mnt/boot/overlays /mnt/boot/oldkernel/
Now, let’s put the new MPTCP kernel in the correct path. Navigate back to your working directory where the kernel was built after exiting the root shell. Then execute the following commands.
sudo cp arch/arm/boot/zImage /mnt/boot/kernel7.img
sudo cp arch/arm/boot/dts/*.dtb /mnt/boot/
sudo mkdir /mnt/boot/overlays
sudo cp arch/arm/boot/dts/overlays/*.dtb* /mnt/boot/overlays/
sudo cp arch/arm/boot/dts/overlays/README /mnt/boot/overlays/
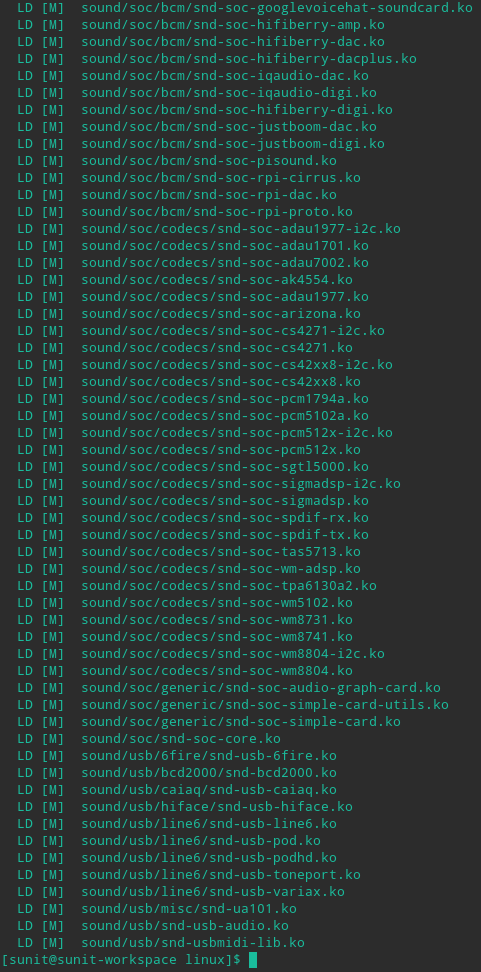
The kernel is now installed. But one step is still left. We need the kernel modules for this MPTCP kernel to also be installed. Without it, most hardware connected to the Raspberry Pi will not work or a kernel panic may occur. As this step is critical, do not skip. To install the modules run this command:
sudo make ARCH=arm CROSS_COMPILE=arm-linux-gnueabihf- INSTALL_MOD_PATH=/mnt/root -j$(nproc) modules_install
When the modules are installed, you’ll see this output.
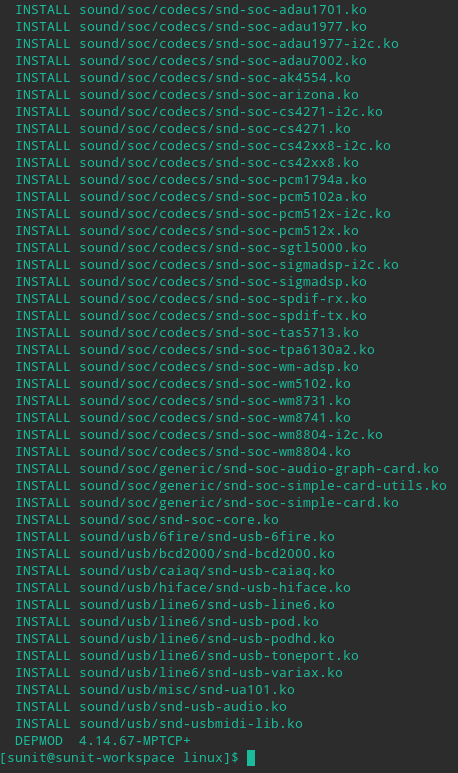
Installing modules for the MPTCP kernel
That’s it! We’re done. Time to wrap up and unmount.
sync
sudo umount /mnt/boot
sudo umount /mnt/root
sudo rm -r /mnt/boot
sudo rm -r /mnt/root
Remove the micro-SD card from the card reader and plug it into your Raspberry Pi 2 or 3.
Step 9: Boot up and verify
Connect the USB power cable to the Raspberry Pi. The Pi should boot up into Archlinux ARM. If there is a kernel panic or your mouse, keyboard or network does not work after the boot process is complete, then either the kernel or the modules or both have not been copied properly. Repeat Step 8 and see if the error persists. If yes, restore the SD card with the instructions in Step 1, and then repeat the process from Step 2 afresh.
If there is no error, log in to the TTY or GUI on the Pi and type uname -a into the console. You’ll get an output like this:
[sunit@alarmpi ~]$ uname -a
Linux alarmpi 4.14.67-MPTCP+ #5 SMP Sat Sep 1 16:06:46 IST 2018 armv7l GNU/Linux
Then type cat /proc/version and see if the output is similar to this:
[sunit@alarmpi ~]$ cat /proc/version
Linux version 4.14.67-MPTCP+ (sunit@sunit-workspace) (gcc version 4.8.3 20140303 (prerelease) (crosstool-NG linaro-1.13.1+bzr2650 - Linaro GCC 2014.03)) #5 SMP Sat Sep 1 16:06:46 IST 2018
If the output is similar to the ones shown above, you are booted into the right kernel. If not, repeat Step 8 again and verify.
Now that we know that the kernel is the correct one, we need to know if MPTCP is enabled correctly in the kernel or not. Type sudo sysctl net.mptcp . If you see an output, then you have successfully installed MPTCP on your Raspberry Pi 2 or 3 running Archlinux ARM.
Instead of an output, if you get the error sysctl: cannot stat /proc/sys/net/mptcp: No such file or directory , then a mistake has been made during the configuration process in Step 7. You will need to restore the SD card with instructions in Step 1 and repeat the process Step 2 onwards from scratch.
Once you’ve verified that everything works as intended, open the file /etc/pacman.conf and change the line
#IgnorePkg =
to
IgnorePkg = linux-raspberrypi
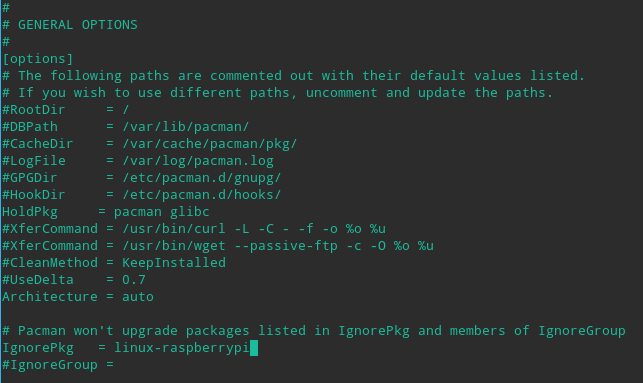
Changing pacman configuration to prevent MPTCP kernel from being overwritten
This is to make sure that the package manager pacman does not overwrite our custom kernel with the stock Archlinux ARM kernel on software updates. Without this change, you’re bound to lose the MPTCP kernel in a matter of few days to a week because Archlinux ARM packages receive very frequent updates.
What to do next
After going through all the steps above, we have finally built our Multipath TCP-capable Raspberry Pi. After I completed the process successfully for the first time, I cloned the working MPTCP-enabled setup to 5 other SD cards and popped them into 5 Raspberry Pi 3 Model B+ units to complete my requirement of the 6-device testbed to perform MPTCP performance experiments. Most researchers will do something similar to what I did.
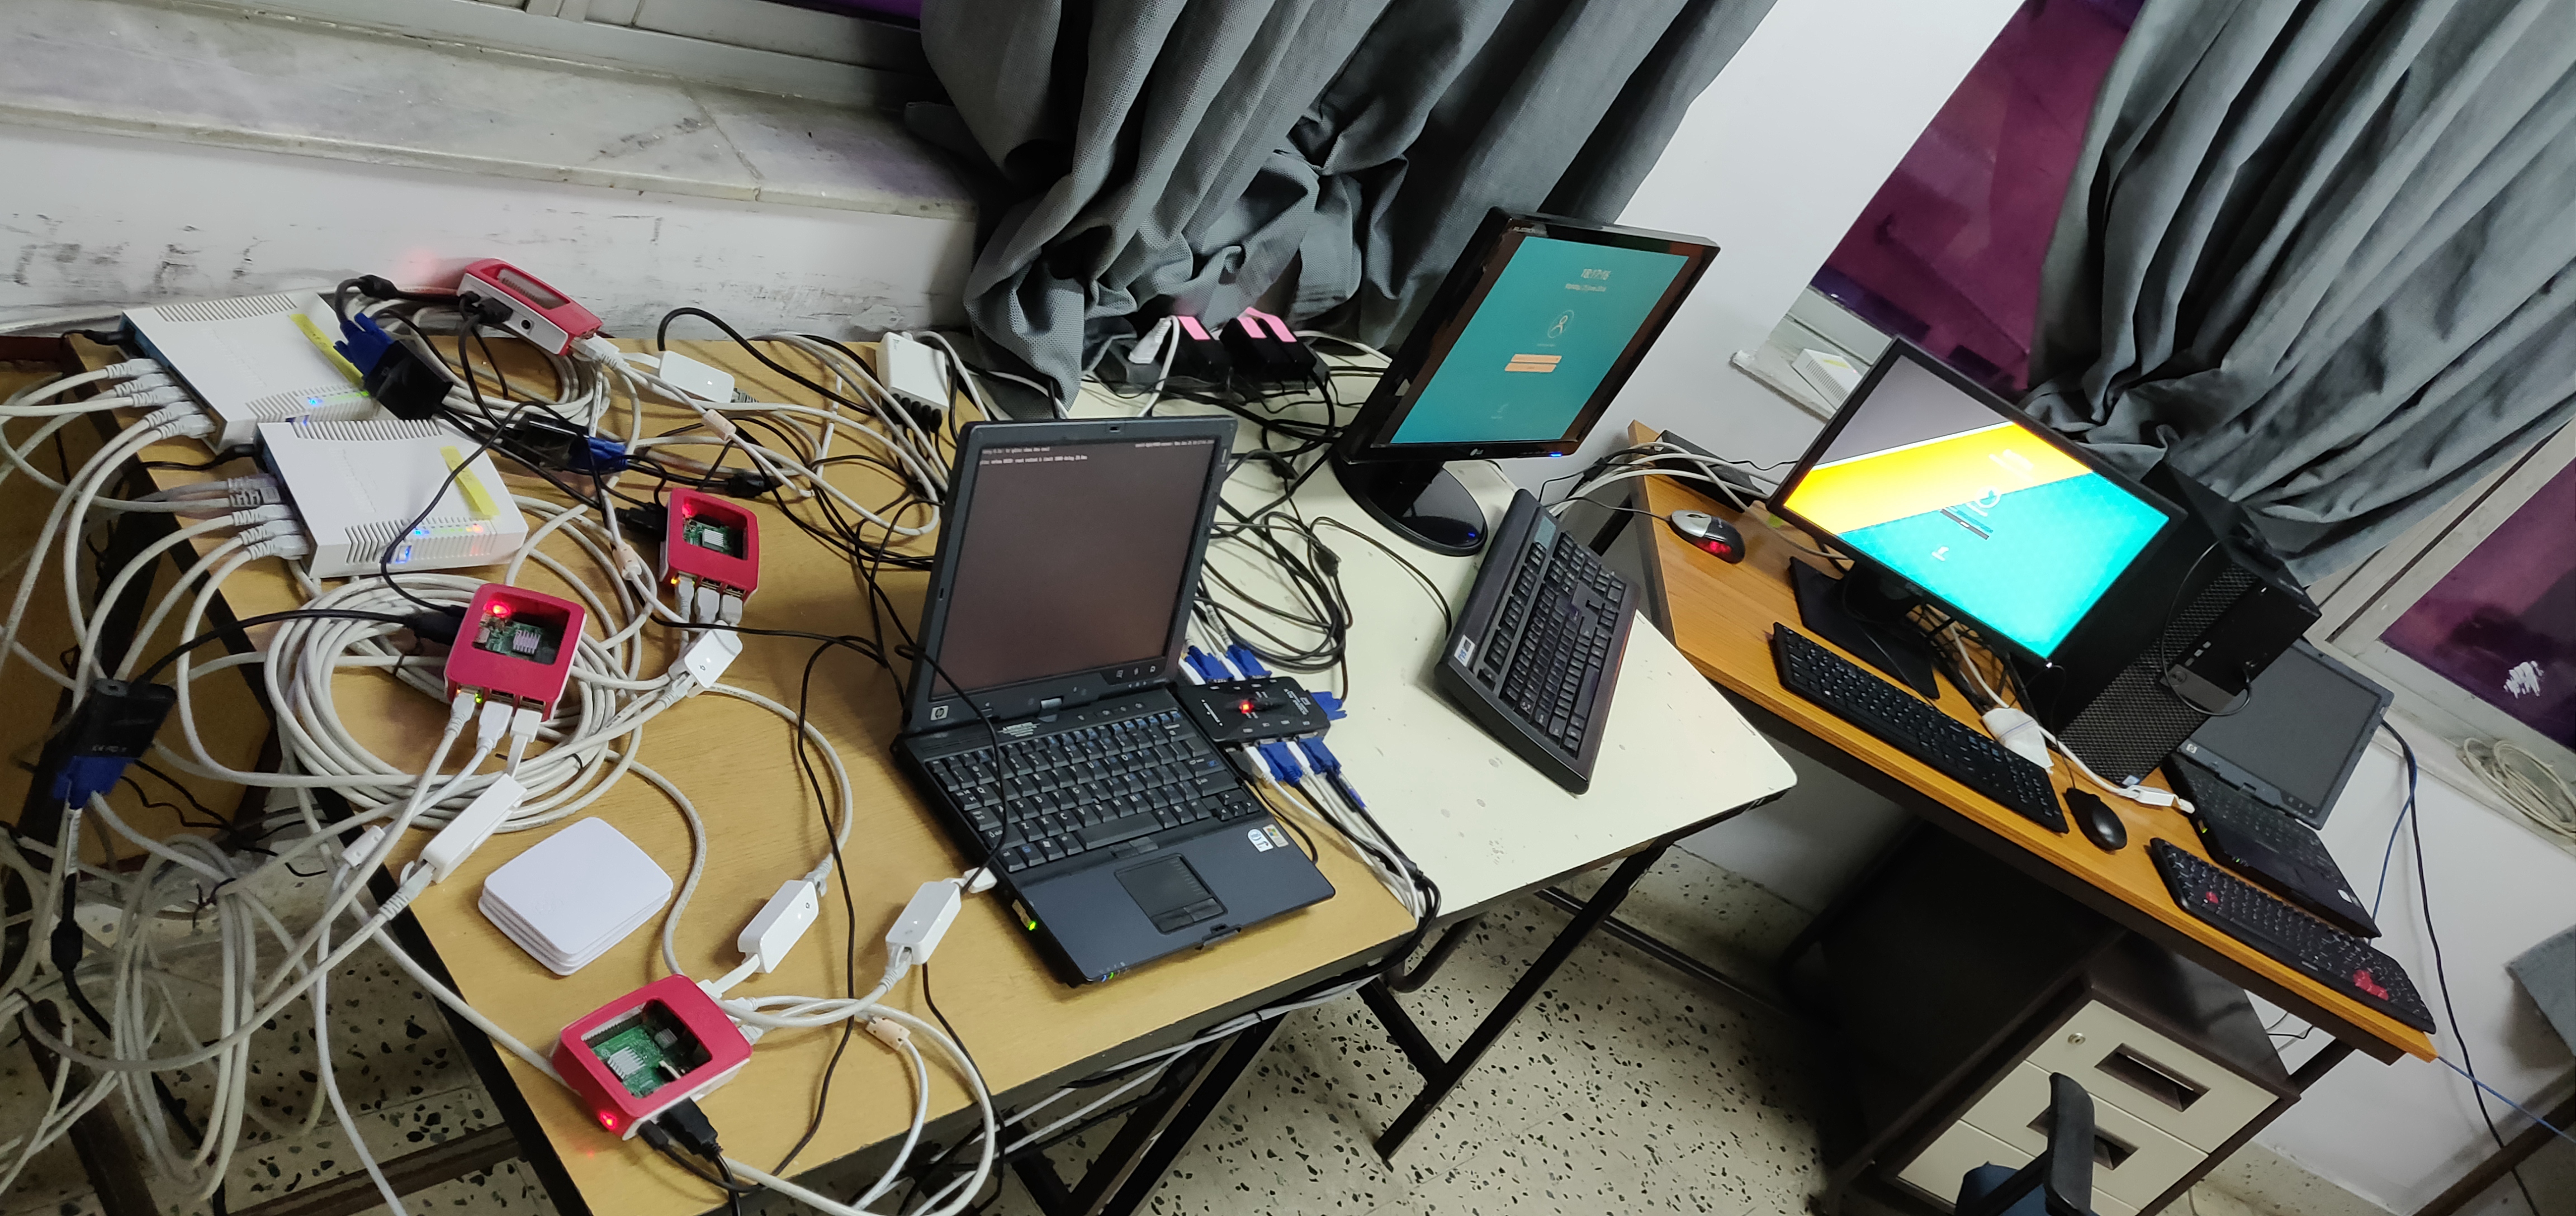
My testbed of 6 Raspberry Pis (4 visible) for MPTCP experiments. The PCs and laptops are for studying traffic characteristics.
But how does a MPTCP-capable Raspberry Pi make sense to the average guy? Well, there are a lot of applications. For starters, it can work as an multipath-aware file and video streaming server (if you’re using TCP for it) if you have a MPTCP-enabled client with multiple network connections, achieving faster data transfers and better reliability. Another thing that comes to my mind is a resilient multipath-aware DNS-over-HTTPS resolver that continues to resolve IP addresses without lag even if one link out of two or more faces intermittent connectivity issues. A more advanced use case, requiring two Raspberry Pis, is a multipath-aware site-to-site OpenVPN between two offices that takes advantage of the presence of multiple ISP uplinks. Such an OpenVPN setup can achieve faster throughput for the tunneled traffic by distributing traffic over the uplinks, as well as keep the tunnel connected at all times even if some of the uplinks face connectivity issues.
The new possibilities brought about by MPTCP are endless, and only limited by your imagination.
So, what are you building with your MPTCP-capable Raspberry Pi? Let us know in the comments below.


4 Comments
Pranav
2 September, 2018Thanks for sharing it. Great Stuff and will be very helpful for many beginners.
Rafael
2 September, 2018Hi Sunit,
After I installed the new MPTCP Kernel in my raspberry Pi, my raspberrysi doens’t recognize anymore the USB/RJ45 dongles.
Do you know what can be happening ? Or how can I enable the recognizing of my dongles ?
tks !
Rafael
Sunit Nandi
2 September, 2018You probably missed out on one step, i.e. adding the appropriate kernel modules. Please do Step 7 again. This step is very important. I missed it while doing it for the first time. Also, do not forget to do this part in Step 8:
sudo make ARCH=arm CROSS_COMPILE=arm-linux-gnueabihf- INSTALL_MOD_PATH=/mnt/root -j$(nproc) modules_install. Without it, the modules will not be copied over to the SD card.Patricia
2 September, 2018I am glad there are such helpful articles for beginners. Thank you for sharing it.