Beginner’s Guide: Knowing the Features of Your First DSLR Camera
So you’ve bought your first digital SLR camera, and you are excited. It is critical to fully understand how your camera works, and know its settings and buttons. Only basic understand on which camera brands are good is not enough, you should try to gather knowledge on functionality of your camera and how you can take the best shot with it. You should not fumble when there’s a subject that suddenly captures your interest.
A single-lens reflex camera (SLR) has manual controls, which make it different from smartphone cameras and the point-and-shoot cameras you’ve used before. The choice of the right Nikon macro lens can give you excellent results. You can ask someone to teach you how your camera works and a few tips about basic photography from people who have more experience, like the photographers in Austin TX. You can also gain knowledge from this guide.

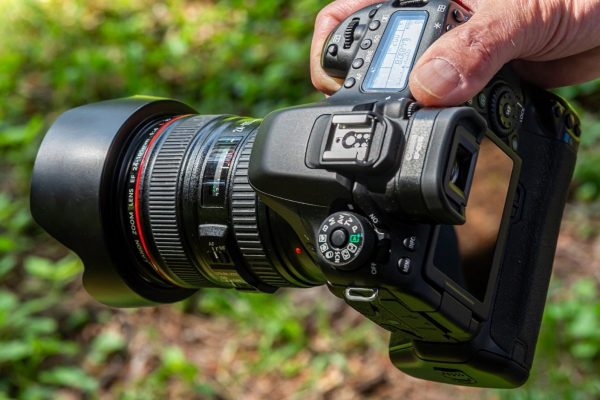
Image credits: https://pixabay.com/photos/camera-slr-keep-technology-4215612/
Using your new camera
A DSLR has two modes – manual and auto (program mode).
Manual mode
In manual mode, here are the terms you’ll encounter:
- Aperture. Controls the size of the opening in the camera lens that allows light to pass through. The f-number designates it. Very little light will pass through the aperture if you set the camera at f/16. At f/2.8, the aperture is larger, so more light can pass through.
- ISO measures the sensitivity of the camera to light and determines the sharpness of the image. For outdoor shooting on a sunny day, use ISO 100. When shooting indoors, set it at 400 or 800.
- Shutter speed. Controls how long the shutter remains open to let the light into the camera. Images are sharper if the shutter speed is faster. For shooting people, especially children, a shutter speed of 1/125th of a second is ideal. For action shots, the recommendation is 1/500th of a second.
- RAW. You have two options to shoot the image, either RAW or JPEG. The latter compresses the image when you save it, so the file size is smaller compared to RAW. However, you have more control over the quality of the image when you shoot in RAW.
Program/auto mode
In auto/program mode, here are the things you should understand:
- Auto – the camera controls aperture, shutter speed, and ISO
- P – Program Mode, which also uses the camera to control the aperture and shutter speed but you can use various combination of settings
- S – Shutter Priority Mode, where you set the shutter speed initially while the camera adjusts the aperture according to the exposure needed
- A – Aperture Priority Mode, where you set the aperture while the camera automatically adjusts the speed of the shutter
- M – for Manual Mode
Did you know? You can create cool phone wallpapers with the photos you have taken. You can upload some of the photos you like on your smartphone. From your phone’s gallery, choose the photo you want to use and click the wallpaper option. Your phone will ask you to resize and position the image. If you’re satisfied with it, click done, and you’ll have your favorite photo as your new wallpaper.
If you are more comfortable working on a desktop, you can find free apps that will help you to create wallpapers in the exact size for your phone using your photos. When you’re done, export it to your smartphone.
Creating phone wallpapers extends your creativity further, according to SpotOnPhotographers.com, as you search for thematic subjects to turn your photos into stunning works of art.


